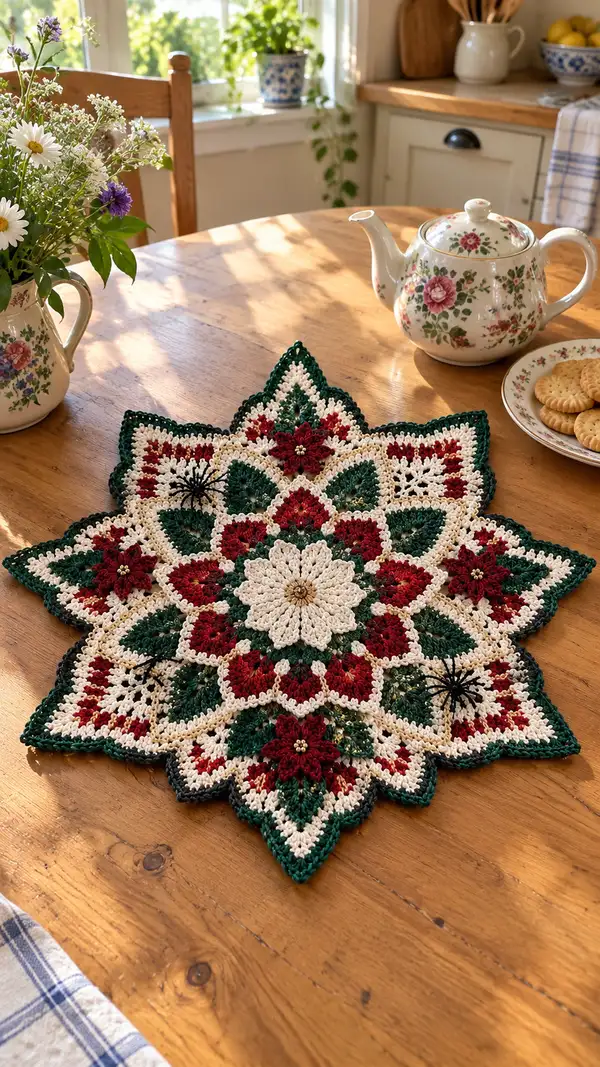
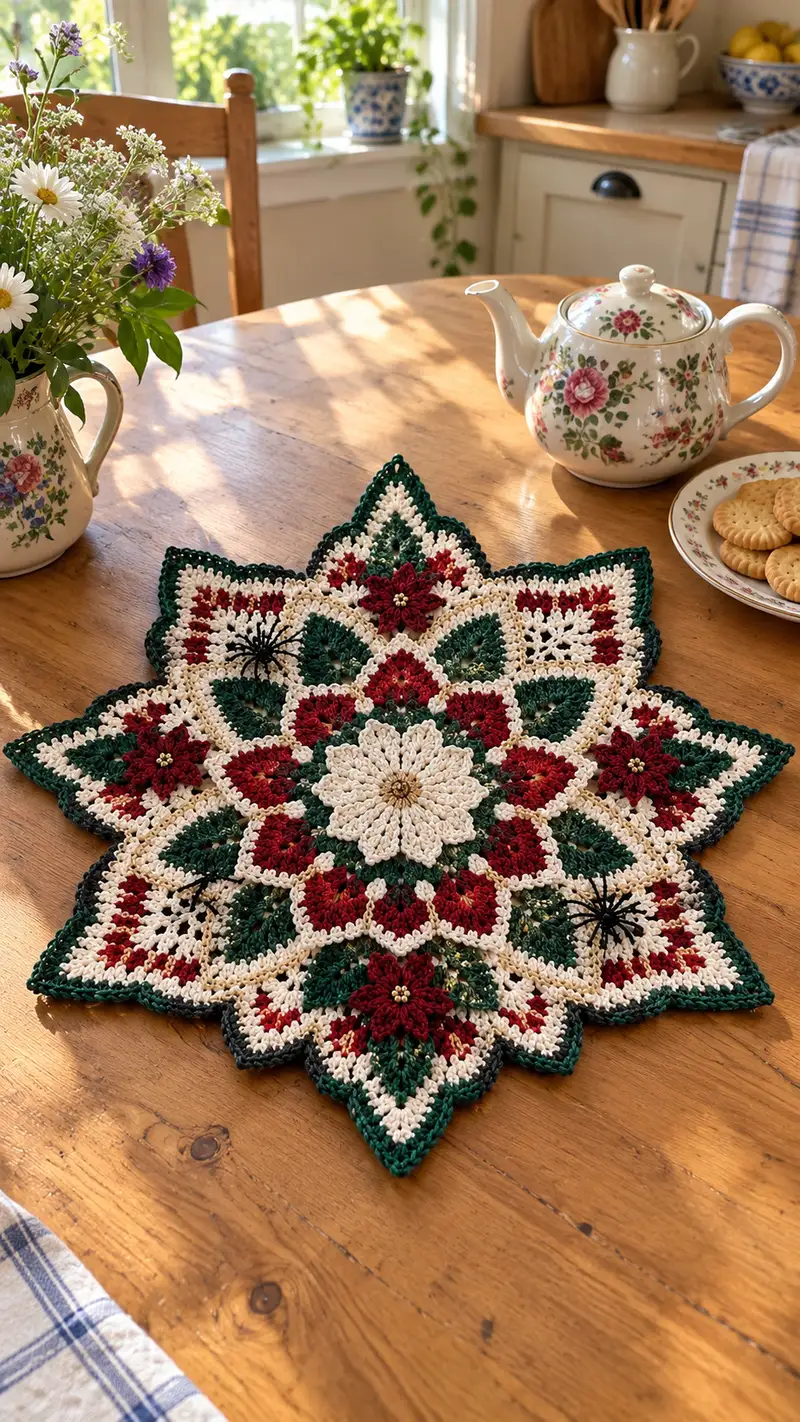
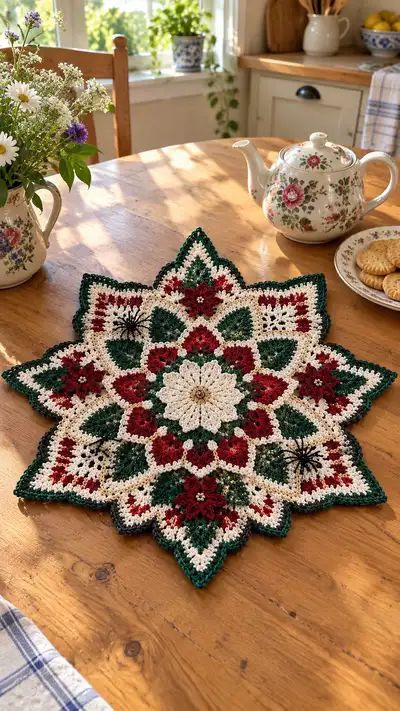
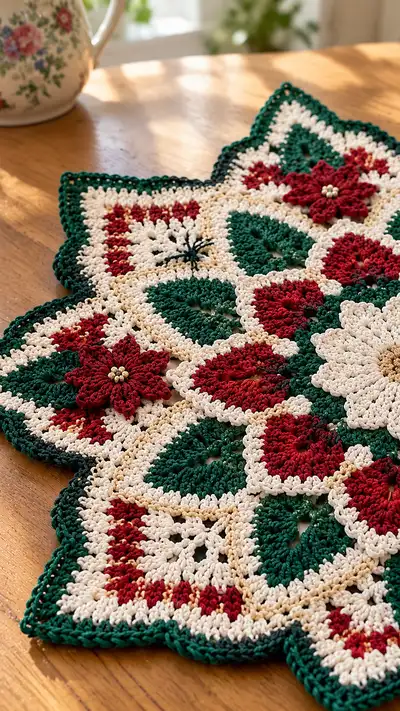
Create a stunning star-shaped poinsettia table runner that transforms any table into a festive scene. This layered lace centerpiece features a raised cream center medallion, deep red poinsettia blossoms, forest-green leaves and a scalloped star border with tiny gold bead centers. Worked in light cotton and joined motifs for a delicate, heirloom-quality finish — perfect for holiday tea or mantel display.
Progress Tracker
0% Complete
— Overview :
Info :
This pattern creates one eight-point star table runner approx. 18-20 inches across when worked in DK/light worsted cotton and blocked gently. Work motifs with consistent tension and block motifs flat before joining. The pattern is written with RS facing unless otherwise noted. Use 3.5mm hook for most rounds and switch to 3.0mm for dense edging or flower petals if desired.
— Center Medallion :
Round 1 :
Make center: ch 6, join with sl st to form a ring. Ch 3 (counts as dc), 15 dc into ring, join with sl st to top of ch-3 (16 dc total).
Round 2 :
Ch 4 (counts as tr), *skip next st, dc in next, ch 1* rep around to create 8 ch-1 spaces; join with sl st to top of ch-4 (16 post stitches, 8 ch-1 sps).
Round 3 :
Into each ch-1 sp: (ch 3, 2 dc, ch 3, sl st into same sp) to form 8 small petals. Sl st to base and fasten off cream if changing to gold center thread.
Info :
Optional: Use metallic gold thread to embroider tiny spiral center or attach a small cluster of gold beads by stitching through the center and knotting securely on WS.
Round 4 :
Rejoin cream: ch 1, sc evenly around the outside of the petals working 3 sc into each petal peak and 1 sc into each valley between petals (total 40 sc). Join with sl st (40).
Round 5 :
Ch 2, (hdc in next 2, dc in next 2, 2 dc in next) repeat around to begin raising the medallion edge; aim for consistent increases across repeats; end with join to ch-2 (48 sts equivalent around).
Round 6 :
Ch 3, 1 dc in next 3 sts, (2 dc in next) repeat to keep medallion flat and increase slightly; total approximately 56 dc after round (math: 48 with eight increases = 56).
Info :
Begin gauging: the center should lie flat; if cupping occurs, add a repeat round with more increases; if ruffling, omit a set of increases. Blocking will refine shape.
Round 7 :
Ch 2, 1 hdc in each st around (56 hdc). Join with sl st.
Round 8 :
Ch 3, (dc 2, ch 2, dc 3) into every 7th stitch to create eight outer arches; 8 clusters total. Join (arches = 8).
Round 9 :
Into each arch: sl st to arch, ch 3, 5 dc, ch 3, sl st (creates eight larger petals). Join and fasten off cream if changing color for next petal layer.
Info :
Fasten off and weave in the center ends now if you plan to work flower petals separately. Use a small mirror to check centeredness and symmetry.
— Inner Petal Layer (Cream to Green Transition) :
Round 10 :
Join forest green at base of one large petal: ch 1, sc evenly around base of each large petal placing 4 sc into each arch (32 sc). Join (32).
Round 11 :
Ch 3, (dc 2, ch 2, dc 3) into each base arch to form pointed petals; join (8 petal clusters x 6 sts = 48 equivalent).
Round 12 :
Ch 1, sc around petals working 3 sc at each petal tip and 1 sc in each side - total should be 56 sc. Join (56).
Info :
Keep petals slightly raised by working posts that lean toward the slice's center (work dc around post to shift height). This creates a subtle 3D lift for later layered petals.
Round 13 :
Switch back to cream: ch 2, hdc in next 8 sts, *(ch 3, sk 1, hdc in next 8)* repeat around forming small arches between green petals; total about 7 arches plus join (approx 56).
Round 14 :
Into each ch-3 arch: (sc, 3 dc, sc) to create small scallops (8 scallops). Join and fasten off cream.
Info :
At this stage you have a layered medallion with alternating cream and green textures. Keep RS facing up; place a stitch marker at one petal top to track starting point for subsequent motif joins.
— First Red Petal Ring (Make 8 Petal Groups) :
Round 15 :
Join deep red at the seam between two adjacent green petals: ch 1, 6 sc into space to form a small red petal base. Repeat to create 8 small red bases evenly spaced (8 clusters of 6 sc each, 48 sc total). Join.
Round 16 :
Ch 3, 7 dc into each red base to build red petals; sl st to join (8 petals, each 7-dc cluster).
Round 17 :
Ch 1, sc around each red petal: 3 sc at tip, 1 sc sides — total approx 64 sc. Join.
Info :
These red petals are intentionally smaller than later poinsettia petals. Keep tension slightly firm to make them sit under the 3D poinsettia later.
Round 18 :
Ch 2, working in cream: *(sk 4, in next st work (sc, ch 3, sc))* repeat around to create 8 ch-3 loops between clusters; join (8 loops).
Round 19 :
Into each ch-3 loop: sl st, ch 4, (tr 3, ch 2, sl st) to make openwork star laces; join and fasten off cream.
Info :
Blocking now will even out these first three rings; pin the medallion flat and spray-block to hold shape before continuing to the outer motifs.
— Petal Cluster Motifs (Repeat 8 for Star Points) :
Info :
You will now build & join 8 identical petal cluster motifs around the medallion to form each star point. Work one motif completely and then use join-as-you-go for the remaining seven to guarantee perfect alignment.
Motif Round 1 :
With forest green, ch 6, join to form ring. Ch 3, 11 dc in ring, join (12 dc).
Motif Round 2 :
Ch 2, (1 hdc, 1 dc) into each st around to give a raised base (24 sts equivalent). Join.
Motif Round 3 :
Ch 3, *dc in next 2, ch 2, sk 1* rep to form 8 arches; join (16 dc + 8 ch-2 sps).
Motif Round 4 :
Into each ch-2 sp: (ch 3, 4 dc, ch 3, sl st) creating 8 petal shells. Join and fasten off green if changing color for inner details.
Info :
Each motif will attach to the medallion at 3 points: two on the inner ring and one at the medallion edge. Use pins to position motif before join-as-you-go rounds.
Motif Round 5 :
Rejoin cream at the base of one shell: ch 1, sc 6 around the shell edge creating a neat border (6 sc). Repeat lightly around outer shells to maintain symmetry (48 sc around motif overall). Join.
Motif Round 6 :
Switch to red: ch 3, into each shell peak work (dc 6, tr 1) to form small inner red petals (8 small red clusters). Join (8 clusters).
Motif Round 7 :
Ch 1, sc around motif edge placing 2 sc at each red petal base and 1 sc between clusters (approx 56 sc). Join.
Motif Round 8 :
Using join-as-you-go: align the motif with medallion, sl st into medallion edge at the pre-marked three points, then sl st across the connecting scs to attach securely; finish the motif join and fasten off ends.
Info :
Repeat motif 1 seven more times, joining each motif into place to create eight star points surrounding the center medallion. Pin motifs precisely before each join to keep symmetry.
— Expanding Petal Rounds Between Points :
Round (Global) 1 :
After all eight motifs are joined, with cream rejoined at any seam, ch 2, hdc in each visible sc around entire joined circle to even out edges. Aim for approximately 320 hdc around the joined motifs (math depends on motif join counts).
Info :
This round unifies the texture so the next rounds read as one continuous fabric rather than assembled pieces. Count carefully and ensure the hdc row sits flat; add or skip a stitch for flatness.
Round (Global) 2 :
Ch 3, dc in next 5 sts, *(2 dc in next) repeat to make gentle outward increase across each motif seam; add 8 increases spaced evenly across the entire join to maintain flatness (approx +8 dc total).
Round (Global) 3 :
Ch 1, sc in each st around to tidy (approx 328 sc). Join with sl st and fasten off cream.
Info :
At this stage the star is clearly emerging. Check symmetry — points should be evenly spaced. Any slight asymmetry can be corrected by adding or removing single sc along the Global 1 round where necessary.
— Large Poinsettia Petals (3D Flowers - Make 8 sets) :
Flower Round 1 :
Each star point will receive a larger 3D poinsettia built from stacked petal layers. With deep red and 3.0mm hook, ch 6, join to ring. Ch 3, work 11 dc into ring, join (12 dc).
Flower Round 2 :
Ch 2, (1 hdc, ch 1, 1 hdc) in same st, *sk next, (1 hdc, ch 1, 1 hdc) in next* rep forming 6 small ch-1 v-spaces for petal bases; join (12 hdc equivalent).
Flower Round 3 :
Into each ch-1 v-space: (ch 3, 5 dc, ch 3) then sl st to next base to create 6 tall petals. Do not fasten off; these will be layered on top of the red clusters created previously.
Info :
To make petals stand up, after the round pull the center ring slightly upward and block petal tips with pins to create curvature; weave ends on WS leaving long tails for sewing down to star point.
Flower Round 4 :
Make second petal layer (slightly smaller): join red into base behind the tall petals: ch 2, into each petal base work (hdc, dc, hdc) to give a smaller layer that tucks under top petals (6 clusters). Fasten off leaving tail for stitching.
Flower Round 5 :
Using gold thread, sew 5–8 small gold seed beads into the center of each poinsettia. Secure beads with doubled thread, then pull long tail to WS and knot tightly. Weave ends in.
Info :
Sew each poinsettia to the top of a star point at rounds where you earlier left red clusters. Use the long tail to stitch through the motif base and center of the poinsettia. Place beads after stitching for best placement.
— Leaf Clusters (Make 8 Large Leaves and 8 Small Leaves) :
Leaf Round 1 :
With forest green: ch 8, sc in 2nd ch from hook, hdc in next, dc in next 3, hdc in next, sc in last; sl st to next base to create a long leaf shape. Make 8 large leaves around star points aligned between motifs.
Leaf Round 2 :
Round leaf edge: ch 1, sc evenly around leaf working 3 sc at tip and 1 sc along sides (approx 18 sc per leaf). Join and fasten off leaving tail for sewing (8 leaves x 18 sc).
Info :
Sew leaves into the negative spaces between star points using yarn needle and mattress stitch to flatten seam on WS. Place leaves so they extend beyond outer edge, giving the star a leafy silhouette.
Small Leaf :
Repeat with ch 6 foundation: sc in 2nd ch, hdc, dc 2, hdc, sc — sl st back to base. Edge with single crochet (approx 12 sc). Make 8 small leaves to tuck under red petals as accents.
Info :
Small leaves can be sewn partially under poinsettia blooms to add layered depth. Arrange and pin before final stitching to verify placement and balance.
— Square Lace Fillers Between Points (Make 8) :
Square Round 1 :
These small square motifs fill the triangular negative spaces between star points. With cream, ch 5, join to ring. Ch 3, 11 dc in ring, join (12 dc).
Square Round 2 :
Ch 1, sc in each st around (12 sc). Join. Ch 3, *ch 2, sk 1, dc* rep to create an openwork mesh forming a small square shape; overall approx 16 openings.
Square Round 3 :
Edge in cream: ch 1 sc around square producing neat border; fasten off leaving tails for join-as-you-go placement between motifs and leaves. Make 8 squares.
Info :
Place these squares into the assembled runner between two star points and two leaves so they form the decorative lattice in each corner of the star. Join using sl st or whip stitch through border stitches.
— Global Joining & Unifying Rounds :
Round (Global) 4 :
Once all pieces (medallion, 8 motifs, 8 leaves, 8 squares, 8 poinsettias) are stitched into place, rejoin cream at any join seam: ch 1, sc in each visible stitch around entire runner to smooth join edges. Expected total about 420 sc; add or subtract to maintain flatness.
Round (Global) 5 :
Ch 3, *(dc 3, ch 1) in next 4 sts, dc 2 in next* repeat evenly around to create the beginning of scalloped star points. Increase by 16 dc total across the round to broaden each point slightly (final approx 436 sts).
Info :
Add stitch markers at each of the 8 point centers to keep track of point shaping as you work outward. This ensures each point has identical stitch counts at the border rows.
Round (Global) 6 :
Ch 1, sc around working 3 sc into each ch-1 sp and 1 sc across dc groups for a tidy round (approx 460 sc). Join and fasten off cream.
Info :
At this stage check for flatness again. The runner should lie flat on a table with star points even. If curling, block and reshape before the final scalloped border.
— Final Scalloped Edge and Deep Green Border :
Round Border 1 :
Join forest green at any point center: ch 2, hdc in same st, *sk 2, (dc 3, ch 2, dc 3) in next st for wide scallop, sk 2, hdc in next 3 sts* rep around to create deep scallops along each point. You should form 8 large scallops (one per star point) with intermediate half-scallops filling valleys.
Round Border 2 :
Ch 1, sc around edge of scallops working 5 sc across each big scallop and 3 sc across small scallops; join and fasten off green. Approximate final circumference stitches: 520 sc.
Round Border 3 :
Optional thicker edge: rejoin darker forest green (held doubled) and work crab stitch (reverse sc) around entire edge for a firm, rope-like border for structure. This will tighten and define star points.
Info :
If you want a slightly smaller final size, omit Border Round 3. The crab stitch gives weight and crispness. Always try a small sample to assess final look before working entire border doubled.
— Decorative Surface Embroidery Accents :
Embro Round 1 :
Use black yarn for tiny spider/seed accents visible in original photographs: using embroidery needle, make 6 straight stitches radiating from a single point (6 spokes) and secure on WS. Place two or three of these spider accents asymmetrically for visual interest.
Embro Round 2 :
Use gold thread to stitch small French knots around selected cream squares and medallion spaces to emulate glittering pollen clusters. Tie and hide knots securely on WS.
Info :
These embellishments should be added after final blocking; stitch through stabilized fabric and avoid pulling too tightly — you don't want to pull the lace out of shape.
— Final Blocking & Finishing :
Info :
Wet-block entire runner flat on foam board. Pin every scallop and point to exact measurements (measure diagonal to ensure symmetry). Allow to dry completely (12–24 hours) before removing pins. This ensures crisp points and flat lace.
Finish :
Weave in all ends on the WS using yarn needle. Check bead security and re-stitch any loose beads with doubled thread. If desired, apply a light spray starch for extra body — test on a scrap first.
Info :
Store flat or rolled to protect points. For gifting, place tissue paper under points and wrap gently to avoid compressing the 3D petals.
This Poinsettia Star Table Runner brings layers of vintage lace, bold holiday color and delicate beaded centers into one stunning centerpiece. Working it is a calm, rewarding process—from the layered medallion to the 3D poinsettia blooms and leafy scalloped edge. Every pin, stitch and bead builds toward a heirloom-worthy runner that will brighten holiday tables for years to come. 🧶🌟 Share your finished star and know you created something beautiful and handcrafted. Happy crocheting! 🎁