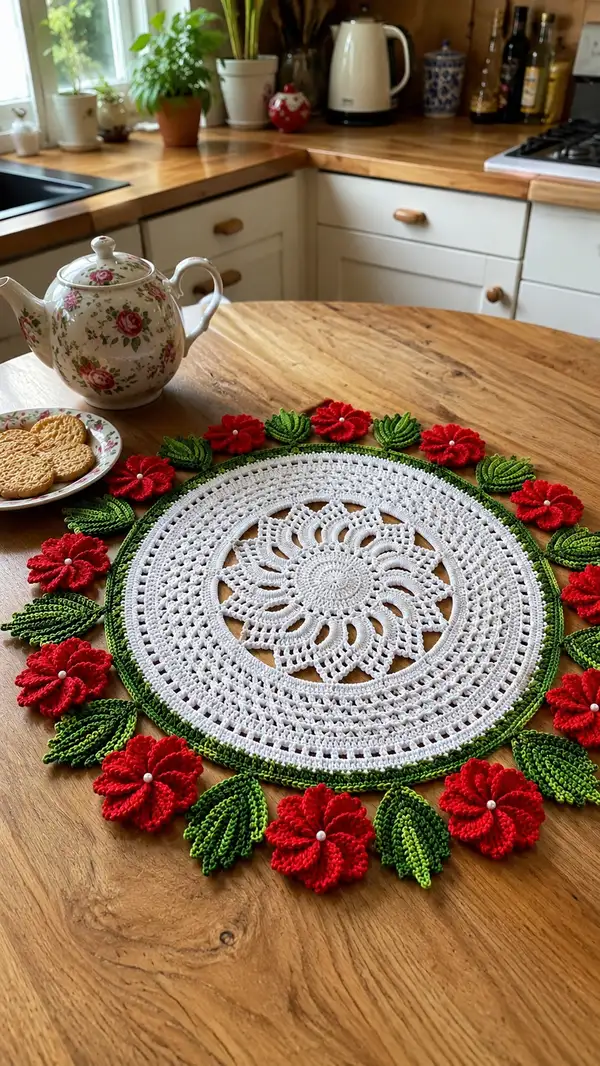
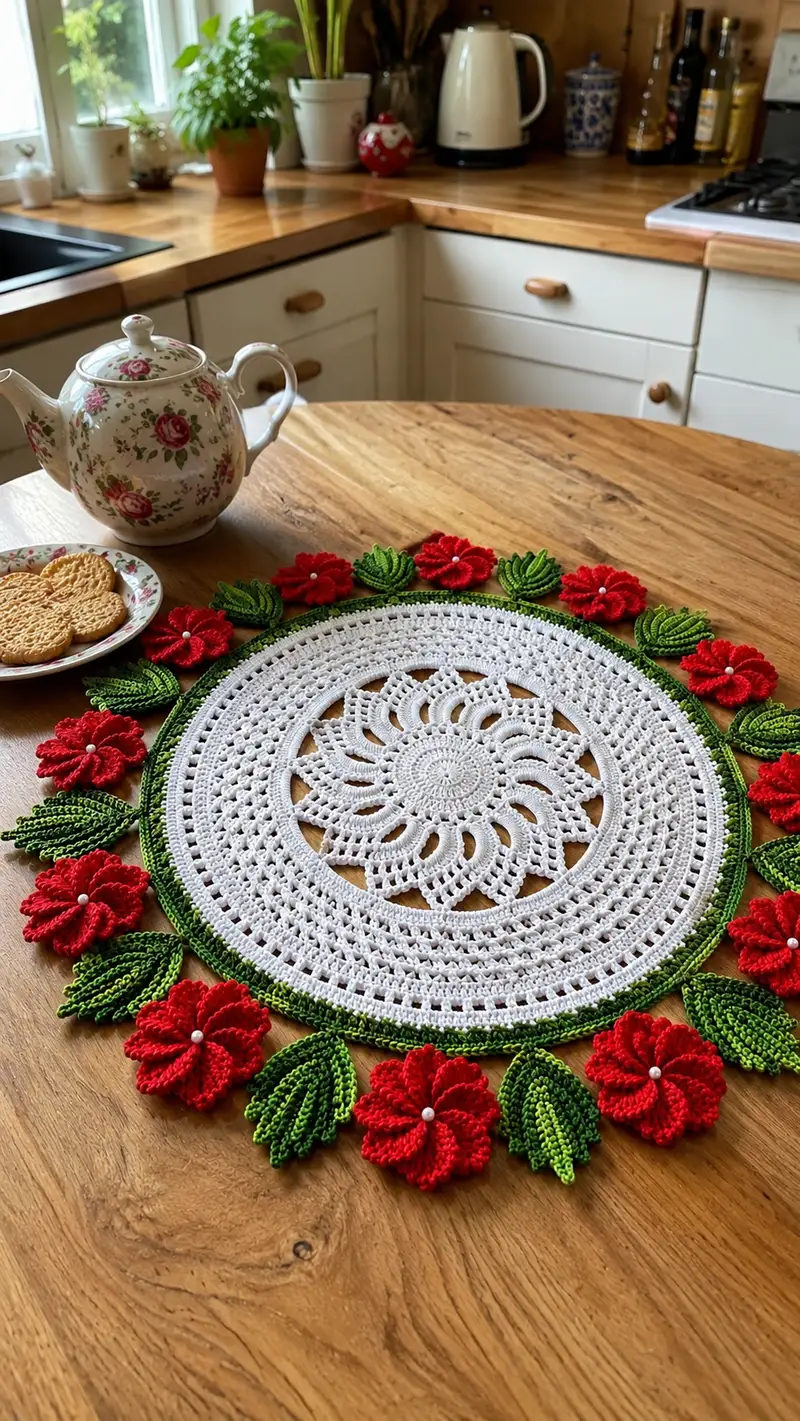
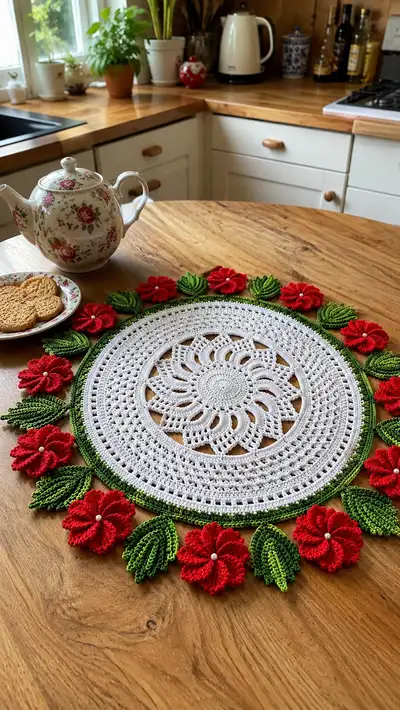
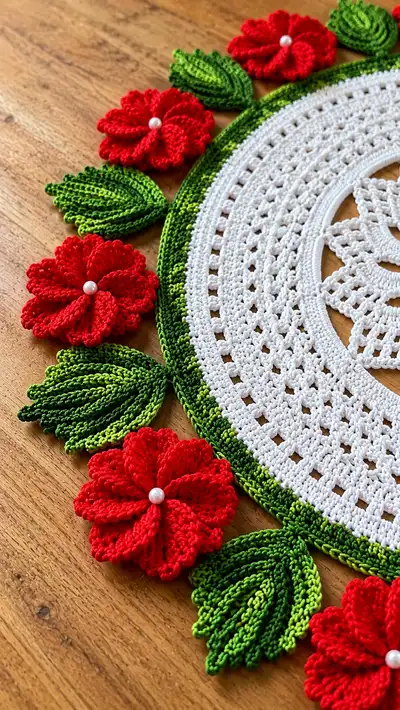
A vintage-inspired round lace doily edged with bold red poppies and layered green leaves. Delicate white lacework in the center forms a sunburst medallion while a two-tone green rim frames the floral appliques. Perfect as a table centerpiece or tea table accent, this pattern combines filet-style rounds with textured 3D flowers and leaves for a charming handmade finish.
Progress Tracker
0% Complete
— Central Sunburst Medallion :
Round 1 :
6 sc in magic ring (6)
Round 3 :
(1 sc, inc) x 6 (18)
Round 4 :
(2 sc, inc) x 6 (24)
Round 5 :
(3 sc, inc) x 6 (30)
Round 6 :
(4 sc, inc) x 6 (36)
Round 7 :
(5 sc, inc) x 6 (42)
Round 8 :
(6 sc, inc) x 6 (48)
Round 9 :
1 sc in each st (48)
Info :
Keep tension slightly snug to create a firm foundation for the sunburst. Place a stitch marker at start of round and move it with you.
Round 10 :
(7 sc, inc) x 6 (54)
Round 11 :
1 sc in each st (54)
Round 12 :
(8 sc, inc) x 6 (60)
Round 13 :
1 sc in each st (60)
Round 14 :
(3 sc, ch5, sk 2, sc in next 3) x 12 - work ch5 loops evenly around base to create petal foundation (60)
Info :
The ch5 loops formed this round will be used to create the raised sunburst petal arches in the next round. Count loops to ensure you have 12 evenly spaced loops.
Round 15 :
*Into ch5 loop: (sl st, ch1, 3 dc, ch1, sl st) to form an arch; sl st to next base sc; repeat across all 12 loops* (60 anchors)
Round 16 :
1 sc in each st and in each arch anchor (60)
Round 17 :
(4 sc, inc) x 12 (72)
Info :
We're increasing to 72 to give more room for the next lace rows. Keep stitches even and use a marker every 12 stitches if helpful.
Round 18 :
1 sc in each st (72)
Round 19 :
(2 sc, ch3, sk 1) x 24 around - creates a delicate open mesh while maintaining 72 base anchors
Round 20 :
Working around anchors from previous round: *into each ch3 sp: (1 sc, ch3, 1 sc)* - this creates decorative picot-like repeating arches (72 anchors)
Info :
Keep the mesh flat by laying work on a flat surface occasionally. If strips start to cup, steam lightly and press during blocking later.
Round 21 :
1 sc in each st (72)
Round 22 :
(5 sc, inc) x 12 (84)
Round 23 :
1 sc in each st (84)
Round 24 :
(2 sc, inc) x 28 (112)
Info :
This is a larger increase round to prepare for the outer lace panels; I divide the round visually into equal sectors — use 8 or 12 markers to help maintain regularity.
Round 25 :
1 sc in each st (112)
Round 26 :
(3 sc, ch4, sk 2) x 28 to create uniform chain-4 mesh points around the circle (112)
Round 27 :
Into each ch4 sp: sl st, ch1, 5 dc, ch1, sl st (arch made into each mesh) (112 anchors)
Round 28 :
1 sc in each stitch and across arch anchors (112)
Info :
At this stage the medallion is noticeably flat and wide. Press gently with a damp cloth if any part is too wavy before continuing. This will make the outer rounds sit evenly.
Round 29 :
(4 sc, inc) x 28 (140)
Round 30 :
1 sc in each st (140)
Round 31 :
(5 sc, ch5, sk 3) x 28 - creates decorative open loops for the outer decorative band (140)
Round 32 :
Into each ch5 loop: sl st, ch1, 7 dc, ch1, sl st (arch) anchored back to base (140 anchors)
Info :
These large arches will be partly covered by the green rim; ensure they are evenly shaped by counting and re-smoothing each arch.
Round 33 :
1 sc in each st and each arch anchor (140)
Round 34 :
(6 sc, inc) x 20 + (7 sc, inc) x 8 to maintain sector regularity (adds 28 sts) (168)
Round 35 :
1 sc in each st (168)
Info :
This large foundation is now ready for the green edging and attach points for flowers and leaves. Count and verify you have 168 stitches around — I recommend markers every 12 stitches to divide the circle into 14 sectors for even motif placement.
— Green Rim and Attachment Band :
Info :
Change to green yarn. We'll make a narrow, sturdy rim that provides a base for sewing on flowers and leaves. Carry yarn in short lengths and fasten off between rounds if color pooling is visible.
Round 36 :
Join green with sl st in any outermost stitch. Ch1, 1 sc in same st and in each st around (168)
Round 37 :
1 sc in each st BLO around to create a slight ridge (168)
Round 38 :
(3 sc, inc) x 42 (210)
Info :
Round 38 slightly widens the rim to give a substantial band for appliques. The increase ratio keeps the circle flat while adding depth for the petals and leaves to sit on.
Round 39 :
1 sc in each st (210)
Round 40 :
*ch2, sk 1, sc in next 2*, repeat around to create small picots and a neat edge (210)
Info :
We will attach 12 flowers and 12 leaves alternately around this rim. With 210 stitches, spacing will be every 8 to 9 stitches. Use the following placement plan: mark 24 even positions around the rim or place pins before attaching motifs.
— Leaf Motif (Make 12) :
Info :
Each leaf is worked flat in two shades for a dimensional look. Using dark green for the base and light green for the ridge is optional; you can carry a second color or change at the start of round 3.
Leaf Round 1 :
Ch 12, sc in 2nd ch from hook and in next 3 (4), hdc in next 2 (2), dc in next 3 (3), hdc in last 2, sc in last ch (12 sts along foundation)
Leaf Round 2 :
Working down opposite side of foundation chain: sc in next 3, hdc in next 2, dc in next 3, hdc in next 2, sc in final 2; join to first sc with sl st. Shape the leaf: total 24 sts perimeter (24)
Leaf Round 3 :
Change to lighter green at this round (Info: use a neat join at mid-point of the leaf). Work 1 sc in each st around for a firm edge (24)
Leaf Round 4 :
FLO: (1 sc in next 2, 1 hdc in next 2, 1 dc in next 4, 1 hdc in next 2, 1 sc in next 2) - this lifts the front loops to create ribbed effect (24)
Leaf Round 5 :
BLO: 1 sc in each st (24) - anchor the front loop ridges
Info :
Pin the leaf flat and pinch the point slightly to give a tapered shape. Light blocking helps the layers sit close to the rim when sewn on.
Leaf Round 6 :
Optional: surface crochet veins - using contrasting thread, chain 6, sl st along center line of leaf; fasten off and weave ends (no additional stitch count)
— Poppy Flower (Make 12) :
Info :
Each poppy is worked as a single round-flower with 8 pronounced petals. The flower is decorative and sewn flat onto the rim. I recommend using bright red cotton and attaching a 4-6mm pearl for the center.
Flower Round 1 :
Make a small ring: ch 2, 12 hdc in 2nd ch from hook, join with sl st (12)
Flower Round 2 :
*Ch 3, 3 dc into same st, ch 3, sl st into next st* repeat 6 times (6 petal anchors) - for 8 petals we will alternate spacing next round (12 anchors)
Info :
If you prefer 8 petals, make Round 2 as: ch3, 3 dc into same st, sl st into next ch space to create 8 anchors around the ring. Count anchors before continuing.
Flower Round 3 :
Into each anchor: (sl st, ch1, 9 dc, ch1, sl st) - this forms long ruffled petals; repeat for all 8 petals (8 petals)
Flower Round 4 :
Working around petal ridge: into the base of each petal, make 1 sc across base and 3 sc along lower petal to secure shape (the flower remains flat). Fasten off and weave ends.
Flower Round 5 :
Optional: With a smaller hook and slip-stitch edging, work sl st around outer edge of petals to smooth any ruffling.
Info :
Sew a small pearl or bead in the center of each flower using a short length of sewing thread; secure with several stitches on the back of the flower to hold the bead tight.
— Decorative Petal Finishing and Extra Lace :
Round 41 :
Return to white and join to any stitch on rim edge between placement markers. Ch3 (counts as dc), *sk 1, 3 dc in next st, ch1, sk 1, dc in next st* repeat around to create small lobed edging (210 anchors)
Round 42 :
1 sc in each st around (210)
Info :
At this point transfer the doily to a blocking board. Pin the circle evenly into a true round before attaching flowers and leaves to ensure they will sit symmetrically.
Round 43 :
Using picot technique every 7th stitch: *6 sc, picot (ch3, sl st into top of last sc)* repeat around to add a gentle scallop (210)
Round 44 :
1 sc in each st to reinforce scallop edge (210)
Info :
Place 24 equally spaced pins around the rim where flowers and leaves will attach. Alternate flower then leaf placement; mark each position with a small stitch marker to guide sewing.
— Additional Detail: Small Inner Lace Rows (Optional) :
Round 45 :
For extra texture add a filet row: *dc, ch2, sk2, dc* across one sector, repeating around (maintain anchors to keep count at 210)
Round 46 :
1 sc in each stitch across to secure pattern (210)
Info :
These optional rows subtly increase surface interest beneath the flowers. Add them if you like a denser lace look.
— Assembly Preparation :
Info :
Before attaching, block each leaf and flower flat to shape them; pin petals outwards so they photograph and sit beautifully. Blocking cotton thread yields crisp shapes that sew on more easily.
Round 47 :
Lay the doily on your table and position one flower at each marked flower position, alternating with leaves. Space approximately every 8-9 stitches around the rim to achieve 12 flowers and 12 leaves (verify spacing visually)
Info :
Use pins to hold motifs in place; check that petals and leaves alternate evenly. Step back to view from above to confirm symmetry before sewing.
— Sewing Motifs On :
Round 48 :
Sew each leaf down with matching green thread: use small whip stitches along the base only so the leaf tips lift slightly. Secure ends well (no stitch count change)
Round 49 :
Sew each flower by stitching through the base ring of the flower into the rim — use neat invisible ladder stitches around the base. Attach pearls at center using sewing thread and knot securely on the back of the flower
Info :
For a clean finish, weave tails into the underside of the rim and trim close. If desired, add a small dot of fabric glue under bead centers for extra security.
— Final Blocking and Finishing :
Round 50 :
Pin the complete doily into a perfect circle on the blocking mat; gentle mist with water and allow to dry fully to set shape (no stitch count change)
Info :
Once dry, remove pins. Lightly press with a cool iron using a cloth barrier if more flattening is needed. Avoid heating beads directly.
Round 51 :
Trim all ends, weave in remaining tails through the back of rim with yarn needle, and check the stitching of each motif for security (no stitch count change)
Info :
Your doily is finished. Measure the completed diameter: with the pattern above, expect a finished diameter of approximately 34-38 cm (13.5-15 in) depending on tension and blocking.
Notes :
If you want a larger doily, repeat additional rounds of increase and mesh before Round 35; decrease or omit outer arches for a smaller piece. For color changes, consider using two greens or ombre thread to add subtle dimension to leaves.
This poppy lace doily is a delightful centerpiece — bringing together delicate white lace and sculpted red flowers for a charming, timeless look. The layered leaves and pearls give it a polished, handmade elegance that shines at tea time or as a decorative accent. I hope making it brings you the same satisfaction I felt stitching each petal. Happy crocheting and enjoy your beautifully finished piece! 🧶🌺