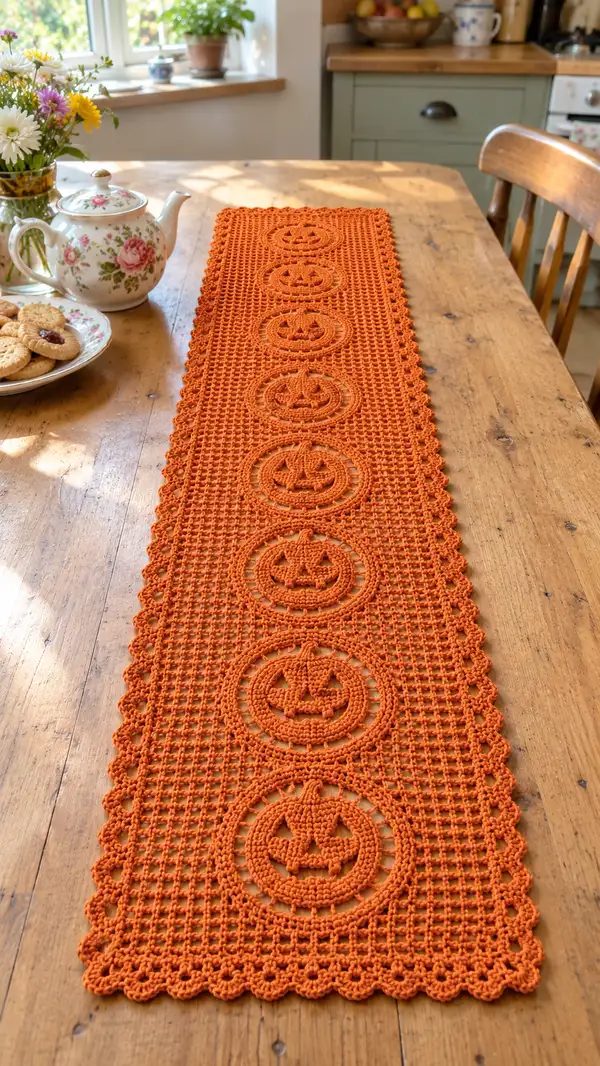
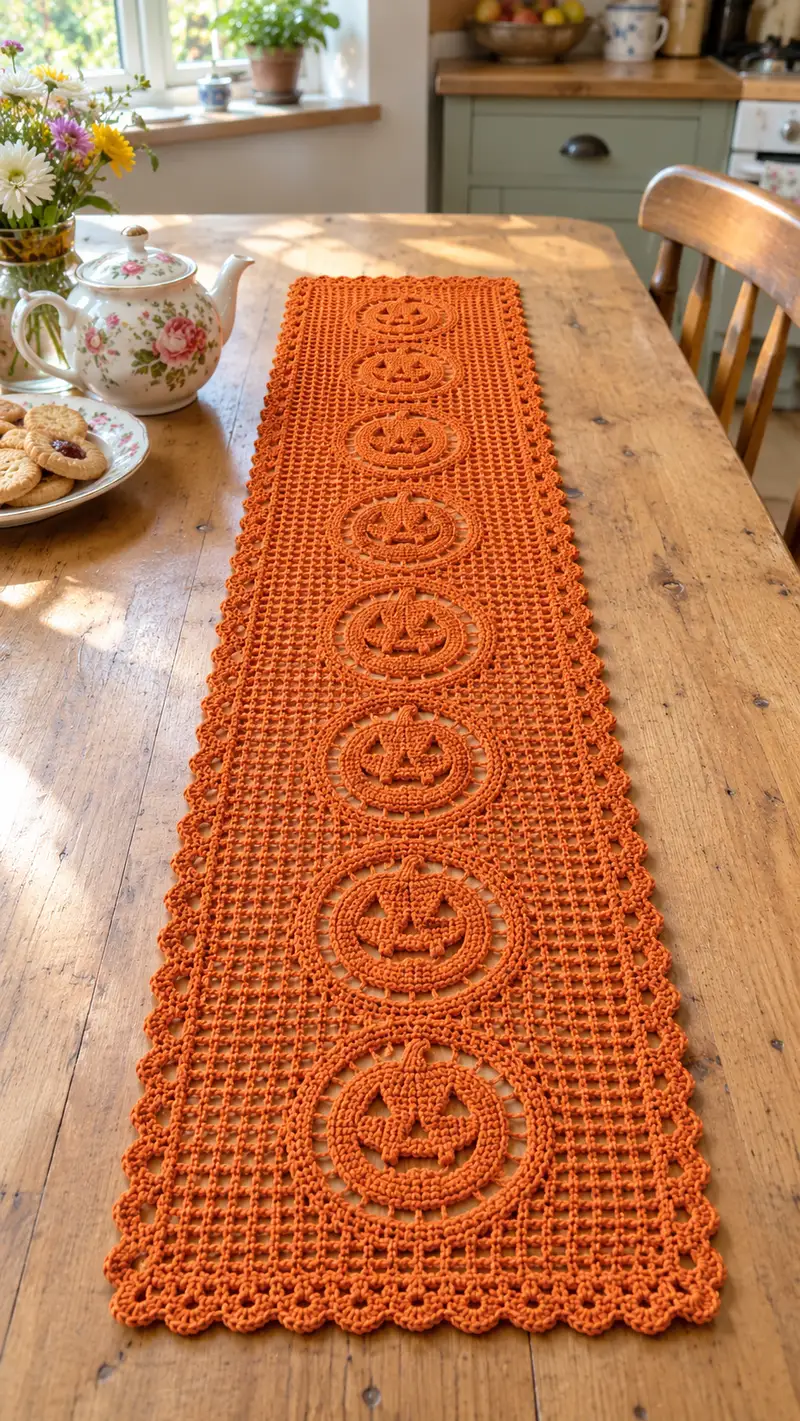
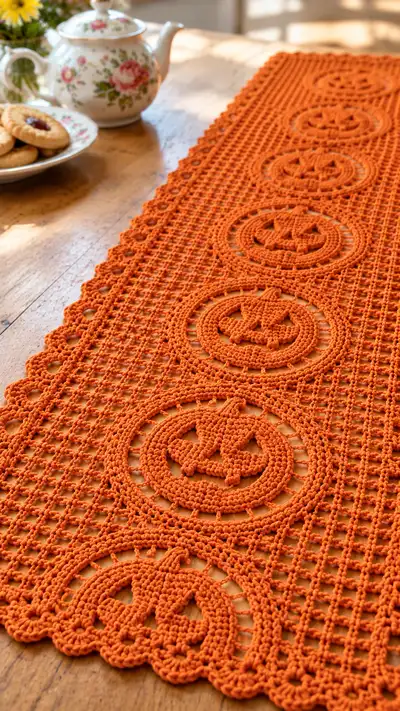
A festive crocheted table runner in warm pumpkin-orange, featuring a row of raised jack-o-lantern medallions on a delicate mesh background with a scalloped edging. This runner is perfect for fall and Halloween tablescapes and uses cotton-style yarn to create crisp stitches and sculpted pumpkin faces.
Progress Tracker
0% Complete
— Overview :
Info :
This table runner is composed of 1) pumpkin medallions worked in rounds, 2) a filet-style mesh strip worked in rows/rounds, and 3) a scalloped border joined around the entire perimeter. The pattern gives instructions to make one pumpkin motif in full detail and then how to assemble seven motifs into a long runner using the mesh joining method. Adjust the number of motifs to lengthen or shorten the runner.
— Pumpkin Medallion (make 7) :
Round 1 :
6 sc in magic ring (6)
Round 3 :
(1 sc, inc) x 6 (18)
Round 4 :
(2 sc, inc) x 6 (24)
Round 5 :
(3 sc, inc) x 6 (30)
Round 6 :
(4 sc, inc) x 6 (36)
Round 7 :
(5 sc, inc) x 6 (42)
Round 8 :
(6 sc, inc) x 6 (48)
Info :
At this point the medallion forms a solid circular base. Use a 3.25 mm hook if you want slightly tighter, more defined pumpkin rounds; BLO or FLO can be used on subsequent rounds to create subtle ridges.
Round 9 :
1 sc in each st around (48)
Round 10 :
1 sc in each st around BLO (48)
Round 11 :
1 sc in each st around (48)
Info :
Decide which direction will be 'top' for your pumpkin. Mark the top stitch with a removable marker; features (eyes, nose, mouth) will be worked relative to that marker. The pumpkin face will be added using small puff/popcorn stitches and surface slip stitch in later rounds.
Round 12 :
(2 sc, fpdc around next st) x 12 (48)
Round 13 :
1 sc in each st around (48)
Round 14 :
Begin placement round for facial features. With marker still at top, count 6 sts to the right and 6 sts to the left for eye centers. Work: sc in next 5, make a small 5-loop puff here to form the 'eye' center (yo, insert hook, pull up loop 5 times, yo and draw through all loops, ch1 to close; puff counts as 1 st), sc in next 7, make a second 5-loop puff for opposite eye, sc remaining sts (48)
Info :
Puff stitch sizes can be adjusted: a 4- or 6-loop puff will change the size of the eye. Keep the puff stitch count consistent between eyes. The puff counts as 1 stitch each to keep the overall stitch total 48.
Round 15 :
1 sc in each st around, working tightly around the puff stitches (48)
Round 16 :
Working to form nose: sc in next 6, make a 3-dc cluster (dc cluster) spanning next 3 sts to create triangular nose point (cluster counts as 1), sc in next 7, repeat cluster for symmetry if desired or leave single small triangle, sc remaining to end (48)
Info :
If you prefer to embroider the nose instead of creating a cluster, skip the cluster instructions and embroider a small triangle later with surface slip stitch or yarn needle and matching yarn.
Round 17 :
1 sc in each st around (48)
Round 18 :
Begin mouth shaping using popcorn clusters: sc in next 5, make a popcorn (5 dc popcorn made into same st, remove hook, insert into popped loop, pull loop through to secure) to begin mouth corner (pop counts as 1), sc in next 6, place second popcorn for mouth center, sc in next 6, place third popcorn for opposite corner, sc remaining (48)
Info :
Popcorn/puff placements form the raised smile. If popcorn stitches seem bulky, switch to 3-dc puff stitches (3 loops instead of 5) or use surface slip stitch to embroider the smile after the medallion is complete.
Round 19 :
1 sc in each st around and work tightly around popcorns to lock them in place (48)
Round 20 :
Establish the pumpkin 'ring' that separates the face area from the outer ring: *sc in next 3, ch 3, skip 3* repeat around until 16 ch-3 spaces are formed; aim to maintain 48 base anchor points (48 anchors, 16 open spaces)
Info :
This round introduces small open arcs around the pumpkin to create a framed medallion effect. If your motif looks slightly oval, gently stretch and block it before continuing. The count of 48 anchor stitches allows consistent alignment with the mesh later.
Round 21 :
Work a round of dc into each sc anchor and 3 dc into each ch-3 space to form a smooth raised outer ring: *dc in next 3 sc, (dc, dc, dc) in ch-3 space* repeat around (total 48 anchor dcs + 16x3 dcs in open spaces)
Round 22 :
Slip stitch into next dc, ch1, sc in same st and in each dc around to produce close textured ring (48)
Info :
At this stage the decorative ring gives a raised frame for the pumpkin. Blocking will help these rings sit flat. We will use the outer edge stitches as join points to the filet mesh strip so keep track of a reference stitch (mark the center bottom stitch for alignment).
Round 23 :
(sc in next 4, dec over next 2) x 8 (40)
Info :
Round 23 slightly reduces the outer circumference to tighten the ring; you may omit these decreases if you prefer a larger medallion. Keep counts exact for consistent joins later.
Round 24 :
1 sc in each st around (40)
Round 25 :
Work 1 round in BLO to create a subtle ridge: 1 sc in each st BLO (40)
Round 26 :
Decorative stem: Turn motif and join yarn at top center (marked earlier). Ch 1, sc in base, ch 2, (sc in next 2, ch2) x 3 to create a short stem arc—fasten off leaving a 20 cm tail for sewing (counts flexible)
Info :
Trim yarn but leave long tail for sewing if you intend to attach the stem with a few whip stitches to heighten it. Alternatively, work a small ribbed stem by working sc in FLO for 6 rounds for a tubular stem effect.
Round 27 :
Surface finish: Using yarn tail or second color, embroider any additional facial lines with surface slip stitch or duplicate stitch. No change in stitch count (visual detail only).
Round 28 :
Final tidy round: 1 sc in each visible edge st to finish seam and prepare for blocking (40)
Info :
Block each medallion flat, stretching the outer ring so the round is even and the inner face is centered. Pin carefully to a blocking mat and spritz or wet-block according to your yarn instructions. Allow to dry fully.
— Mesh Panel (work 1 long strip to attach motifs) :
Info :
The mesh strip forms the background connecting all medallions. You can either 1) work a long foundation chain and fileting rows to match the length of your runner, OR 2) work shorter mesh sections and seam them together. The sample runner placed 7 pumpkin medallions with 6 consistent mesh repeats between them. The foundation chain used here is 201 chains across (multiple of 8 + 1) to allow even spacing for 7 medallions; adjust multiples if you change motif count.
Round 1 :
Foundation chain: ch 201 (multiple of 8 + 1). Turn. This will be the width of the runner (across table).
Round 2 :
Row 1 (setup): sc in 2nd ch from hook and each ch across (200 sc). Turn.
Info :
This solid sc foundation stabilizes the edge so the mesh begins from an even base. Count carefully to ensure 200 sc across; this will align with motif joins later.
Round 3 :
Row 2 (begin mesh): ch 4 (counts as tr + ch1), *skip next st, tr in next st, ch1* repeat across ending with tr in last sc, turn (100 tr anchors + 100 ch-1 spaces)
Round 4 :
Row 3: ch 1, sc into top of first tr, *ch 3, skip next ch1 space, sc into top of next tr* repeat across. This creates open filet spaces across width. Turn.
Info :
Count filet blocks as groups of ch3 spaces. Each filet block will span a set of vertical tr anchors; this is how you will position medallions by marking centers on the row where a medallion should sit.
Round 5 :
Row 4: ch 4, *tr in next sc (from previous row), ch1* repeat across, turn. The mesh alternates between tr rows and ch3 sc anchor rows to create a tight but open grid.
Round 6-18 :
Repeat Rows 3-5 to build mesh lengthwise. Each repeat (3 rows) is approximately 1 cm depending on yarn and tension. Work 14 repeats for a sturdy mesh panel between medallions and along edges (total rows here = 42 rows inclusive of set-up rows). Keep counts consistent: maintain tr anchors equal to half the number of starting sc (100 in our example).
Info :
Mark with temporary pins the points along the mesh where each medallion center will be placed. Calculate spacing by dividing the total chain length into 7 even segments; mark these anchor ch-3 squares directly on the mesh rows. This ensures each medallion sits centered in a vertical column of open mesh.
Round 19 :
Row 19 (attachment row - top connection): ch 1, sc across until you reach first marked attachment point (count depends on placement). At the center sc of attachment column, work sc through both the medallion outer edge stitch and into the mesh anchor stitch to join (sc join counts as 1), continue to next anchor and join medallion in the same manner. Repeat joining method for each medallion across row. Continue sc to end of row. Turn.
Info :
When joining, always work through corresponding sc on medallion outermost round (Round 28 in medallion instructions) and into mesh stitch directly to keep motifs flush with the mesh. Pin medallions in place before joining for perfect alignment.
Round 20 :
Row 20: Work three rounds of mesh pattern above the row of joined medallions to stabilize: ch 4, tr pattern row; ch1 sc anchor row; ch4 tr. Maintain consistent stitch/space counts matching earlier mesh repeats.
Round 21-38 :
Continue working mesh repeats (tr rows alternating with ch3 open rows) for the remaining length of the runner until you reach the final edge. Repeat the same number of mesh repeats you used on the top side so the medallion row remains centered vertically.
Info :
At this stage the runner is a long mesh rectangle with the medallions joined into the mesh at the planned row. Keep the runner flat by measuring diagonals and blocking if the fabric becomes distorted. The mesh provides a delicate, lacy texture that frames the raised pumpkins.
— Edge/Scallop Border :
Info :
The scalloped border is worked all around the perimeter after the mesh and medallions are assembled. Work evenly spaced scallops using anchor points from the foundation sc row and the tr anchors so the scallops line up neatly. The border is described in rounds for clarity.
Round 1 :
Join yarn at any corner with sl st. Ch 1, *sc evenly along edge until you reach the first open mesh space, (sc, ch 3, sc) in space for picot/loop* repeat along the entire edge working 1 sc into each top-of-tr anchor and 1 sc into each sc base. This will create small loops around the perimeter. Count the number of loops and aim for 48-60 loops per long side depending on your mesh counts.
Round 2 :
Scallop set-up: In each picot/loop from previous round work: (sc, hdc, 3 dc, hdc, sc) to form a 5-shell scallop. At corners work an extended shell of (sc, hdc, 5 dc, hdc, sc) to maintain symmetry. Repeat around entire perimeter. Keep count: if you have 56 loops, you will make 56 scallops.
Info :
Shell counts do not change the foundational stitch anchors, but ensure that shells are evenly stretched and pinned during blocking so scallops are consistent. If a scallop is too tight, ease it out with blocking pins and steam or wet blocking.
Round 3 :
Finish round: Ch 1, working behind scallop shells, sc into the base between each shell to lock shell shape. Fasten off and weave in ends. Repeat for all sides, ensuring corner shells flare consistently for a tidy finish.
Round 4 :
Optional decorative picot: With contrasting color or same color, make a picot chain of ch 3 and sl st into shell tops every third scallop to add tiny points. Fasten off and weave in ends.
Info :
Blocking the entire runner at this stage is critical to make the scallops sit flat and the mesh open evenly. Use many pins along scallops and mesh and leave to dry fully. Consider starching for a crisp table runner suitable for dining use.
— Finishing and Optional Variations :
Info :
Embroider additional face lines with surface slip stitch or small chain loops to give more character to pumpkins. You can change spacing or number of medallions to fit various table lengths. For a subtler autumn look, make the runner in deep rust or cream rather than bright orange.
Info :
If you want the pumpkins to be more three-dimensional, make two pumpkin medallion fronts and back, lightly stuff between them and seam closed before attaching to the mesh so each medallion has slight padding and a sculpted look.
Info :
For a reversible runner, work a second identical runner and sew them together wrong sides out, leaving a small opening to turn and press; this doubles the thickness for practical tabletop use.
Completing this pumpkin-parade table runner will transform your table into a warm fall showcase! The medallion faces add playful details while the airy mesh keeps the piece elegant. Block carefully, pin your scallops, and enjoy the glow of handmade texture on your table. 🍂🧶🎃