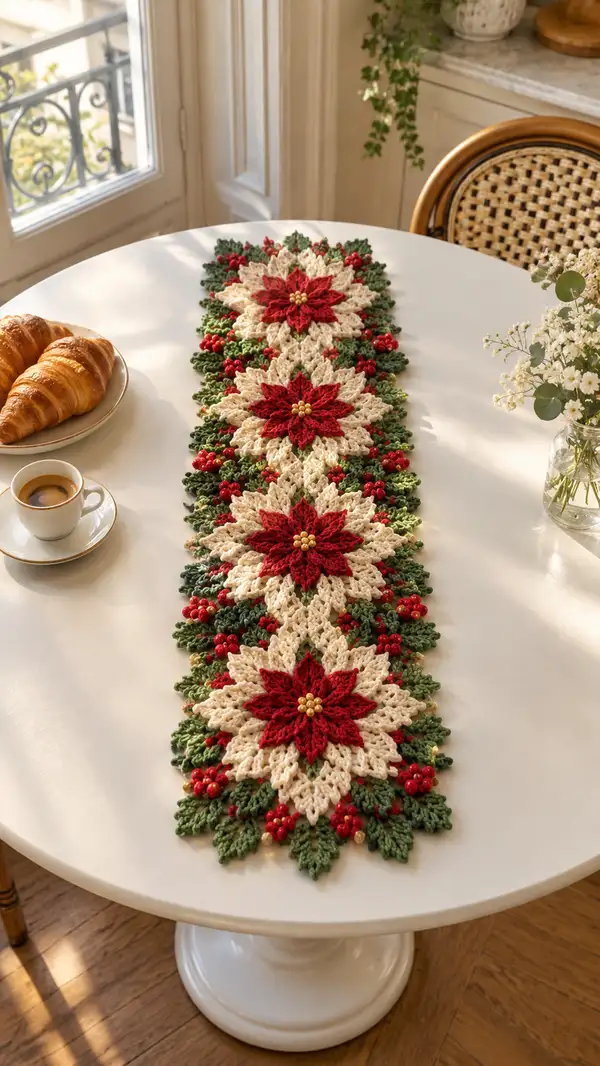
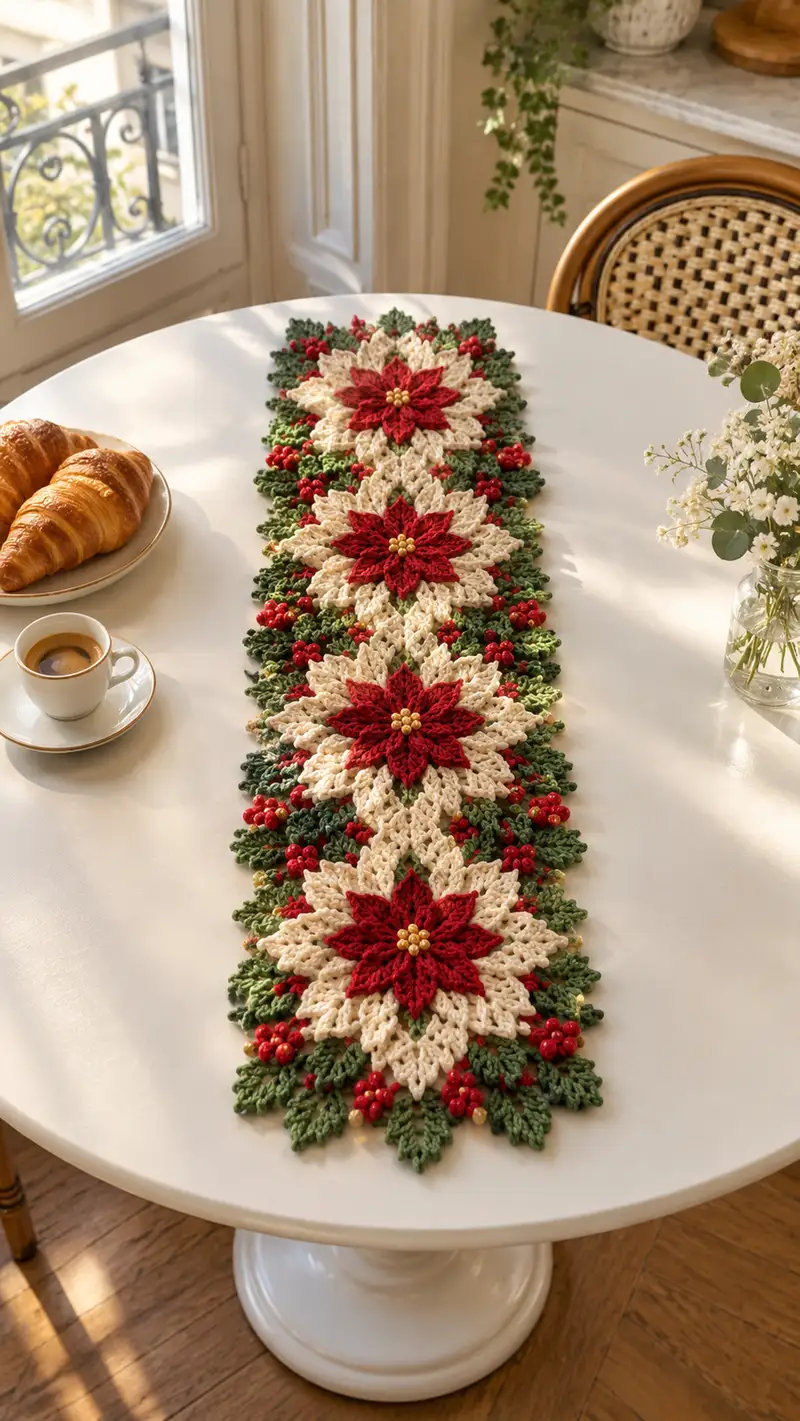
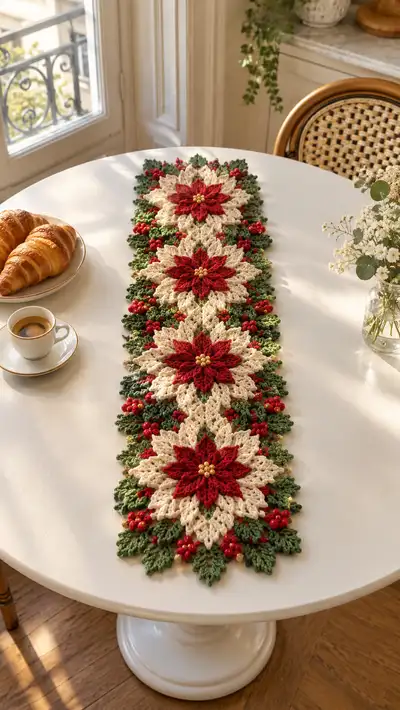
Create a festive Red and Cream Poinsettia Table Runner perfect for holiday décor. This layered motif runner features three large poinsettias, cream outer petals, deep green leaves and clustered red berries with gold bead centers for sparkle. The pattern uses modular motifs joined and edged with leafy scallops to lay flat on your table. Detailed, step-by-step instructions guide you through each motif, assembly and finishing touches.
Progress Tracker
0% Complete
— Notes and Gauge :
Info :
Gauge is not critical for this rectangular runner because motifs are modular and joined. With worsted weight yarn and 3.5mm hook, each complete poinsettia motif measures approximately 18-22 cm (7-8.5 in) across when blocked. Adjust hook size if you want the motifs larger or smaller. Block each motif flat before joining for best results.
— Flower Motif - Inner Center Disk (Make 3)
Round 1 :
Make a magic ring. 8 sc in MR (8)
Round 3 :
(1 sc, 1 inc) x 8 (24)
Round 4 :
(2 sc, 1 inc) x 8 (32)
Round 5 :
(3 sc, 1 inc) x 8 (40)
Info :
This inner disk creates a sturdy base to anchor the red star petals. Keep tension even; do not over-tighten the magic ring so the center remains flat.
Round 6 :
1 sc in each st (40)
Round 7 :
1 sc in each st (40)
Round 8 :
Change to red yarn. Join with a sl st to any sc to begin petal foundation. Carry cream inside if you prefer not to cut.
Info :
Mark the first stitch of round 8 so you know where petal anchors will be counted from. We will form 8 evenly spaced red petals; anchor points are every 5 stitches (40/8=5).
Round 9 :
*Ch 4, skip 2 sc, sl st in next st (anchor). Rep from * around to form 8 chain-arches. Join with sl st to first arch base (8 arches)
Round 10 :
Work petals: in each chain-arch: (sc, hdc, 3 dc, hdc, sc) all in same arch. Repeat for 8 petals. After last petal do not join; leave tail for finishing. Each petal occupies one arch.
Info :
Petal shape uses taller dc stitches at the center for a pointed star look. Keep petals upright by working slightly into the base stitch when possible.
Round 11 :
Turn the work (optional) and working behind the red petals, sl st into the base of the first petal, then *ch3, sl st into the base between petals to create small connecting loops*. Repeat around (16 small connecting loops including anchors).
Round 12 :
*Into each small connecting loop: (sc, ch3, sc)* to form a raised ring behind the petals. Repeat around to stabilize petals (16 small rings). Fasten off red if you wish to change to cream for outer petals.
Info :
Thread gold seed beads onto a short length of yarn to make the center cluster; you will sew these in place after blocking the whole motif. For a neat look, bead-threading before assembly is recommended.
— Flower Motif - Outer Cream Petals (Make 3, attach to inner disk)
Info :
Return to the cream yarn at the base between red petals or attach new cream. Outer petals are larger and formed by working into the base spaces behind red petals. This section creates 8 larger outer petals that overlap slightly.
Round 1 :
Join cream with a sl st in a base space behind a red petal. Ch 6, sl st into same base to form a long loop; *ch6, sl st into next base space* repeat around to create 8 long loops (8 loops)
Round 2 :
In each loop work: sc, hdc, 5 dc, 2 tr, 5 dc, hdc, sc into same loop to form a large pointed petal. Repeat for 8 petals.
Info :
Count the large petals as you go to ensure you have 8. Petals should be slightly staggered so outer petal points sit between the red star points when blocked.
Round 3 :
Work 1 sc in each stitch around the petal bases to stabilize (approx. 8 sc per petal depending on counts) resulting in approx. 64 sc total. Join with sl st.
Round 4 :
Work a decorative lace round: *(ch3, skip 1 sc, sc in next sc) x across base of each petal* to create scalloped lace between petals. Repeat across all petals and join. This adds openwork texture behind the large petals.
Info :
Block the entire flower motif flat, arranging red and cream petals so red star sits neatly centered and cream petals fan behind. Pin each point carefully and steam or wet block as appropriate for your yarn. Let dry completely.
— Leaf Motif (Make 18-24)
Round 1 :
With green yarn, ch6, sc in 2nd ch from hook, hdc, 2 dc, 3 dc in next, 2 dc, hdc, sc in last, then sl st to form a small leaf chain foundation. (This forms a single leaf shape)
Round 2 :
Working around the chain foundation, on one side of chain: sc, hdc, 2 dc, 3 dc in tip, 2 dc, hdc, sc. Repeat on opposite side so leaf is mirrored. Sl st to base (approx. 14 sts per leaf).
Round 3 :
Into each dc at leaf tip: (ch3, sl st) twice to make small picot accents. Work 1 sc around entire leaf edge to smooth and define. Fasten off and weave ends.
Info :
Make 18-24 leaves to place around motifs and joins; alternate sizes slightly by using ch5 for smaller leaves and ch7 for larger leaves for a natural look. Leaves are worked flat and then slightly curved when pinned for shaping.
Round 4 :
Optional: For larger vine leaves add an extra round of dc around the last sc round: (1 dc in each st) to increase leaf size (approx. 28 sts).
Info :
Leaves will be joined into the runner edge and tucked between cream petals. Plan quantity based on how many spaces you want to accent (we used 6 leaves per flower spacing in the sample runner).
— Berry Cluster (Make 18-30 tiny clusters)
Round 1 :
Thread 3-4 small red beads onto yarn before starting. Ch 2, 6 sc in 2nd ch from hook (6). Do not join; you will form a small bead cluster cup.
Round 2 :
With beads threaded close to hook, push the beads down so they sit on top of the 6 sc cluster. Next round: ch1, 6 sc around holding beads into position. Fasten off with a short tail for sewing. Each cluster holds 3-4 beads perched on a 6-sc cup.
Info :
Sew each berry cluster between leaves and cream petal junctions using the tail and a tapestry needle. Space clusters evenly around motifs; in the pictured runner there are three clusters between each flower pair and one cluster at each end.
— Small Gold Center Bead Cluster (Make 3)
Round 1 :
Thread golden seed beads on short yarn tail. Sew 6 gold beads across the center of the red star using a small running stitch across petals; alternatively, weave gold beads onto a 10 cm tail and sew through the inner disk center, knotting on the underside.
Info :
For a secure center, stitch through the center disk three times with the bead string anchored to the motif back. Hide the knot under the petals and weave in ends.
— Joining Loop Motif (Make 2 long connector strips)
Round 1 :
Join cream yarn at the point where two flower motifs will meet. Ch 8, sc in 2nd ch from hook, sc across (7 sc). Turn and work 6 rows of sc (7 sc each) forming a short rectangular tab. This tab will be used to sew motifs together and create an openwork join.
Round 2 :
On the final row of the tab, work ch5 loops across: *ch5, skip 1 sc, sl st into next sc* repeat across to create 3 ch-5 loops per tab. These loops will be used to anchor leaf clusters and create the lace in-between flowers.
Info :
Make two of these connector tabs between each pair of flowers; you will later join tabs with a narrow lace strip that picks up leaf motifs and berry clusters for a cohesive runner.
Round 3 :
Work a single sc round around the tab (sc in each st and sl st into each chain-loop) to tidy edges. Fasten off leaving a long tail for sewing.
— Edge Scallop and Leaf Border (Make edging to fit entire runner length)
Round 1 :
With green yarn, join at any petal edge. *Ch 4, sc in edge space, ch 4, sl st in next edge space* repeat across entire runner perimeter to create chain arches for leaf placement.
Round 2 :
In each chain arch make a leaf as described earlier but worked in the round: (sc, hdc, 2 dc, 3 dc, 2 dc, hdc, sc) in arch. Alternate large and small leaves every other arch to create natural rhythm.
Info :
When working the border, pin the runner flat and work edging in place to ensure scallops align and leaves tuck under outer petals just enough to appear integrated. Keep edges neat with small sl st joins to motif edges.
Round 3 :
After leaves are attached across both long sides, work a final decorative round in gold or cream: sl st around the base of each leaf and across petal junctions to smooth and secure. Use gold sparingly to highlight only outer-most tips if using metallic thread.
— Decorative Lace Fill Between Flowers (Strip to sit between three main motifs)
Round 1 :
With cream yarn, ch 22. Turn and work a filet lace row: in 3rd ch from hook (counts as dc), *(dc, ch2, skip 2 ch) across to last 3 ch, dc in last 3 ch*. This creates a ladder of openwork between flowers.
Round 2 :
On each ch-2 space work (sc, ch3, sc) to create small loops. Repeat for length of the connector to produce an airy filler that rests beneath flower edges without bulk.
Info :
Adjust ch count to fit the spacing between your three motifs precisely. When attaching, place the lace strip under the outer petals and tack in place with small stitches through the petal for a nearly invisible join.
— Assembling Motifs Together
Round 1 :
Block all motifs flat. Arrange three flower motifs in a straight line, spaced so cream outer petals of adjacent flowers almost touch (approx. 2-3 cm overlap depending on your blocking).
Info :
Pin motifs on a blocking mat to keep alignment. Use pins spaced every 1-2 cm to hold points and valleys in place. Lay connecting lace strip and connector tabs between motifs so loops align with petal valleys for leaf insertion.
Round 2 :
Sew connector tabs to the underside of each adjacent motif using mattress or whip stitch through corresponding foundation rows. Use cream yarn for near-invisible joins. Make sure the edge of the tab lines up with the base of petals and is smooth when flipped right-side up.
Round 3 :
Using green leaves and berry clusters, tack them into the chain arch loops created at connector tabs and motif edges: insert yarn tail under a few base stitches and pull tight to nest each leaf. Add berry clusters in groups of 2-3 where desired; secure firmly using multiple passes.
Info :
Sew gold center beads onto inner disk centers after joining to ensure center positions remain perfectly centered. Weave ends under petals and hide tails behind disks to prevent them showing from the front.
— Final Edge Finishing and Stabilizing Rounds
Round 1 :
Once all pieces are joined, work a round of sc around the entire runner edge to even everything out and secure loose ends. Work (sc, ch2, sc) in corners and petal tips to form small picots where needed. Keep tension steady to avoid puckering.
Round 2 :
Optional stabilization: work a second round in cream or gold along the long sides in sl st to flatten raised decorative stitches. This helps the runner lie flat under centerpieces.
Info :
Weave in all ends on the back. If any beads feel loose, reinforce with an additional stitch and knot; cut tails close and hide under decorative stitches. Press lightly if needed after final shaping.
— Variation Instructions (Length and Repeat Guidance)
Info :
To change runner length: add or remove complete flower motifs (each complete flower unit including surrounding leaves measures ~24-26 cm in length with connectors). For a single centerpiece circle, join motifs in a ring instead of a line. For a longer runner, make 4-5 flower units and increase leaf clusters proportionally.
Info :
If you prefer less three-dimensional texture, flatten petals by working outer cream petals with fewer tall stitches (replace tr and dtr with dc). This reduces height and gives a more placemat-like appearance.
— Care Instructions :
Info :
Hand wash cold with mild soap, reshape and dry flat; avoid machine wash to protect beads and delicate join stitches. Store flat or rolled in tissue to prevent creases in layered petals.
This Red and Cream Poinsettia Table Runner brings holiday charm and handcrafted elegance to your table! Layered petals, leafy borders and sparkling bead accents create a festive centerpiece that’s as beautiful as it is tactile. Each motif joins together like a little work of art—perfect for gifting or holiday hosting. I hope stitching this runner brings you cozy, creative joy. 🎄🧶