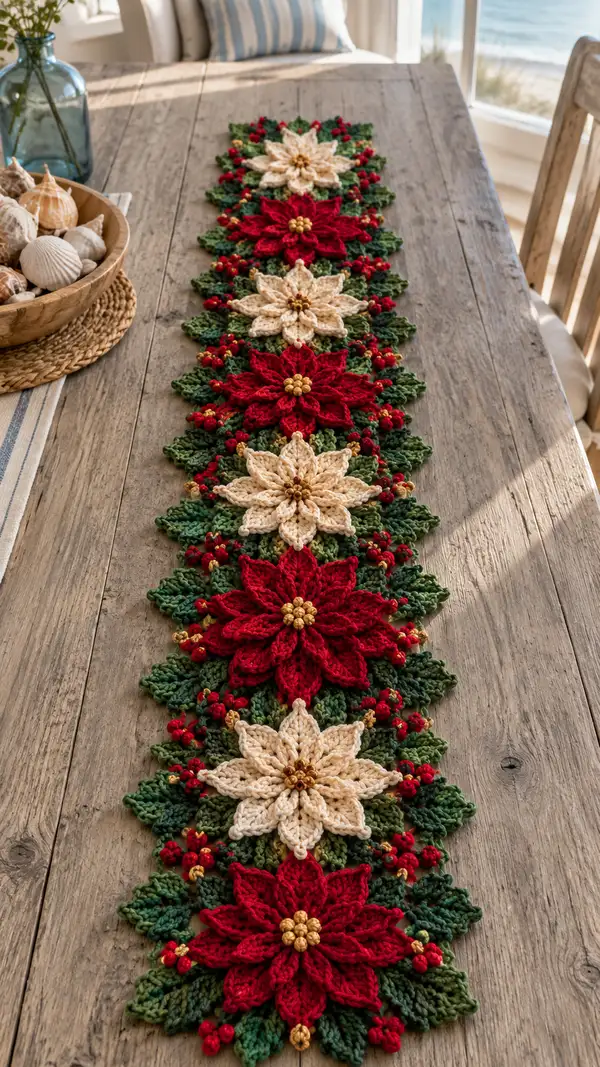
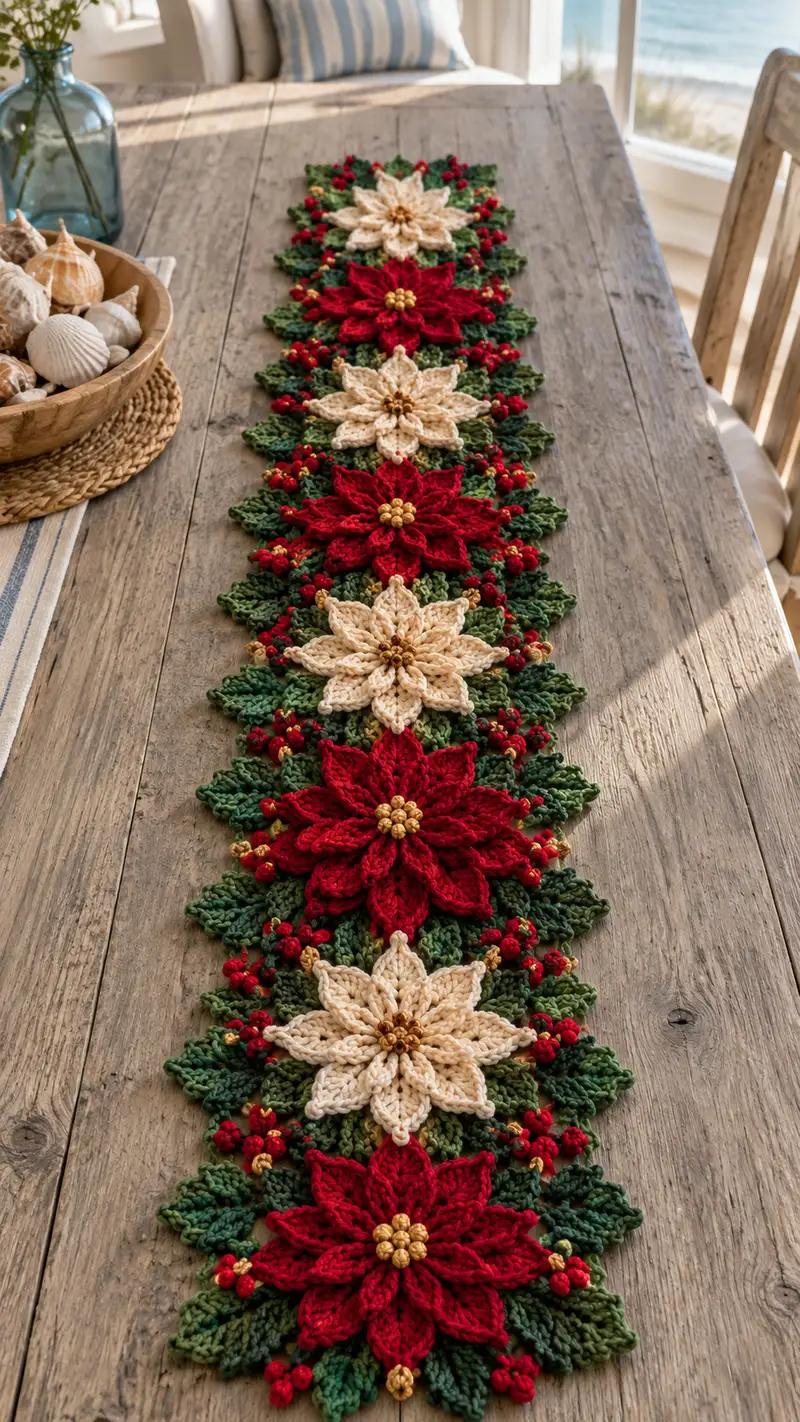
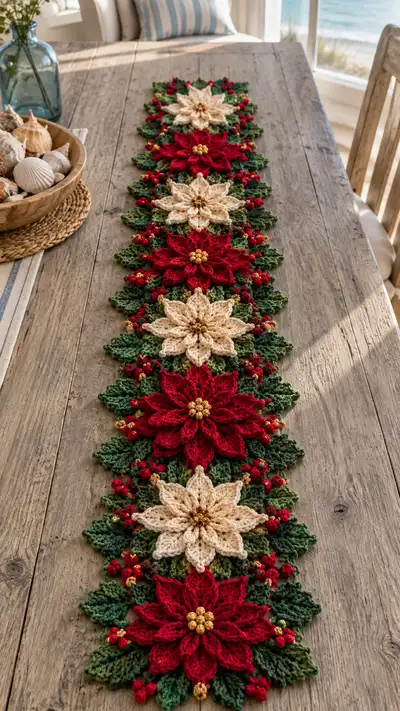
Create a festive Red and Cream Poinsettia Table Runner made from layered poinsettia motifs, leafy clusters and tiny berry accents. This pattern teaches how to crochet textured two-layer flowers, gold bead centers, leafy bases and the method to join motifs into a long runner. Perfect for holiday décor, the runner alternates rich red and warm cream flowers set on variegated green foliage with pops of red berries and gold beads.
Progress Tracker
0% Complete
— Center Disc :
Round 1 :
6 sc in magic ring (6)
Round 3 :
(1 sc, inc) x 6 (18)
Round 4 :
(2 sc, inc) x 6 (24)
Round 5 :
(3 sc, inc) x 6 (30)
Round 6 :
(4 sc, inc) x 6 (36)
Info :
Work tight tension for this disc so the center sits firm and beads can be sewn on securely. This disc provides the anchor for both petal layers.
Round 7 :
(5 sc, inc) x 6 (42)
Round 8 :
(6 sc, inc) x 6 (48)
Round 9-10 :
1 sc in each st (48)
Info :
Place a stitch marker to mark the top if you prefer a consistent orientation for attaching petals. Finish the disc and fasten off, leaving a long tail for sewing the bead cluster if you are using yarn-wrapped beads.
— Inner Petal Layer (Petal Base Loops and Petal Build) :
Round 11 :
*Ch 8, skip 5 sts, sl st in next st* x 8. (creates 8 loops evenly spaced around disc)
Info :
Loops are chain loops that will be worked into to form the inner (upper) petals. Adjust ch length slightly for taller or shorter petals—longer chains create looser petals.
Round 12 :
Working in each ch-8 loop around: 6 sc in loop (6) x 8 = 48 sc total (48)
Round 13 :
*1 sc in next 2 sts, hdc in next 2 sts, 3 dc in next 2 sts, hdc in next 2 sts, 1 sc in next 2 sts* repeat x 8 = 80 sts total (80)
Info :
This round builds the petal shape by working stitch clusters into the loop foundation. The round count increases because each petal is composed of many stitches. Keep track by marking the first stitch of each petal.
Round 14 :
*Work 1 sc in the first 4 sts of each petal, 1 hdc in next 4 sts, 2 dc in next 4 sts, 1 hdc in next 4 sts, 1 sc in final 4 sts of petal* x 8 (total 112)
Round 15 :
*1 sc in each of the next 6 sts of petal, fpdc around the central dc 3 times (to lift center of petal), 1 sc in remaining sts between petals* x 8 (total approximately 128)
Info :
Use front-post double crochets (fpdc) to push the petal center forward and create dimension. Place a marker at the start of each petal cluster so you know where each repeat begins.
Round 16 :
*Work 1 sc in each st around petal edge (use FLO on the base round to create a ridge at petal base if desired)* x 8 (approx. 128)
Round 17 :
*Switch to BLO for next round: 1 sc in each st BLO to create a defined petal seam (128)
Info :
If you are making cream petals for alternate flowers, switch yarn color at the end of Round 10 before starting Round 11. Use matching color for all rounds of this inner petal layer.
Round 18 :
*For each petal, work 3 sc decs along the left edge to create pointed tips: (sc, dec) in first 6 sts of petal, sc across center, (dec, sc) in last 6 sts of petal* x 8 (approx. 104)
Round 19 :
*1 sc around each st to even out (104)
Info :
At the end of Round 19, block the inner petal layer lightly to open petals out and help them hold their shape before proceeding to outer layer. A small spray of water and pinning works well.
— Outer Petal Layer (Larger Petals) :
Round 20 :
Join yarn on outside edge of inner petal layer where space exists between petals. Ch 6, sl st into space between inner petals, ch 6, repeat around to create 8 outer loops (no global stitch count change)
Info :
Outer loops should be positioned halfway between inner petals to give a full, layered flower. Make sure loop spacing is consistent so outer petals are evenly distributed.
Round 21 :
Working in each outer loop: 8 sc in loop x 8 = 64 sc (64)
Round 22 :
*1 sc in next 3 sts, hdc in next 2 sts, dc in next 4 sts, tr in next 2 sts, dc in next 4 sts, hdc in next 2 sts, 1 sc in next 3 sts* repeat x 8 (approx. 128)
Round 23 :
*Work 1 sc in each st around petal to tidy edge; then FLO round with 1 sc in each st to create a seam under petal base* (128)
Info :
To make the outer petals stand up more: use a slightly smaller hook for the outer petal rounds (e.g. switch to 3.5mm) to create a firmer edge that lifts away from the inner layer.
Round 24 :
*Create edging around each petal point: in each petal tip work (sc, ch2, sc) as a small picot to give pointed tips* x 8 (counts vary)
Round 25 :
*1 sc around to secure picots and finish outer layer (approx. 128)
Info :
Fasten off outer petal yarn but leave long tail for sewing motif into leafy base later. If making alternating cream and red flowers, use the appropriate color for all rounds that compose the two petal layers.
— Center Bead Cluster (Flower Core) :
Round 26 :
With gold yarn or matching beads: create small bead-wrapped bobble cluster by sewing 6-9 small beads into a tight circular arrangement in the very center of the disc. Alternatively, crochet a tiny psuedo-bead cluster:
Round 27 :
Make 6 small clusters: ch 2, 3 dc in ch2, sl st to disc center. Repeat 6 times to create small raised petals for beads. Weave in ends and secure beads with thread through center (no global stitch count change)
Info :
Sew beads individually through the center disc into the fabric and tie knots on the back. Use small beads (4-6mm) spaced evenly to mimic the look in the photo. If using metallic yarn, wrap a few stitches to create a gold center without beads.
— Leaf Cluster Base (Surrounding Green Foliage) :
Round 28 :
Join variegated green yarn to underside between two outer petals. Ch 6, sl st at intervals around the motif to create 10 leaf foundation loops around each flower (no global count change)
Round 29 :
Work each leaf loop individually: in loop: sc, hdc, 3 dc, hdc, sc (close). Repeat for each loop to create 10 leaves around motif. Each leaf uses 8-10 stitches; total approximate stitch count surrounding motif ~100.
Round 30 :
*On each leaf, work 1 sc in first 2 sts, 1 hdc in next 2 sts, 2 dc in next 2 sts, 1 hdc in next 2 sts, 1 sc in last 2 sts* across all leaves to add texture (count varies by yarn tension)
Info :
Leaves are worked to create a dense green mat to sit under the flower. Use BLO on one round to make a ridge along the leaf stem so leaves appear cupped and textured.
Round 31 :
*Edge each leaf in BLO: 1 sc in each st BLO to form a neat, slightly raised edge around the leaf* (approx. same stitch count)
Round 32 :
*Add tiny filler leaves between larger leaves: ch 4, sc in loop to make small accent leaf in gaps (no global count change)
Info :
Block leaf clusters gently to open them and sculpt them so the petals sit prominently above the foliage. Use pins to position leaves slightly under the outer petal tips for a natural wreath-like look.
— Berry Clusters (Small Red Berries) :
Round 33 :
Using bright red yarn, ch 2, 6 sc in second ch from hook to form tiny cherry bobble, sl st to base where you want the berry. Make 2-4 berries per motif, grouped into clusters of 3 where pictured (each bobble counts 6 sc if worked independently)
Round 34 :
*For each cluster, make 3 tiny balls close together: (ch2, 6 sc in 2nd ch) x 3 and attach to motif base with sl st and secure ends inside the foliage* (no global count change)
Info :
Work berries close to the leaf bases near the edges of the motif. Make some berries with beads or metallic gold yarn for shine as seen in the image. Secure each berry by sewing through the motif on the back several times.
— Small Accent Gold Berries :
Round 35 :
Create tiny gold knot beads by threading 3-4 small gold beads on a short length of thread and sewing them to small picot loops around leaves, or crochet simple ch2 picot and secure a bead to each picot (no global count change)
Info :
Gold accents give the finished runner a rich holiday look; distribute them sparingly so the gold pops but doesn't overpower the flowers.
— Motif Finishing and Blocking :
Round 36 :
Weave in any remaining ends from petals and leaves on the backside of the motif. Secure tails with a yarn needle and knot inside leaf base so knots are hidden (no global count change)
Round 37 :
Block the entire motif using pins and steam or mist. Shape outer petals up and leaves down so the flower sits above the foliage. Allow to dry fully before joining.
Info :
Blocking is important to produce the final dramatic look in the photograph. Without blocking the petals can flop and the motif will not match the crisp look in the photo.
— Joining Motifs Into Runner (Method A: Slip-Stitch Join) :
Round 38 :
Make 5 full motifs (alternating red and cream petals as desired). Place two motifs with the long axis aligned and overlapping leaf edges where outer petal tips meet leaf tips.
Round 39 :
With right sides facing up and wrong sides together, join variegated green yarn at a leaf point where motifs touch. Work through both motif edges: *sl st through leaf tip of motif A, sl st through corresponding leaf tip of motif B* across 6-8 stitches to create a seam. Repeat for each motif pair to form a long line of 5 motifs. This will not change counts on motifs themselves but creates a seam every junction.
Info :
Place motifs so flowers alternate in color along the length of the runner. Pin heavily first and check spacing: 1-2 cm spacing between petals keeps the runner airy; touching edges makes a denser runner.
Round 40 :
After every join, make a few anchoring stitches through leaf bases and petal bases: *yarn over, insert needle through both motifs, pull yarn, sl st to secure*, repeat 4-6 times along seam for a firm join. Fasten off and weave tails into leaves.
Round 41 :
*Optional reinforcement: Using needle and yarn tail, whip-stitch along seam from back to create a discrete seam that will hold together well under table use* (no global count change)
Info :
Make sure the seams are invisible from the top. Most of the seam should be hidden among leaves and petals; if visible, use small stab stitches to hide the yarn.
— Joining Motifs Into Runner (Method B: Crochet Bridge) :
Round 42 :
For a more decorative join, create a small crocheted bridge: join yarn at adjacent leaf base on motif A, ch 4, sl st to corresponding point on motif B, ch 4, return to A with sl st; repeat across 6 bridges across seam. This forms decorative connecting arcs between motifs.
Round 43 :
*Work 1 sc in each ch space along the bridge to thicken it; then 1 sc BLO to create a slight ridge if desired* (no global change)
Info :
Bridges add decorative interest and help stabilize runners so they lie flatter on a table. Space bridges evenly along the join for a balanced look.
— Runner Edge Finishing :
Round 44 :
When all motifs are joined, work a 1-row edging in variegated green around the entire runner: join yarn at one edge point, sc evenly around entire compound piece working 1 sc in each exposed edge stitch and 3 sc in each small gap to keep edges flat. Maintain consistent stitch counts to avoid ruffling (stitch count depends on runner length)
Round 45 :
*Work a decorative scallop: *skip 2 sts, 5 dc in next st, skip 2 sts, sl st in next st* across edges to form a gentle scallop edging. Repeat around entire runner. Fasten off and weave ends.*
Info :
Use a smaller hook for the edging to produce a neat finish. Scallops help hide any irregularities from joins and give a finished, polished look similar to the table photo.
— Final Accent Work (Extra Berries and Gold Beads) :
Round 46 :
After edging, stitch additional tiny red berry clusters into the gaps along the runner edges and junctions between motifs: make 2-4 berries per junction for the clustered look in photo.
Round 47 :
Sew small gold beads in the center of each flower cluster and at scattered points among the leaves to mimic photo sparkle. Secure beads tightly from the back and knot threads thoroughly.
Info :
Check the runner on the table and adjust any petals or leaves that lie flat by lightly steaming or re-blocking and pinning into desired shape.
— Alternate Construction Details (If You Prefer Sewn Petals) :
Round 48 :
You may elect to crochet individual petal units and sew them to a central disc. If so, make 16 petal pieces per motif (8 inner + 8 outer) each worked as a small oval: MR 6 sc (6), inc rounds to 18, then elongate by working in rows of sc and increases at both ends, then sew onto disc. This method increases sewing time but offers precision.
Info :
If sewing petals on, ensure each petal's base is snug to the disc and distribute petals evenly. This approach can produce cleaner layered looks on close inspection but is slower.
— Tips and Troubleshooting (Many Info Sections) :
Info :
Use stitch markers to note the start of each petal cluster and each leaf base. This prevents accidentally drifting stitches and keeps petals symmetrical.
Info :
If your motifs differ in size slightly, block all motifs together and re-shape to average size before joining — minor variations will be removed by blocking.
Info :
For a longer runner, add additional motifs and repeat the same join method. Each motif as described forms a repeat unit; spacing and addition of bridges determines final runner length.
Info :
Trim all loose ends and weave them at least 3 cm into the back of the motif for durability. Where beads are sewn on, run thread through beads multiple times and knot secure on the underside.
Info :
To preserve the runner, hand-wash gently in cool water with mild soap or spot clean. Lay flat to dry and re-block if needed to restore shape.
Info :
Gauge is not critical for decorative pieces, but staying consistent in tension ensures all motifs match. Try to maintain same hook and yarn throughout the project.
This Red and Cream Poinsettia Table Runner brings instant holiday charm to any table with its layered petals, textured leaves, and sparkling gold centers. Each motif is a little work of art — soft, tactile and full of seasonal warmth. I hope you enjoy making these flowers as much as I did; every stitch builds a beautiful centerpiece you'll be proud to display. Happy crocheting and enjoy your festive table! 🎄✨