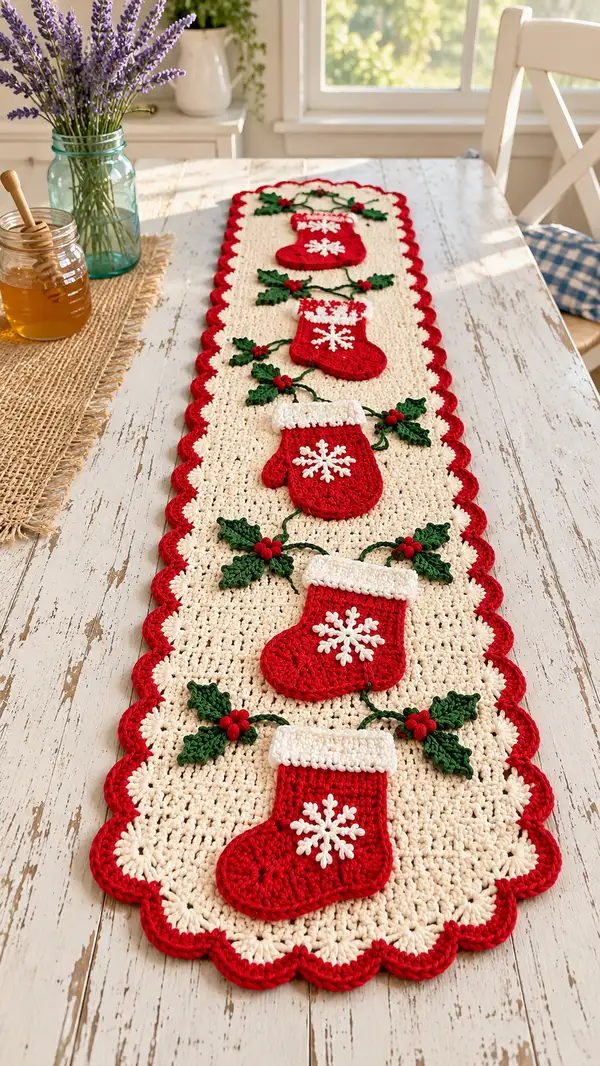
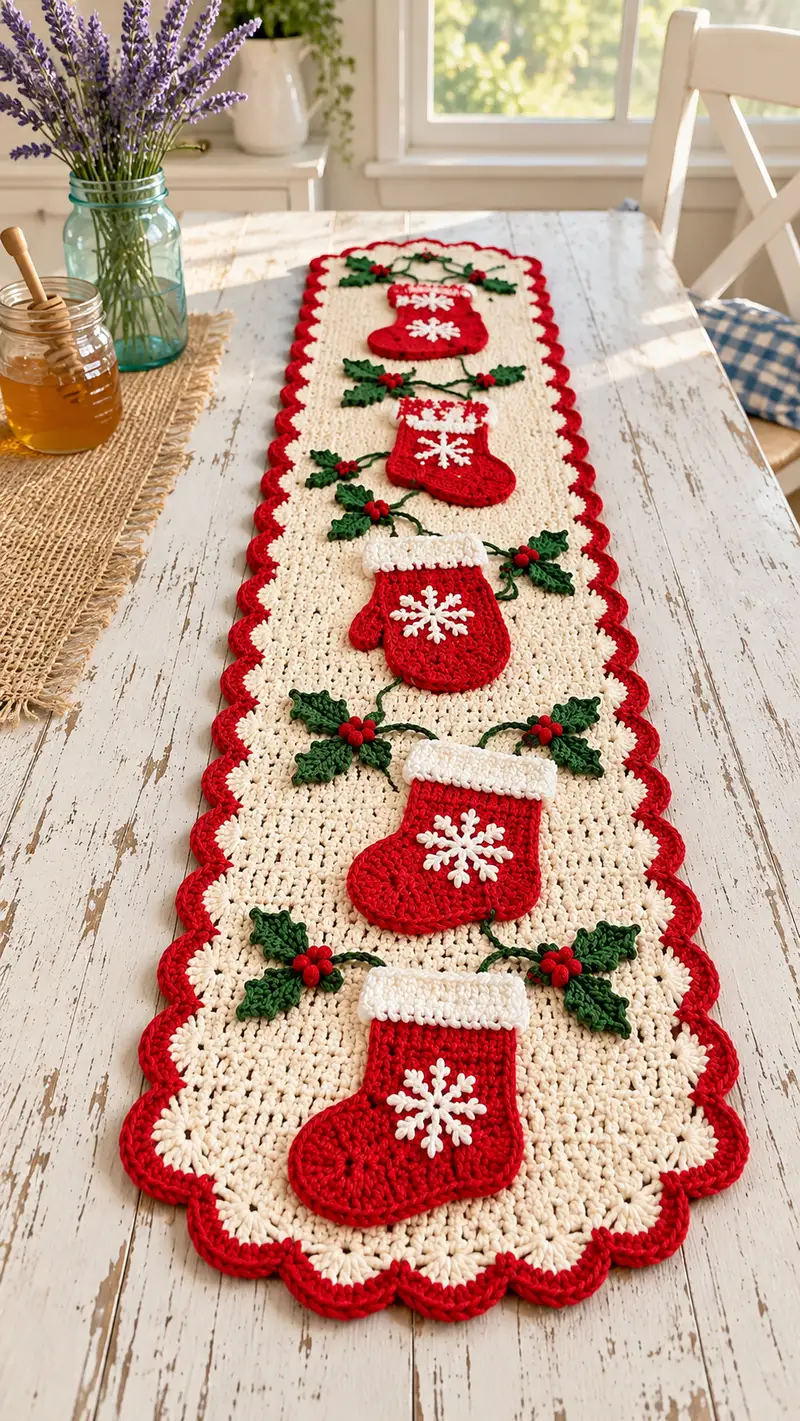
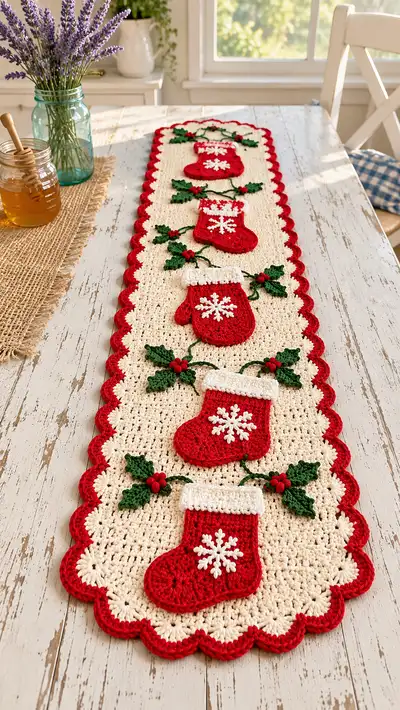
A festive, long table runner crocheted in warm cream with bright red stockings, fluffy white cuffs and delicate white snowflake appliques. Green holly leaves and tiny red berry clusters connect the motifs with friendly vine work. A scalloped red edge finishes the runner with vintage holiday charm — perfect for a farmhouse or cozy kitchen centerpiece.
Progress Tracker
0% Complete
— Materials & Gauge :
Info :
Gauge: approx 14 dc x 10 rows = 4 inches in worsted weight yarn with 4.0mm hook. Finished runner in photo measures approx 10.5 inches wide x 48 inches long. Adjust chain length for a narrower/wider runner maintaining pattern multiples as noted in base panel.
— Base Panel (Work flat, rows labeled as 'Round' to match format) :
Round 1 :
Foundation chain 101 (this is the width of the runner; adjust by multiples of 4 plus 1 to change width). Turn chain, 1 dc in 4th ch from hook (counts as dc + ch2 space setup), *sk 2 ch, (dc, ch2, dc) in next ch, sk 2 ch, 1 dc in next ch; rep from * across until last 3 chains, 1 dc in final ch. (This establishes a row of lacy cluster shells across; total approximate cluster count = 25 shells)
Round 2 :
Ch 3 (counts as dc), turn. 1 dc in same st as ch3, *sk 2 sts, (dc,ch2,dc) in ch2 space of previous row, sk 2 sts, 1 dc in top of next dc; rep across to end, 1 dc in last st. (Maintain same cluster count as previous row)
Round 3 :
Repeat Round 2 across (this creates the lacy shell texture). Total shells remain consistent. (101 sts width remains visually consistent due to shell placement)
Round 4-8 :
Repeat Round 2 (5 rows). Block occasionally to keep edges straight. Info: Place stitch markers at the edges if you find ends pulling; adjust tension at the beginning and end of rows to keep edges straight.
Round 9 :
Change to working in pattern to create a denser background for the stocking placement: Ch 2, turn, 1 hdc in each stitch and in ch2 spaces across (approx 101 hdc). This creates a slightly denser strip to anchor appliques.
Round 10-14 :
Work 5 rows hdc across (101 hdc each). Info: These tighter rows give visual separation between stockinings and make sewing appliques easier. Keep the panel flat by checking edge counts each row.
Round 15 :
Restart lace shell pattern: Ch 3, turn. 1 dc in same st, *sk 2 sts, (dc,ch2,dc) in next ch2 sp, sk 2 sts, 1 dc in next dc; rep across. (Back to shell rows)
Round 16-22 :
Repeat Row 15 seven times to make a long cream field. Info: This set of rows is where most appliques will be sewn. To place 5 stockings evenly, measure your runner and mark center points before sewing, or use the provided placement guide in Assembly section.
Round 23 :
Change to hdc rows as in Round 9 to make a supporting strip: Ch2, turn, hdc across (101 hdc). This gives a small band between stocking rows.
Round 24-28 :
Work 5 rows hdc across (101 hdc). Info: These compact rows help visually separate motifs and prevent the applique from sinking into a very lacy background.
Round 29-44 :
Repeat the shell pattern (Rounds 15 pattern) for 16 rows to reach near the other end of the runner. Keep the number of shell repeats even so that motifs can be centered symmetrically. Info: Before finishing the body, wet-block or steam-block the panel flat. Pin to measure spacing of stocking appliques; allow about 7-8 inches between centers depending on final runner length.
Round 45 :
Switch to hdc for a final band: Ch2, turn, hdc across (101 hdc).
Round 46-50 :
Work 5 rows hdc across (101 hdc). Info: These rows mirror the top band and ensure symmetry with the center panel.
Round 51 :
Fasten off cream yarn leaving tails for weaving. Block panel flat and let dry. Measure and mark centers for five stocking placements at roughly even intervals: starting approx 4 inches from the short edge, then every 8-9 inches depending on measured length.
Info :
If you prefer a longer runner with more negative space between stockings, add additional repeats of the shell group (Rounds 15 pattern) in multiples of 2. Remember to maintain symmetry. The width is controlled by your starting chain; any adjustments should keep the multiple pattern (4n+1).
— Stocking Applique (Make 5 identical; worked in rounds; red main color with white cuff) :
Round 1 :
With red, make a magic ring. 6 sc in magic ring (6). Pull ring tight. This forms the toe foundation of the stocking applique.
Round 2 :
6 inc around (12). (Inc = 2 sc in same st)
Round 3 :
(1 sc, inc) x 6 (18)
Round 4 :
(2 sc, inc) x 6 (24)
Round 5 :
(3 sc, inc) x 6 (30)
Info :
These rounds shape the toe into a flat rounded circle. Keep tension slightly tighter than the base panel so the applique holds its shape when sewn on.
Round 6 :
1 sc in next 15 sts, turn your work to begin working back and forth to form the foot and heel shaping. (You will now work partial rounds across the front and then join to form the ankle)
Round 7 :
Working back and forth across the 15 sts: ch1, 1 sc in each of 15 sts (15). Turn. Info: Do not join at end of this row; you are forming a shaped oval that will become the stocking's foot and leg.
Round 8 :
Sc across 15 (15). At end, rotate and continue in continuous rounds around the edge of the oval: 1 sc in next 7 sts, 1 sc in next 3 sts (these are the previously round base), 1 sc in next 8 sts, join with sl st to first st of this joining round. Total approx 38 sc around the new oval shape.
Round 9 :
(2 sc, inc) x 9 + 2 sc at spacing = 47 sc (approx). Increase evenly around the base to widen toward the ankle. Info: The counts here are approximate because of the partial-row join — aim to produce a smooth, slightly elongated stocking shape. You should have an even, smooth outline resembling a small stocking toe + foot + beginning of ankle.
Round 10-13 :
1 sc in each st around for 4 rounds (47 sc). Stuff lightly with fiberfill if you like a slightly raised applique (optional). Info: If you prefer a flat applique for sewing, do not stuff; simply keep the piece flat and slightly relaxed.
Round 14 :
Begin heel shaping: (6 sc, dec) x 6 = 41 sc. Work decreases distributed to pull the heel inward on one side of the oval. Keep track visually to maintain symmetric shaping of foot curve.
Round 15 :
(5 sc, dec) x 6 = 36 sc
Round 16 :
1 sc in each st around (36). Info: At this round, determine which edge will be the top cuff; mark it with a removable stitch marker. The cuff side will receive the white cuff later and should be the straighter side of the oval.
Round 17 :
Change to white yarn: sl st to change color at cuff marker, ch1, work 1 sc in each of next 8 sts (front cuff), then ch1, turn and work back across these 8 sts in sc to form a folded cuff that stands slightly away from the stocking (8 sc each row). Fasten off leaving long tail for sewing the cuff down if desired.
Info :
To create the fluffy cuff seen in the image, work two rows of white sc in alternating BLO to create a ridge. Alternatively, you may work a single row of bobble/cluster stitches in white for extra texture. We recommend the BLO ridge: with white, join and work 1 sc in each st BLO for one round, then 1 sc in each st for the next round in normal position.
Round 18 :
With red, rejoin at next red stitch and work 2 rounds sc around to tidy the cuff join area (36 sc). Finish and fasten off. Weave ends to the back. Make 5 total stockinings.
Info :
Use a smaller 3.5mm hook for the cuff rows if you want the cuff to be tighter and more textured. If your stocking shape becomes too round, reduce increases in Rounds 9-11 slightly to keep a longer ankle.
— Snowflake Applique (Make 5 — one per stocking) :
Round 1 :
With white, ch 6, sl st to first ch to form ring. (This will be the center ring).
Round 2 :
*Ch 5, (sl st) into ring; rep from * 6 times to create 6 loops around the ring (6 loops). Fasten off white tail only as you will work back into the loops for points.
Round 3 :
Attach white to the base of one loop: (sc, hdc, 2 dc, hdc, sc) in loop to form a pointed petal. Slip to next loop and rep around for 6 petals. Fasten off leaving tail for sewing.
Round 4 :
For a layered snowflake, use very small picot points: attach white to any petal tip and make (ch3, sl st in same point) in alternate petal tips to create small picot accents. Weave ends and block lightly. Sew one snowflake to center of each stocking body on the round 10-12 region (mid-foot).
Info :
Snowflakes are delicate — use a small tapestry needle and matching white thread to sew the center firmly. Consider a tiny dab of fabric glue under the center to keep it flat while sewing if your yarn is slippery.
— Holly Leaves (Make 12 leaves for 6 clusters, two leaves per cluster) :
Round 1 :
With green, ch 7. Starting in 2nd ch from hook: sc, hdc, 2 dc, hdc, sc, sl st to base to form a tapered leaf. This creates a small pointed leaf approx 6 sts long.
Round 2 :
Turn leaf and work along the other side of foundation chain: sc in base of next st, hdc, 2 dc, hdc, sc; sl st into initial base to close. Fasten off. (Leaf will have 2 symmetrical sides forming jagged edges).
Info :
For the serrated holly look, after Round 2, work tiny picot points along each side separated by 1 sc: *ch2, sl st back into same stitch to make a tiny spike; rep along both sides. This gives the leaf its holly appearance.
Round 3 :
Make a spine: with darker green or same green, embroider a central backstitched vein down the middle of each leaf using sewing thread or thin yarn. Use small neat stitches to emphasize the holly look. Make 12 leaves in total for 6 clusters spaced between stockings.
Info :
To increase leaf size, add 1 or 2 more chains at start (e.g., ch 9) and increase the number of dc/hdc accordingly keeping symmetry. Use a slightly smaller hook if you desire crisper serrations.
— Berry Clusters (Make 6 clusters; 3 berries each) :
Round 1 :
With red, make a small bobble: ch2, 5 dc in 2nd ch from hook, sl st to join to form a tiny round bobble (5 dc). Alternatively make a magic ring and 5 sc into ring, pull tight. These small balls will be sewn in clusters of three.
Round 2 :
Fasten off leaving long tail for sewing. Make 18 single-bobble berries (3 per cluster x 6 clusters). Info: If you prefer 3D berries that sit up a little, make 6 dc in the ring and do not flatten when fastening off; this produces a small puff.
Info :
For stuffed berries (optional), use a very small pinch of fiberfill inside the ring before closing to create a bead-like berry. Secure tightly and weave tail through the berry several times to compress and shape it.
— Vines and Connecting Stem (Make 6 vine pieces) :
Round 1 :
With green, use a smaller hook (3.5mm or 3.25mm) for a neat cord. Ch 30-40 depending on spacing between motifs (approx 30 chains for tight spacing, 40 for more drape). Fasten off leaving long tails for sewing. These chains will be arranged in gentle curves between the stockings.
Round 2 :
Optional: Strengthen the vine by working 1 sc in each chain back across to make a flat cord. This will hold a slight curve and be easier to sew on. Fasten off and weave ends.
Info :
Arrange vines in a slight S-curve between motifs and tack with small slips of thread before sewing with yarn needle. If you want a twisted cord look, chain and then use foundation single crochet to work over the chain to make a rounded cord.
— Scalloped Border (Worked in rounds around the entire runner) :
Info :
Before beginning the scalloped edge, block and pin your runner to a flat surface so the edge is even. The scalloped border is worked all the way around the rectangular panel; you will work shells into the sides accordingly. Use red yarn for the scallop visible in the photo.
Round 1 :
With red, join with sl st in any edge stitch on the short side. Ch1, sc evenly around the edge working 1 sc per row end and 1 sc in each side stitch; place 3 sc in each corner to keep corners flat. Join with sl st to first sc. (Maintain approx stitch count equal to panel perimeter; for our 101-ch width with approx 51 rows of height, expect about 300-320 sc around depending on blocked dimensions.)
Round 2 :
Ch3, *skip 2 sc, (5 dc in next sc - a shell), skip 2 sc, sl st in next sc; rep from * around to create shells spaced by sl st. At corners, place shells such that corner stays flat (work shell+sl st+shell into corner groups as needed). Join with sl st to top of begin ch3.
Round 3 :
For deeper scallop, in each shell work: sl st to center of shell, ch1, 1 sc in center, ch3, 1 sc in center (creates a small lacy scallop). This gives the runner the rounded edging seen in the image. Fasten off and weave ends.
Info :
Adjust shell size to taste: 5 dc shells are medium; for a larger scallop use 7 dc. Keep shells evenly spaced — count across a short side to ensure equal shell number on both ends for symmetry. If necessary, add or remove 1 sc in Round 1 to make counts divisible by the shell repeat.
— Final Assembly & Placement :
Info :
Before sewing, lay out all pieces on the blocked base panel. Center each stocking at the marked placement lines. Place a snowflake on each stocking center. Arrange holly leaf pairs on either side of each stocking, with berries clustered at their intersection and a vine connecting to the next cluster. Use pins or safety pins to hold in place briefly.
Round 1 :
Sewing technique: using a tapestry needle and matching yarn, whip stitch the stocking edges to the base through the back loops only to give a neat seam. Use small, even stitches spaced 3-4 mm apart to secure the applique. Sew through shell stitches of the panel where the applique overlaps for a hidden seam.
Round 2 :
Attach snowflake: sew through the center of each snowflake into the stocking using several passes of white yarn to make it stable. Add a tiny dab of fabric glue in the center if desired to keep it from shifting while sewing.
Round 3 :
Sew holly leaves: position two leaves per cluster, overlap slightly at the base. With green yarn, sew the bases of the leaves to the panel and to each other with a few secure stitches. Add berries at the base after sewing leaves in place.
Round 4 :
Sew berries: cluster three berry bobbles together on the front and secure with red yarn in the center to hold them in a triangular cluster. Sew the cluster to the base panel where vines converge. Hide tails by weaving into the underside of the cluster and the panel.
Round 5 :
Sew vines: Attach vine ends under the seams of adjacent appliques (or behind the cuff) and tack into place at 2-3 points along the curve using hidden stitches. If vines are made as a flat cord, sew through the middle of the cord to the panel so stitching is invisible on the top.
Round 6 :
Secure all loose ends by weaving through several stitches on the back of the panel. If desired, lightly press with a steam iron from the back through a towel to settle stitches; avoid direct high heat on wool blends. Finalize by trimming any visible threads.
Info :
Assemble with patience — pin and tack each piece before committing to final sewing to ensure even spacing and symmetry. Check both sides of the runner as you work to ensure piping of vines and berries look balanced from all viewing angles.
This festive table runner brings a classic holiday look to any table. The combination of lacy cream panels, cheerful red stockings, crisp white snowflakes and bright holly leaves make it a beautiful focal point for seasonal decor. Each sewn applique adds personality, and the scalloped red edge gives a polished, vintage finish. 🧶🎄 Display it proudly or gift it to someone special — it will brighten a room for years to come. Happy stitching! ✨