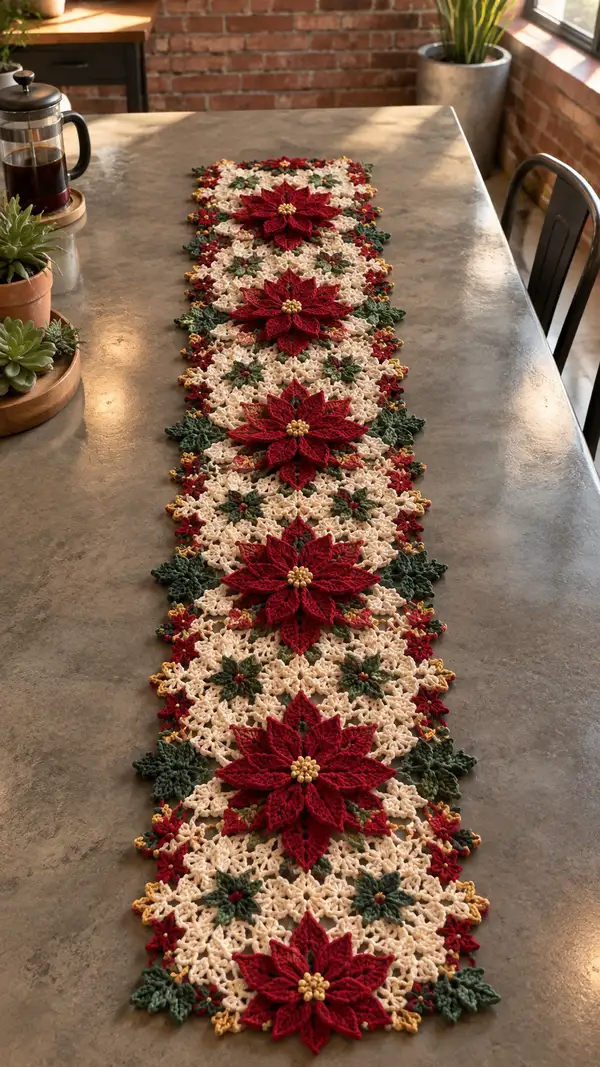
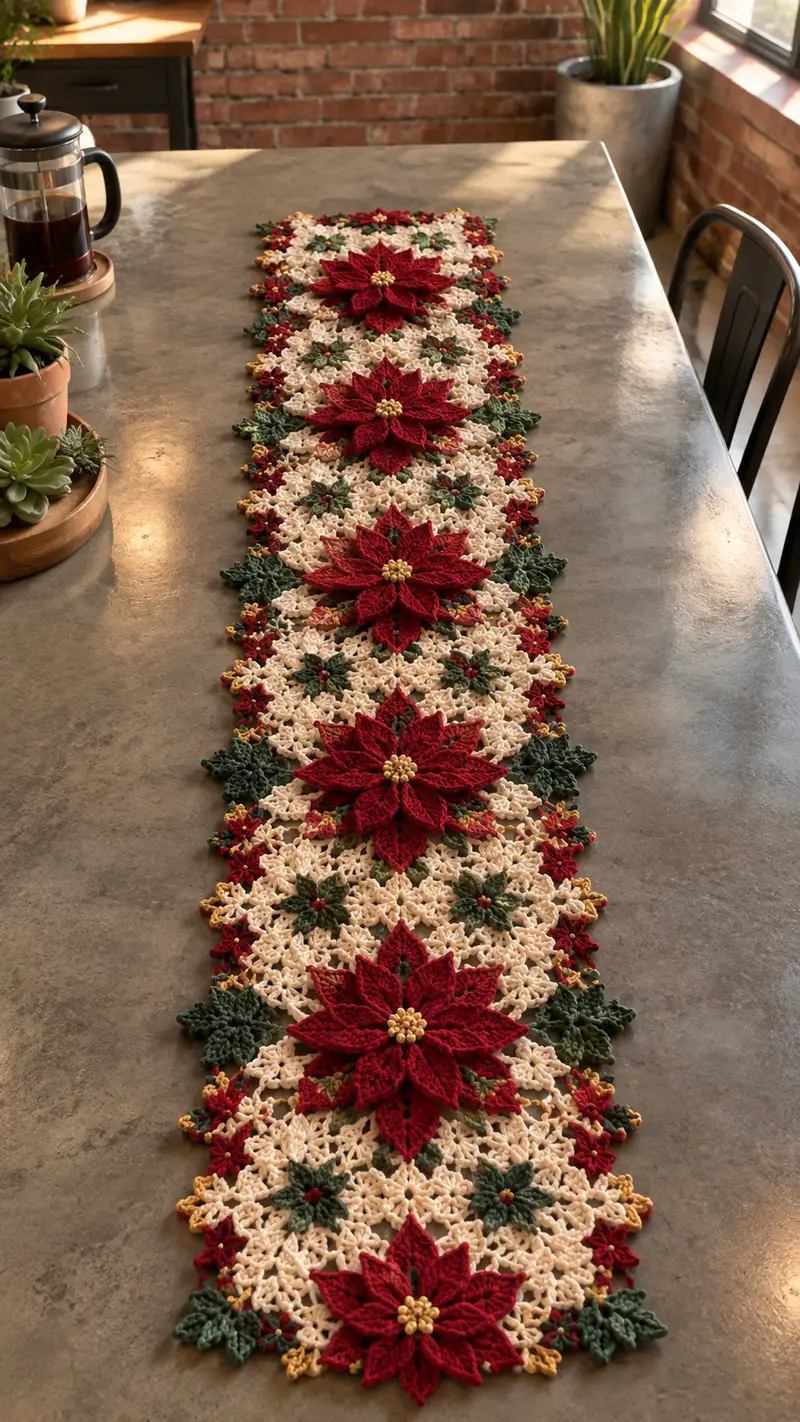
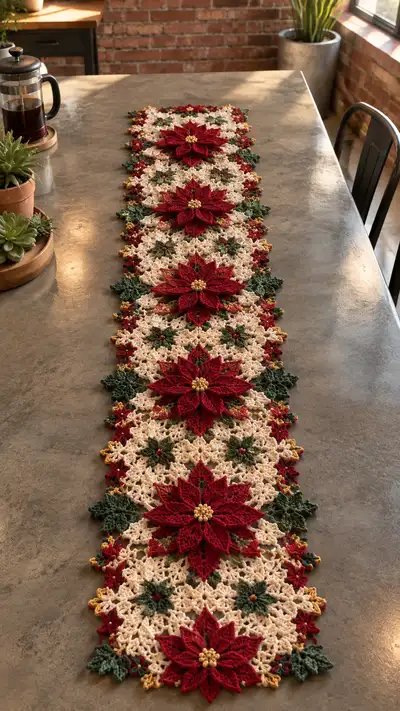
Create a festive, vintage-inspired table runner featuring layered 3D poinsettias worked in deep red, forest green leaves and golden accents on a delicate cream lace background. This pattern uses modular motifs joined into a long runner with richly textured petals and a scalloped edge. Perfect for holiday centerpieces or seasonal decor, the finished runner lays flat and shows bold poinsettias popping from an airy lace lattice.
Progress Tracker
0% Complete
— Materials & Gauge :
Info :
Use worsted weight yarn and the recommended hook. Gauge is not critical for a decorative runner but consistent tension is essential so motifs match. Make a sample cream motif and measure to match other motifs before committing to full runner.
— Overview :
Info :
The runner is built from repeating modular components: large layered poinsettia motifs, square/diamond lace motifs in cream, small star filler motifs (red and green), and small leaf motifs for edges. Motifs are blocked to size and joined with a combination of slip-stitch join and overcast whip stitch to create a flat runner. Center bead clusters are added to each poinsettia after assembly.
— Large Poinsettia Flower (Make 6 main flowers) :
Info :
Each large poinsettia is worked in rounds in red with a layered petal system: inner petal ring (smaller petals), outer petal ring (larger petals), and a small gold bead cluster center. This section totals 36 rounds across base, petal formation and finishing details.
Round 1 :
mr, ch1, 8 sc in ring (8)
Round 2 :
Inc in each st around (8 inc) (16)
Round 3 :
(1 sc, inc) x8 (24)
Round 4 :
(2 sc, inc) x8 (32)
Round 5 :
(3 sc, inc) x8 (40)
Info :
Rounds 1-5 create a firm base; keep tension slightly firm so the flower holds shape. Do not fasten off. This 40-st base will be used to create 8 petal anchor points (every 5 stitches = 8 anchors).
Round 6 :
*1 sc in next 5 sts, ch6, sl st in next st* x8. After last repeat, sl st to first sc to join. This creates 8 ch-6 loops for petals. (40 base sc, 8 ch-6 loops)
Info :
Count chain loops carefully; each loop becomes one petal. Keep loops laid flat while working the petals to ensure even petal direction.
Petal Round 1 (Round 7) :
*Enter ch-6 loop, sc, ch2, (2 dc, tr, 2 dc) in loop, ch2, sc in same loop, sl st into next base sc* x8. Each petal uses 1 sc + 1 ch2 + 5 stitches + ch2 + 1 sc = approx 9 stitches per petal. Total petal stitches across motif: 9 x 8 = 72 (plus joins).
Round 8 :
*Turn to work on front of petal: ch1, sc around the base of petal on the RS working evenly into petals (9 sc across petal), sl st to base sc* x8. Total counted sc across petals 9 x 8 = 72. This secures the petals upright.
Info :
Work Petal Round 1 and Round 8 for inner (smaller) petal layer. Keep petals slightly folded toward center as you secure the base — this gives a natural curved petal shape.
Petal Round 2 - Build Height (Round 9) :
*Ch3 (counts as dc), (2 dc, tr, 2 dc) in the top area of the petal, ch1, sl st at petal base* x8. Each petal receives 1 ch3 + 5 dc-ish = ~6 sts per petal -> total ~48 plus joins.
Round 10 :
*Work a row of sc around each petal tip working into spaces created (8 sc across each petal tip), sl st to next petal base* x8. Total sc = 8 x 8 = 64 sc.
Info :
After two petal rounds, the inner ring is complete. Stuffing is not required for petals; instead shape each petal with fingers and a small amount of steam-blocking if desired.
Round 11 (Start outer petal anchors) :
From the outer edge of the base, *ch3, sk next 4 sc, sl st into next sc* x8. This creates 8 ch-3 anchor loops between petals for outer petals. No change in base sc count; anchors formed along exterior.
Round 12 :
*Into each ch-3 anchor: ch2, (hdc, dc, tr, dc, hdc) in anchor, ch2, sl st to next petal base* x8. Each outer petal uses 5 tall stitches + chs -> roughly 7 stitches per petal -> total approximately 56 stitches across outer petal tips.
Round 13 :
*Turn and work a sc edging around the base of each outer petal (6 sc across each petal), sl st to next base* x8. Total sc 6 x 8 = 48 sc.
Info :
At this stage you have an inner ring of 8 smaller petals and an outer ring of 8 larger petals. Ensure petals are oriented radially and symmetrical. Block lightly if pieces are inconsistent before continuing layering details.
Round 14 (Outer petal shaping) :
*Ch4 (counts as tr), (2 tr, dtr, 2 tr) into petal tip, ch1, sl st to petal base* x8. Each outer petal receives ~7 tall stitches; total tall stitches ~56.
Round 15 :
*Work a picot or small sc cluster over the outer petal tip: ch3, sl st into tip to create slight point; then work 4 sc along the petal edge toward base* x8. This adds sculpted pointed tips to petals.
Info :
Use tighter tension on last rounds to sharpen petal tips. If preferred, work these rows with a 3.25mm hook for firmer petals and switch back to 3.5mm for the lace motif joins.
Round 16 (Optional shading row) :
With a slip stitch in front loops only (FLO), work 1 sc in FLO around each petal base to create a subtle ridge: 1 sc FLO around each petal base area (total depends on how many base sts remain — roughly 40 sc across base).
Round 17 (Stabilize petals) :
Ch1, sc in each sc around the whole motif where appropriate to create a stable, connected underside. This evens out the base for sewing later. Count approx 40 sc around base + petal anchors; final count ~80 sc when including petal anchors.
Round 18 :
Fasten off red leaving a 12-14" tail for sewing. Weave tail through base stitches and pull snug to flatten base slightly; do not close entirely — you will sew this base to lace motif later.
Info :
Make a total of 6 large poinsettia flowers for a long runner (spacing them with lace motifs between). Block each flower lightly from the RS to shape petals; poke petal tips with blocking pins to sharpen points if desired. Add a temporary cardboard disc under the base while blocking to keep the center open for bead placement.
Center Bead Cluster (Make 6) :
Using gold yarn and small seed beads or small gold yarn pom, sew bead cluster centers directly to each poinsettia after assembly. Alternatively, crochet a bead cluster as follows.
Round 1 :
Using gold yarn: mr, ch1, 6 sc in ring (6)
Round 3 :
Work a final round of (sc, dec) x4 as needed to create a tight domed cup holding 6-8 beads; total ~8-10 sc. Fasten off leaving a long tail for sewing through the flower center. Insert beads individually through yarn or sew pre-strung beads to this small golden cup using strong thread (approx 6-8 beads per center).
Info :
Sew bead cluster on top of the base center of the poinsettia after petals are arranged and sewn. Reinforce beads with several passes of the yarn needle and optional fabric glue for durability.
— Cream Lace Star Motif (Make many to assemble runner background) :
Info :
The cream lace motif is an airy star/diamond unit worked flat in rounds; these are the repeating background panels. Each motif is made to measure roughly 5.5" across after blocking. Make the number required to equal the length of your table runner (example image uses 6 main flowers spaced with 5 full lace panels between and small fillers at edges—plan approx 22-30 cream motifs depending on spacing). The instruction below is 30 rounds total for full detail.
Round 1 :
Using cream yarn: mr, ch3 (counts as dc), 11 dc in ring (12 dc total) (12)
Round 2 :
Ch3, dc in same st, 2 dc in each dc around (12 inc) (24)
Round 3 :
(1 dc, inc) x12 (36)
Round 4 :
(2 dc, inc) x12 (48)
Info :
Rounds 1-4 build a circular star base; we will create chain loops around the perimeter for lace points. Keep the piece flat by easing increases evenly.
Round 5 :
*1 dc in next 3 sts, ch5, sl st to next st* x12 — produces 12 ch-5 loops around (48 base dc remain).
Round 6 :
*Into each ch-5 loop: (sc, ch3, 3 dc, ch3, sc) in loop, sl st to next dc* x12. Each point becomes an open fan star point. Approx stitches per point: 1sc+ch3+3dc+ch3+1sc = 8 stitches per point -> total ~96 plus joins.
Round 7 :
Ch1, sc evenly around whole motif in the tops of the fans and base dcs to create a stable connector row. Approx 120 sc around; count and adjust evenly to keep shape.
Info :
From here we transform the fan points into a lace lattice by creating chain arches that will serve as join points for small filler motifs. Check the motif across the blocked sample to ensure all points align for later joining.
Round 8 :
*Ch6, skip 6 stitches (work into next sc), sl st* x12 around to create 12 ch-6 arches between star points. These arches will accept small star filler motifs later.
Round 9 :
*Into each ch-6 arch: sl st, ch3 (counts as dc), 2 dc, ch2, 3 dc, sl st into arch again* x12. This creates a delicate lacy arch of 6 tall stitches per arch.
Round 10 :
Sc around entire motif into the previous round's stitches to even edges. Aim for an even multiple for joining later (approx 144 sc around). Fasten off cream; weave in ends and block flat to exact dimension.
Info :
Make as many cream motifs as needed. Block each motif to the same measurements. While blocking, pin the ch-6 arches open so that filler motifs and poinsettias will sit neatly when attached.
Round 11 (Optional decorative round after blocking) :
After blocking, rejoin cream yarn at the midpoint of any side and work a very loose scallop round: *ch3, sl st into next arch, sk 2* around. This embellishment adds uniform edge loops used later to secure leaf motifs.
— Small Star Filler Motif (Make many in red and green) :
Info :
These small motifs nest into the ch-6 arches of the cream motif and act as small floral centers between large poinsettias. Make these in red for accents and green for leaf-like small stars. Each small star is worked in 12 rounds (compact).
Round 1 :
Using green or red yarn: mr, ch1, 6 sc in ring (6)
Round 3 :
*Ch4, sl st into next st* x6 to make 6 tiny loops around the center. This will create star points when worked into.
Round 4 :
*Into each ch-4 loop: (sc, ch2, 3 dc, ch2, sc) in loop* x6. Each small star point approx 7 sts -> total ~42 effective stitches across star points.
Round 5 :
Sc around base of star points to stabilize (approx 18-24 sc depending on spacing). Fasten off leaving tail for sewing.
Info :
Small stars will be sewn into the ch-6 arches of the cream motif later. For red stars, you can create a tiny gold bead in the center using a single gold sc loop and a seed bead sewn on top.
— Leaf Motif (Make many to edge runner) :
Info :
Leaf motifs in green reinforce the runner edge and fill gaps between large flowers. These can be worked in 10 rounds with shaping to create a pointed leaf. Leaves will be sewn along the runner edge, usually anchored at the cream motif corners.
Round 1 :
Using forest green: ch8, sl st into first ch to form a ring (8-ch loop).
Round 2 :
*Into loop: ch2 (counts as hdc), 9 hdc around loop, sl st* to form a small oval of 10 hdc. Fasten off and rejoin on one end to shape the leaf.
Round 3 :
Rejoin at leaf tip: ch1, sc evenly down one side of oval (approx 5 sc), sc 3 times across the rounded far edge, sc up other side (approx 5 sc) = total ~13 sc. Join with sl st and turn.
Round 4 :
To shape point: ch2, (hdc, dc, tr, dc, hdc) into central tip area, then 1 sc into each side down to base. This makes an elongated pointed leaf. Fasten off and block slightly with finger press to curve leaf slightly.
Info :
Make enough leaves to run along both long edges of runner (estimate 2 leaves per cream motif side plus extras at joins). Leaves are sewn between cream motifs and tucked under poinsettia petals at joins for a natural embedded look.
— Runner Assembly Concept :
Info :
Layout the motifs on a flat surface: alternate cream lace motifs with large poinsettia motifs. The visual rhythm in the picture shows large flowers centered on groups of cream motifs: two cream motifs form a diamond field between adjacent poinsettias. Pin motifs and small fillers in place before joining. Join with slip-stitch where possible to keep the lace flexible, then reinforce with whip stitch by hand for flatness.
Round 1 :
Place motifs RS up. Align ch-6 arches with small star motifs and insert slip stitch joins through both loops: Working along one join line, sl st through cream motif arch ch-loop and through small star edge, joining them approximately every 3-4 sl sts across the arch. This initial edge join reduces gaps.
Round 2 :
After slip-stitch joins, use matching cream yarn and tapestry needle to whip stitch motifs together along all join seams: at each seam, sew through 6-8 base stitches for a stable join. Secure each end with several passes and knot on the WS, then weave in ends.
Info :
When joining large poinsettias, sew the flower base to three adjacent cream motif stitches around the base circle. Use the long tail left earlier to make 10-12 evenly spaced small stitches around the base to secure it flat against the lace. Reinforce with a second pass through base stitches and cream motif's foundation row for strength.
Round 3 (Edge leaves & small star anchors) :
Sew leaf motifs along the runner edges using 2-3 small whip stitches at each anchor point (use leaf base to cream motif corner). Add a small red star filler at edge junctions and secure them with 4-6 whip stitches through the arch loops.
Info :
Be mindful of orientation: ensure leaf tips point outward from the runner edge and leaves are evenly spaced. Pin each leaf in place and check symmetry before sewing permanently. Add a small dab of fabric glue under leaves if they tend to lift after sewing (optional).
— Decorative Gold Accent Loops and Final Scalloped Edge :
Round 1 :
With gold yarn, rejoin at any border point. Ch3, sl st into next arch to create tiny picot-like gold accents along perimeter. Work *ch3, sl st in next small edge stitch* around perimeter of entire runner, placing gold loops at every 3-4 cream stitches to mimic the image's gold tips at motif points. This round is purely decorative and should be worked with a light hand so loops remain small and even.
Round 2 :
For a more substantial scallop: (ch5, sl st into next outermost stitch) repeat around, spacing to create an even scalloped border. Count scallops so they are symmetric at the runner ends; typical runner will have 24-30 scallops per long side depending on motif count.
Info :
Gold accent loops are delicate: use a smaller hook (3.25mm) to keep loops neat. Tension should be consistent so loops don't sag. After gold loop round, weave in tails and block final runner to crisp edges.
— Finishing Touches & Blocking :
Info :
Once all motifs are joined and decorative gold loops are in place, place the runner RS up on a blocking board. Pin each petal and motif corner to maintain balanced spacing and to flatten the lace. Mist lightly with water or use a steam iron on low through a pressing cloth to set shape. Allow to dry completely before removing pins.
Round 1 :
Sew bead clusters to the center of each poinsettia: position cluster slightly domed over the inner petal ring and stitch through the base of the flower, taking care not to pull petals together. Use multiple passes to secure beads well.
Round 2 :
Tidy ends: weave in all tails on the WS of the runner. Use small, even passes through motif junction stitches to hide ends; trim close after secure weave-backs. Give the runner a final blocking to even any stitches disturbed during sewing.
Info :
Optional: For added stability, you can thread a thin piece of ribbon along the underside join seam before final whip-stitch passes. This will help keep the runner flat and support heavier centerpieces.
— Notes on Scaling & Customizing :
Info :
To make the runner longer, add additional cream motifs between each large poinsettia or add an extra poinsettia and accompanying lace sets. To make the runner narrower, omit alternate motifs and balance edge leaves accordingly. Changing yarn weight will alter overall dimensions—switch to DK or Bulky yarn and adjust hook to maintain tension and appearance.
Round 1 :
Optional assembly: If you prefer a continuous crochet join rather than sewn seams, use the join-as-you-go method during the final lace round by slip-stitching new cream motifs to adjacent motifs at the ch-6 arches. When using JAYG, plan motif orientation carefully and work on a flat surface to preserve lace geometry.
Info :
Every motif change and layer included multiple 'Info' checkpoints in this pattern to guide shaping, placement, stuffing (where applicable), and sewing. Follow blocking, pinning and gentle shaping tips to achieve the crisp lace and three-dimensional petals seen in the picture.
Completing this poinsettia table runner is such a satisfying finish — the textured red petals against the airy cream lace really pop and bring instant holiday charm. Each motif adds a little piece of handmade luxury, and seeing them joined into a long runner feels rewarding and festive. Take your time with shaping and blocking — the care shows in the final drape and crisp edges. 🧶🌟 Your table will look gorgeous with this runner at its center — enjoy every stitch and happy holidays! 🎄