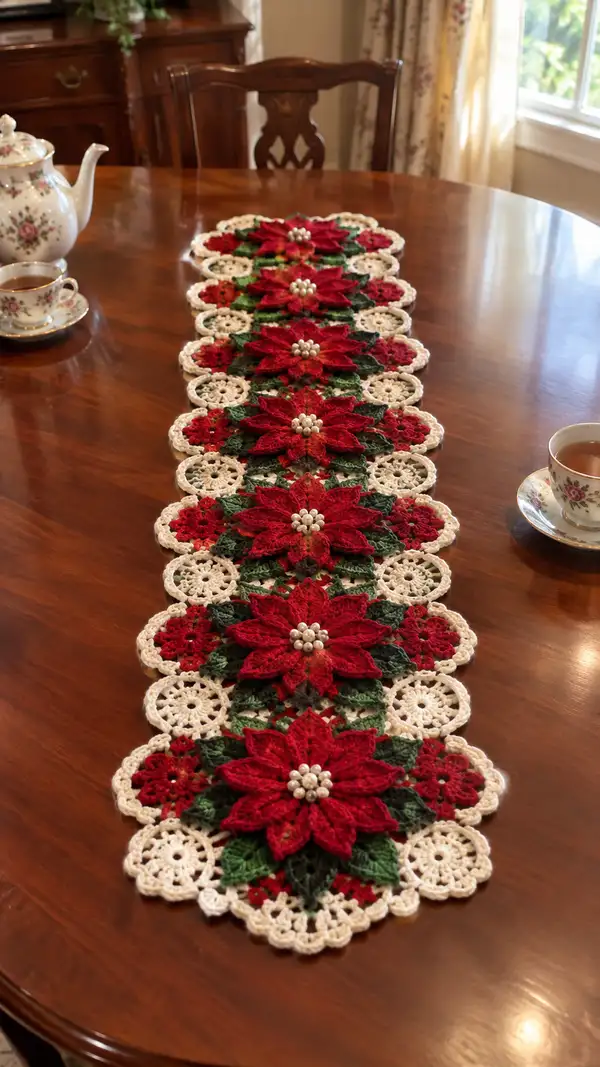
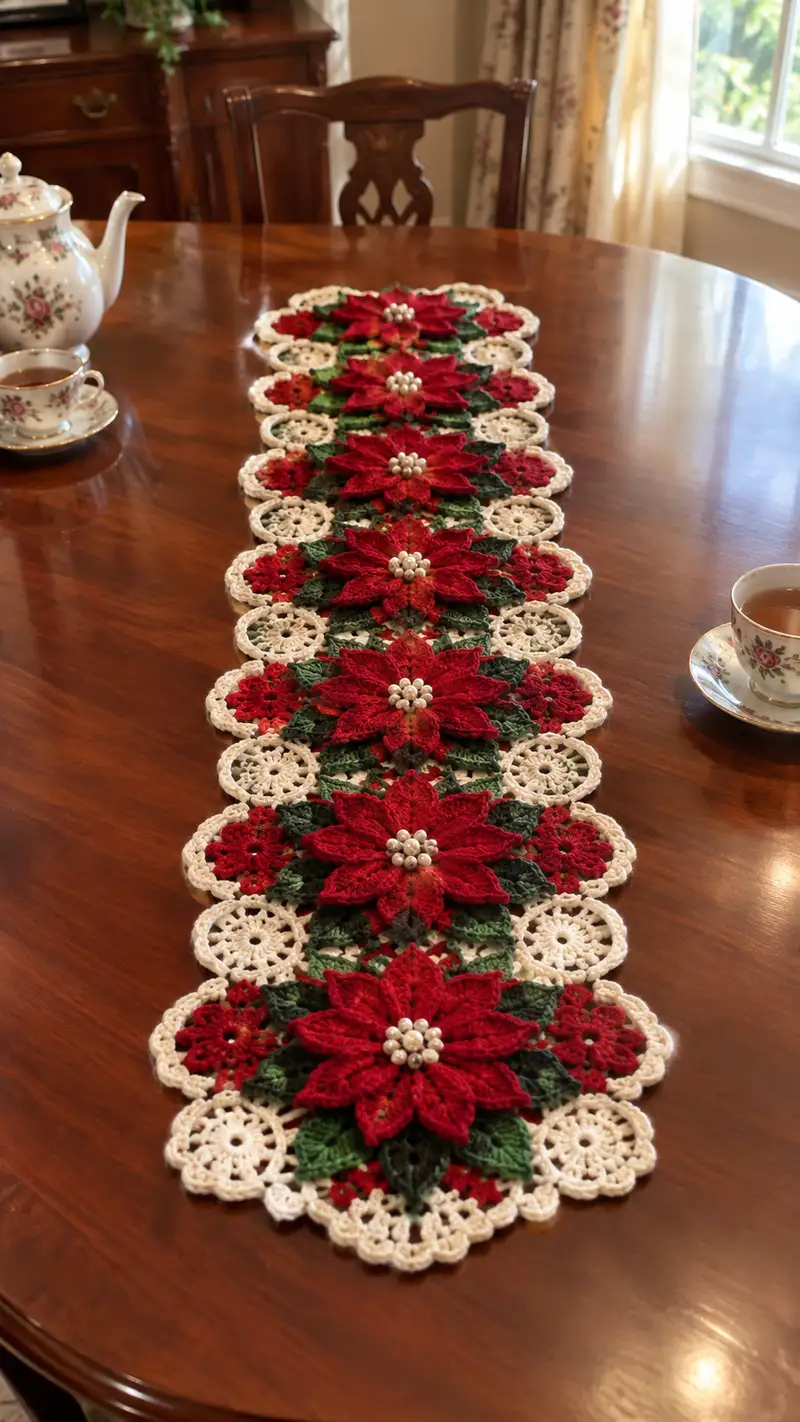
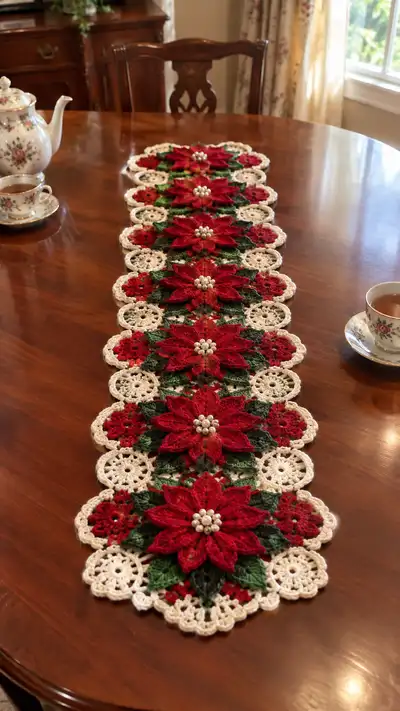
A festive, elegant table runner featuring layered red poinsettia motifs, dark green leaves and delicate cream lace medallions. Each motif is richly textured with layered petals and pearl centers, joined edge-to-edge to form a long runner. Perfect for holiday centerpieces or special occasion tables, this pattern creates a luxurious handmade accent using fine cotton thread and careful assembly.
Progress Tracker
0% Complete
— Overview :
Info :
This pattern is written for size 10 mercerized cotton thread and a 1.75mm hook. Each motif unit consists of a cream medallion base, a red layered poinsettia with two petal tiers and green leaves, and a small red filler flower. Motifs are joined edge-to-edge and finished with a scalloped cream border. The pattern below is broken into sections so you can make any number of repeats to suit your table length.
— Poinsettia Center Medallion (Cream base) :
Round 1 :
With cream thread work mr, ch1, 8 sc into mr, pull ring tight (8)
Round 2 :
Inc in each st around (16)
Round 3 :
(1 sc, inc) x8 (24)
Round 4 :
(2 sc, inc) x8 (32)
Round 5 :
(3 sc, inc) x8 (40)
Round 6 :
(4 sc, inc) x8 (48)
Info :
Keep tension even; this medallion forms the stable foundation that will anchor the petals. Block lightly if desired to flatten before attaching petals.
Round 7 :
1 sc in each st around (48)
Round 8 :
1 sc in each st around BLO (48) — this creates a slight ridge for petal attachment
Round 9 :
*Ch3, skip 2, sl st in next, ch3, skip 2, sl st in next* repeat to make 12 loops evenly spaced. (12 loop points)
Info :
These 12 loops will be used as anchor points for petals and small filler motifs. Use stitch markers to mark every loop for consistent petal spacing; this medallion supports both the main petals and secondary decorations.
— Main Petal Tier (Make 8 large petals per motif) :
Info :
Work petals in red from the center outward. Each petal is worked around a chain loop anchored to the marked loop on the medallion. Make 8 large petals evenly spaced around the center. Follow the petal rounds below; repeat for each petal.
Round 1 :
At marked loop ch1, join red with sl st, ch2 (counts as hdc), 1 hdc in same loop, ch1, 2 hdc in same loop (creates small fan) — 1 petal foundation made
Round 2 :
Turn work toward petal. Ch3 (counts as dc), 2 dc in next sp, ch1, 3 dc in same sp, sl st to base to join forming a rounded tip (7 dc with small ch spacing)
Round 3 :
Working in FLO of last round for texture: sl st to center of petal base, ch2, (hdc, dc, tr, dc, hdc) all in same stitch to build curve (7 stitches total with tr center)
Round 4 :
Ch1, in back of petal chain: (sc, hdc, dc, tr, dc, hdc, sc) around petal edge to create scalloped shaping (7 sts symmetrical)
Round 5 :
Ch2, (fpdc around previous round tr, dc in dc, hdc in hdc) working back toward base to add volume (7 sts) — do not fasten off
Round 6 :
Slip stitch back to medallion and fasten off, leaving a long tail for sewing if you prefer to sew petals down instead of crocheting directly onto the medallion. Each finished petal should measure approximately 3.25-3.75 inches long with thread and hook specified.
Info :
Work petals with consistent tension so all petals match in length and curvature. If petals curl too much, adjust by adding an extra dc or hdc on the outer edge, or block lightly with pins to shape the point.
— Secondary Petal Tier (Top Layer) (Make 8 smaller petals) :
Info :
These smaller petals sit between main petals, slightly elevated and offset to give the full layered look. Work them in a darker shade of red (or same red for a single hue) and attach between main petals onto alternate medallion loops.
Round 1 :
Join red (shade B) on an alternate loop, ch1, 6 sc into loop (6)
Round 2 :
(1 sc, inc) x3 (9)
Round 3 :
Ch2, (hdc, dc, tr, dc, hdc) across the outer edge to make a pointed petal (5 stitches across plus turning chains)
Round 4 :
Work a reverse picot or small loop at tip: ch3, sl st into first of chain to form a small tip point, then sl st back to base and fasten off (neat tip keeps top tier distinct)
Info :
Place the small petals so they peek from beneath the main petals. Attach either with sewing using the long tail or by slip stitching through medallion loops for extra security.
— Leaf Units (Make 8 leaves per motif) :
Info :
Leaves are worked in dark green and placed in pairs around the base of each main petal to create the lush look. Work two sizes: larger outer leaves and smaller inner leaves for depth. All leaves are worked from the medallion outward.
Leaf Round 1 :
Join green at a chosen medallion sp between petal anchors, ch1, 8 sc into sp (8)
Leaf Round 2 :
(1 sc, inc) x4 (12)
Leaf Round 3 :
Ch2, (hdc, dc, tr, dc, hdc) working in next sts to form the leaf spine; ch1, sl st back to base (5 textured stitches)
Leaf Round 4 :
Work fpdc along the edge of the leaf spine (fpdc, dc, hdc, sc, sc) to create a raised rib; fasten off leaving a tail for sewing
Info :
Use two shades of green or a variegated green to mimic the tonal changes visible in the photo. Stagger leaves so that larger leaves are set slightly outward and smaller ones tuck near the center.
— Small Red Filler Flower (Make 4 per motif) :
Round 1 :
With red join at small medallion loop, mr, ch1, 6 sc into ring (6)
Round 2 :
Inc in each st (12)
Round 3 :
(1 sc, inc) x6 (18)
Round 4 :
*Ch3, sl st in next st* repeat to create small petals (6 loops), fasten off
Info :
These small flowers sit near the cream medallion edges and fill gaps between poinsettias when motifs are joined. Use a slightly tighter tension to keep them small and neat.
— Poinsettia Bead Center :
Info :
Use 6-8 faux-pearl beads per flower. Thread beads on a short length of sewing thread or thin yarn. Position beads in the central hole of the cream medallion and secure with several passes through the medallion center; tie knots on the back and dab with a tiny drop of fabric glue to secure if desired.
Round 1 :
Bring long tail from medallion center to front, thread 6-8 beads, arrange beads in a tight cluster and anchor by sewing through the center several times; hide knots on the reverse side of medallion
Info :
Position beads slightly raised so petals curve up around them. If using larger beads, reduce bead count to maintain proportion.
— Cream Outer Medallion Extension (Completes motif edge) :
Round 1 :
With cream attached at medallion outer rounds, ch1, 1 sc in each st around (48)
Round 2 :
(3 sc, ch3, skip 2) x12 to create decorative eyelet loops positioned around the circle
Round 3 :
Work around loops: In each ch3 loop work (sc, hdc, 3 dc, hdc, sc) to create small scallops (6 sts per scallop) — results in 12 scallops
Round 4 :
1 sc in each st and scallop st, smoothing transitions so that scallops sit flat; fasten off leaving long tail for joining
Info :
This outer cream round frames the red and green cluster and creates the decorative points that visually separate connected motifs when the runner is joined.
— Joining Motifs Into a Runner :
Info :
You can arrange motifs in a straight strip mirrored so the scalloped cream edges align. The pictured runner shows motifs joined by overlapping the cream scallops and slip stitching through matching points. Join motifs as you make them, or block all motifs first and join later using whip stitch for invisible seams.
Round 1 :
Place two motifs right sides together, align scallop points. Insert hook through both motifs at one scallop edge, sl st through both loops to join. Continue sl st along matching scallop sts until motifs are joined along 4-6 points.
Round 2 :
For stronger join, use yarn needle and matching cream tail to whip stitch through both motif edges using small, nearly invisible stitches. Reinforce high-stress joining points with an extra pass.
Round 3 :
When joining a long strip, keep motifs flat and check alignment frequently. Pin motifs together before stitching to maintain straight runner edges.
Info :
To make the runner longer, simply make more motif repeats. For the pictured runner length, assemble 6 motif repeats joined end-to-end with slight overlap of cream scallops.
— Edge Border and Final Scallop (Cream) :
Round 1 :
Once all motifs are joined, edgings are worked around the entire outer edge in cream. Join cream at a convenient point, ch1, sc evenly around inner and outer edges of runner including seams (work approx 1 sc per visible stitch) — maintain even tension.
Round 2 :
(*Ch4, skip 2*, sc in next) repeat to form uniform looped spaces around the outer perimeter. Adjust count so loops sit evenly around scallops and between petal tips.
Round 3 :
In each ch4 loop work (sc, hdc, 5 dc, hdc, sc) to create prominent scallops; where loops align with scalloped medallion edges, work a slightly larger scallop (7 dc) for balanced look.
Round 4 :
1 sc in each st around the inside edge and join with sl st to starting sc. Fasten off and weave in ends neatly to the back.
Info :
Work border with a slightly looser tension than motif bodies so scallops lay flat without puckering; block entire runner after finishing to even out scallops and flatten seams.
— Optional Reinforcement Rows for Stability (If Runner Will Be Handled Frequently) :
Round 1 :
With cream, work one additional round of sc on the wrong side along motif joins to strengthen seams. Insert needle beneath joining stitches and work evenly spaced sc to knit joins together.
Round 2 :
Work a final decorative slip-stitch round on the right side: join cream at a scallop point and sl st into each outermost sc of each scallop to create a neat, slightly raised outline.
Info :
These reinforcement rounds are optional but recommended for table runners that will be moved or stored often; they prevent separation at join points and keep the runner flat.
— Blocking and Finishing :
Info :
Wet block each motif: pin into shape on a foam board or towel, stretching petals gently so they arch slightly upward around bead center, then allow to dry. After all pieces are assembled and border completed, re-block the entire runner to ensure a uniform, flat finish and even scallops.
Round 1 :
Weave in all tails: use yarn needle to bury ends through several motifs to prevent pulling free. Trim ends close but avoid cutting too near knots.
Round 2 :
Sew bead clusters securely and test each bead knot. Dab minute glue if required and allow to dry fully before handling.
Info :
Lay the runner on a table and check for any loose petals; if petals lift unevenly, re-pin and steam-block lightly from the wrong side using a low setting from a distance to avoid flattening beads.
— Sizing & Repeats :
Info :
Each completed motif is approximately 8.5-9 inches in diameter (measured across outer scallops) with the materials specified. The pictured runner uses six motifs for an overall length of approximately 54-56 inches. Add or subtract motifs to reach your desired length.
Round 1 :
To scale motifs up, use a slightly thicker thread and increase hook size by 0.25-0.5mm, maintaining stitch patterns to proportionally enlarge petals and medallion rounds.
Info :
Color variations: use deep burgundy or wine red for the outer petals and a brighter scarlet for the inner tier for richer tonal variation. Variegated green thread for leaves will mimic the subtle shading visible in the photo.
Completing this Red Poinsettia Cream Lace Table Runner is wonderfully rewarding—each motif joins to form a striking, festive centerpiece. The layered petals and pearl centers give the runner a luxurious handcrafted look that brightens holiday tables. Enjoy the calming rhythm of repeating motifs and the satisfying transformation at assembly. 🧶✨ Display with care and it will become a seasonal heirloom to treasure. 🎁