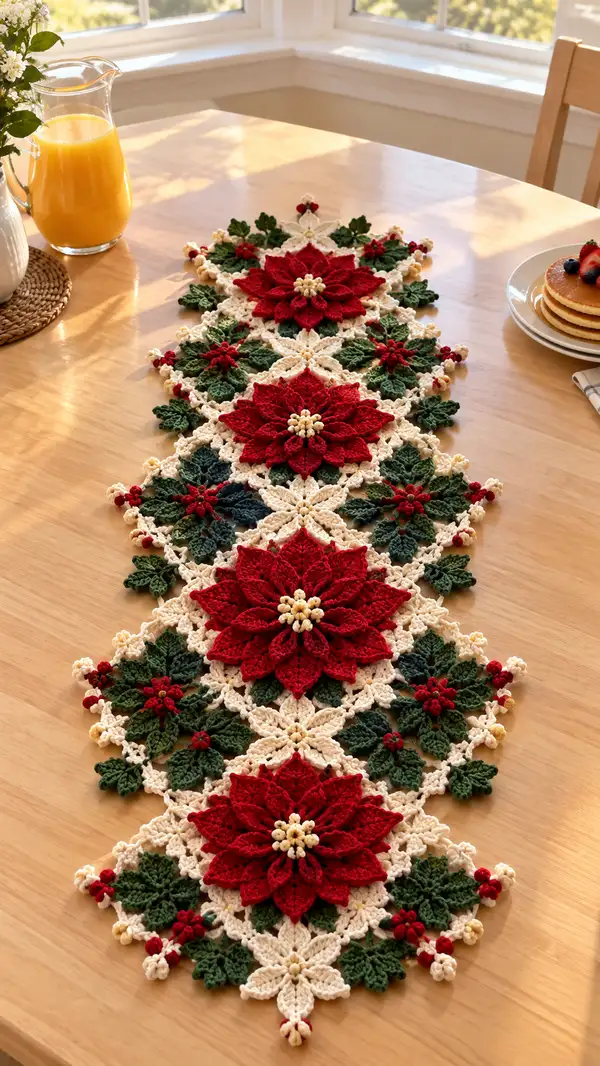
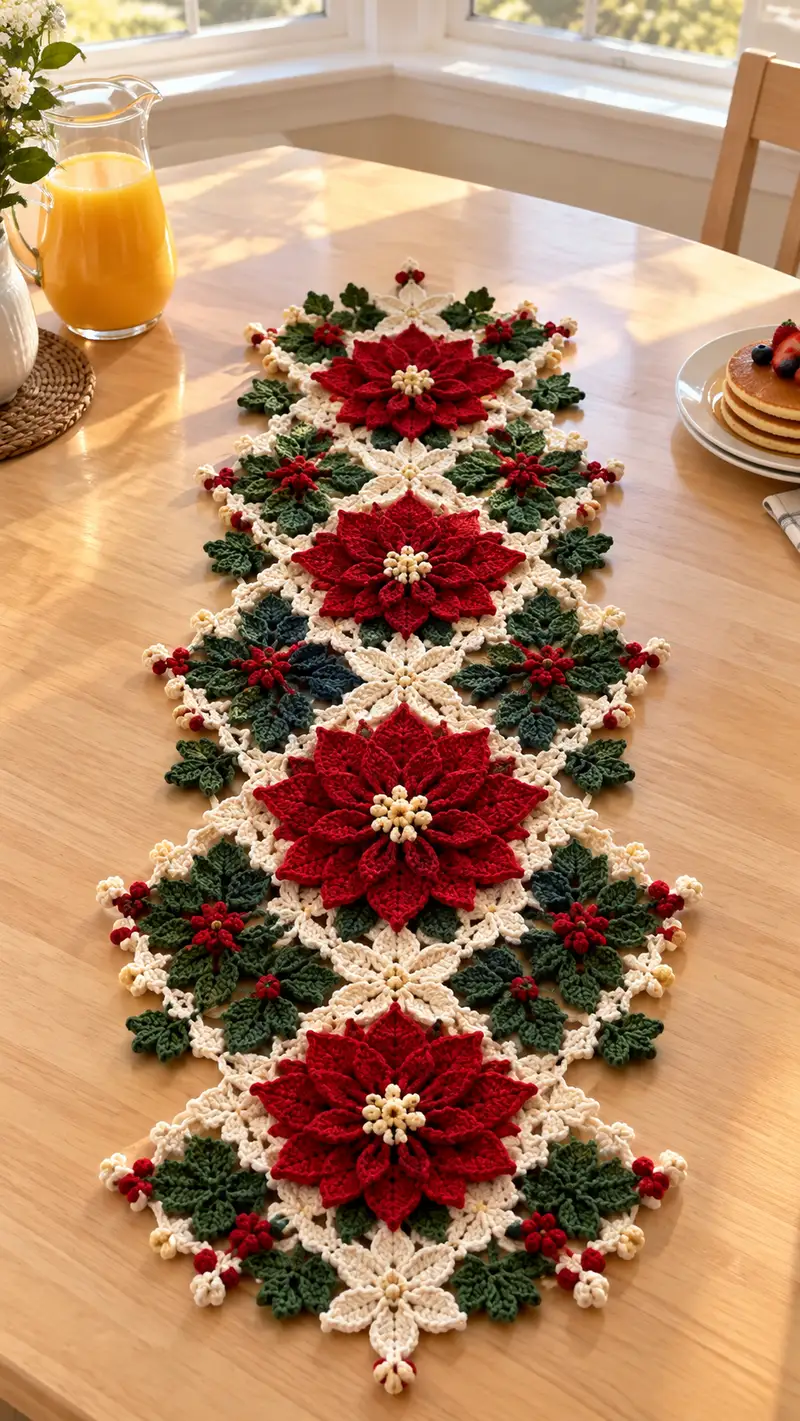
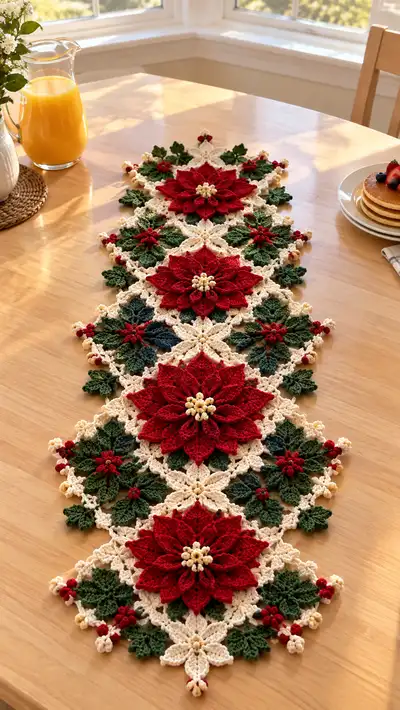
A festive, lacy table runner featuring three large 3D red poinsettias set on a delicate cream lace lattice with deep green leaves and tiny red and cream berry clusters. This elegant runner is made from modular motifs joined as you go for a seamless, textured finish. Perfect for holiday centerpieces, the layered petals and raised leaves create beautiful shadow and depth on any table.
Progress Tracker
0% Complete
— Notes & Techniques :
Info :
This design is modular: you will make three large poinsettia motif units, six diamond connector motifs, numerous leaf modules and small berry clusters. Motifs are joined-as-you-go where possible to create a flat, seamless runner. Work with a slightly smaller hook than the yarn label suggests for crisp, lace-like definition. Use cotton or mercerized cotton for the clean stitch lines shown. Block motifs lightly before final joining.
Info :
Abbreviations and popcorn stitch: a popcorn (pop) used here is 5 dc in same st, remove hook, reinsert into first dc, pull loop through to form a 5-dc cluster. Alternatively use bobble as (dc7tog) variant if your tension prefers more compact centres. When I instruct 'make X petals' you will repeat the petal sequence that many times, anchoring each to the designated base stitch.
— Large Poinsettia Base (Make 3 large motifs) :
Round 1 :
With red yarn, mr, ch1, 6 sc in ring (6)
Round 3 :
(1 sc, inc) x 6 (18)
Round 4 :
(2 sc, inc) x 6 (24)
Round 5 :
(3 sc, inc) x 6 (30)
Round 6 :
(4 sc, inc) x 6 (36)
Round 7 :
(5 sc, inc) x 6 (42)
Round 8 :
(6 sc, inc) x 6 (48)
Round 9 :
(7 sc, inc) x 6 (54)
Round 10 :
(8 sc, inc) x 6 (60)
Round 11 :
(9 sc, inc) x 6 (66)
Round 12 :
(10 sc, inc) x 6 (72)
Info :
Round 12 gives 72 stitches — this is the petal anchor round. Each petal will use a 6-stitch anchor (72/12 = 6), so we will make 12 petals. Place a stitch marker at the start of round 13 to keep track of petals and join points.
Round 13 :
Ch1, 1 sc in each st around (72). Join with sl st to first sc if you prefer a joined round; otherwise work continuous rounds. (72)
Round 14 :
1 sc in each st (72)
Info :
Begin petal construction on the next round. We will work petals one at a time into groups of 6 base stitches. Petals use textures: FLO and BLO, dc and tr to create shape. Keep tension slightly loose while shaping petals so they lie flat when layered.
Petal sequence (Work 12 petals; each petal anchors to 6 consecutive stitches) - Petal rounds are written as a sequence to be repeated 12 times :
Place marker at base stitch 1 of the 6-stitch anchor before you begin each petal to keep count.
Petal Round 1 :
Attach red at anchor st A (first of the 6), ch2 (counts as first hdc), hdc in next 2 sts, dc in next 2 sts, ch1, sl st into base to start shaping (this creates a short arc; do not fasten off)
Petal Round 2 :
Ch3, 2 tr in same stitch as sl st (if using US terms tr=triple), tr in next st, 2 dc in next st, dc2tog over two base stitches to taper, sl st to base. Fasten off or carry for overlay petal.
Petal Round 3 :
Re-attach at next petal anchor; repeat Petal Round 1 and Round 2 for next petal. Repeat this 12 times total to create a first layer of 12 short petals.
Info :
After completing the first (lower) layer of 12 petals, stagger the next layer of longer petals to sit between the short petals. Mark the midpoint between petals along round 13 for attachment of the second layer. You may chain 1 between attachment points to space petals evenly.
Second petal layer (make 12 longer petals) - Sequence to repeat :
Attach yarn between the short petals. This layer will be built taller with more tr/dtr stitches for height.
Layer 2 - Petal Round 1 :
Attach red to designated mid base st, ch3 (counts as dc), 2 dc in same st, 3 tr in next 2 sts working tall stitches to form height, dc in next st, hdc in next st, sl st to base. (Creates a tall petal foundation)
Layer 2 - Petal Round 2 :
Ch3, (2 tr, ch1, 2 tr) into the top of the petal foundation to add a shell, sl st back to base to anchor. Fasten off and weave tail behind petal. Repeat 12 times.
Info :
When making tall petals use consistent tension to avoid curling. If the petal tips curl, block them lightly with steam or pin them flat while damp. Trim tails closely and weave them into the base to hide them behind layers.
Third petal overlay (optional decorative layer) :
For the decorative third layer repeat a smaller petal sequence between the existing two layers to increase fullness — ch2, hdc, dc cluster, picot tip (ch3, sl st into third ch) for a decorative point. Repeat 12 times.
Info :
If you want the three-dimensional look identical to the image, make the first layer modest, the second taller and full, and add tiny picot-edged petals on top between larger petals. Block and shape each layer as you finish the motif.
Center stamen cluster :
With cream yarn, in a small mr, make 8-10 sc, ch1, then make 8-10 popcorns or bobble clusters by making (5 dc pop) in each of 8-10 sts of the ring, pulling each pop tightly. Fasten off leaving a long tail. Sew the cluster onto the center of the red petals, adjusting placement so that the cluster slightly raises the inner petals.
Info :
Alternatively, use small 3-4mm beads and sew them into a tight circular cluster for a slightly shinier stamen. If using beads, sew a bead at the tip of each small cream bobble for an heirloom look.
— Small Poinsettia Accent (Make 6) :
Round 1 :
With bright red, mr, ch1, 6 sc in ring (6)
Round 3 :
(1 sc, inc) x 6 (18)
Round 4 :
1 sc in each st (18)
Round 5 :
Petal anchor: (2 sc, ch3, skip 1) around to create 6 chain arches for petals. (6 arches)
Round 6 - Petal :
Into each chain arch: (sc, hdc, dc, hdc, sc) to form 6 small petals. Fasten off and weave ends.
Round 7 :
Center: with cream, mr, 6 sc, pull tight, sew to center or make 6 tiny popcorns and attach as small stamen cluster. (6)
Info :
These smaller accents are worked flat and sewn into connector diamond points in the lattice for a charming cluster effect. Make 6-8 per large motif according to the layout shown in the photo.
— Leaf Module (Make 36-40 leaves; two sizes) :
Large Leaf - Round 1 :
With dark green, ch10, starting in 2nd ch from hook work: sc, hdc, 3 dc, hdc, sc, sl st in next chain to form center spine. Turn and work along opposite side of foundation chain: sc, hdc, 3 dc, hdc, sc. Join at base. (Approx 16-18 sts across foundation)
Large Leaf - Round 2 :
Working around leaf edge: BLO: sc around edge to round corners; in the center top of leaf make (3 dc, ch2, 3 dc) to form a small fan point. Fasten off leaving tail for sewing. Make 18-20 large leaves.
Info :
For a sharper, textured look use BLO on the second round to make the leaf ridge more pronounced. Slightly block leaves to maintain shape. Stagger two shades of green for realism: use forest green for the main leaf body and top-stitch veins with a slightly lighter green using a single strand of yarn and surface slip stitch.
Small Leaf - Round 1 :
With forest/olive green, ch7, sc in 2nd ch from hook, hdc, 2 dc, hdc, sc, sl st back to base. Fasten off. Make 18-20 small leaves for filler around motifs.
Info :
The image shows layered leaves grouped around connectors and flowers. When assembling, tuck small leaves under the petal edges and larger leaves slightly offset; this creates depth and hides join stitches.
— Berry Cluster (Make 18-24) :
Round 1 :
With bright red, mr, ch1, 6 sc in ring (6). Do not fasten off.
Round 2 :
Work 6 small popcorns evenly spaced: (make pop: 5 dc in same st, pull through) then sl st to next st and repeat 6 times; fasten off leaving long tail for sewing. Alternatively, make 3-4 tiny sc balls using 6 sc in mr and close tightly and sew groups of 3 together for cluster.
Info :
Sew clusters of 3-4 small berries together then attach them to join points in the cream lattice. Use a few cream/yellow tiny bobbles as accent berries to match the photo where small cream berries are placed at diamond tips.
— Cream Lace Connector Diamond Motif (Make 6 connectors between the 3 large poinsettias) :
Round 1 :
With cream yarn, mr, ch2, 8 dc in ring (8). Join with sl st or continue in rounds. (8)
Round 2 :
Ch3, dc in same st, (2 dc in next) x 7 (16). (16)
Round 3 :
(1 dc, ch1, skip 1) x around to create 8 chain loops. (Create 8 loops)
Round 4 :
Into each chain loop: (sl st, ch3, 3 dc, ch3, sl st) to create lacy petals. This makes a floral diamond point at each corner; continue around. Fasten off. (8 decorative loops)
Round 5 :
Re-join cream at one edge and work mesh: ch5, sl st into corresponding opposite loop to create a diamond side, repeat to produce a rhombus-shaped connector net with four corner petals. (This creates the diamond lattice sections between large poinsettias)
Round 6 :
Edge the diamond with sc evenly: sc around all free edges and in corners make (3 sc, ch2, 3 sc) to form a firm corner. Fasten off. The diamond should measure approximately the width necessary to place large poinsettia centers at alternating points.
Info :
Make 6-8 of these diamond connectors and layout them alternating with large poinsettia motifs to match the photo. The lattice uses consistent chain arches and small picots to create delicate points where small berries will be sewn.
— Joining & Join-As-You-Go Technique :
Info :
Pin motifs on a blocking board in the desired final layout. Join-as-you-go (JAYG) is used to attach petals and diamonds without visible seams: when you reach a joining round on the diamond connector, instead of sl st into your own loop, sl st through the loop or st of the already-blocked adjacent motif. Work slowly so tension matches both pieces.
Join Round 1 :
Lay first large poinsettia flat. Align one diamond connector beside it. With cream, attach at diamond corner and sl st into the prepared edge st of the flower base; ch3, sl st into flower base again, continue lace pattern connecting every 3rd chain arch to flower base to create stable join. Repeat around each side to connect diamonds and flowers.
Join Round 2 :
Where leaf clusters meet the diamond tips, use a small whip stitch to secure leaves under petals with matching green yarn; this hides attachment stitches. Sew berry clusters onto diamond tips and into leaf clusters with short tails, tying knots at the back and weaving ends inside motifs.
Info :
During JAYG allow about 3-4 mm of give in joins so motifs sit flat; do not pull too tight or motifs will pucker. Use blocking pins to keep edges aligned as you join. If a seam becomes visible, cover with a small leaf or berry cluster to hide it beautifully.
— Edge Finishing & Lace Border :
Round 1 :
With cream, join at one long edge and sc evenly around entire runner edges created by points and petals. For each nap of petal edges make 3 hdc in outer stitches to create a small scallop. Work even looped picots at diamond tips: (ch3, sl st in 3rd ch).
Round 2 :
Work decorative scallop: *ch2, skip 1, (5 dc in next st), ch2, sl st in base* repeat along major points to form a pretty scalloped border that echoes the petal shapes. Fasten off and weave in ends.
Info :
Check symmetry: if one side has more petals/points show, add tiny cream bobbles at inner diamond tips to visually balance both sides. Blocking after finishing the border will give the runner a professional, flat look.
— Blocking & Final Shaping :
Info :
Lay runner flat on blocking board and pin each scallop, petal tip, and diamond corner to shape. Mist lightly with water or use a steam iron at a safe distance for cotton yarn. Allow to dry fully (24 hours) before removing pins. This step helps the petals remain slightly lifted and keeps the lace crisp.
Info :
After blocking, check all joins and add a few finishing stitches to secure any loose join points. If using beads for stamen centers, apply a tiny dab of fabric glue on knots for extra security, then weave ends and hide the thread between motif layers.
— Layout & Placement Suggestions :
Info :
The pictured runner shows 3 full large poinsettias spaced evenly along a central axis with diamond connectors placed between them and partial motifs at the ends to form points. Before permanent joining, arrange components on a flat surface and photograph layout so you can replicate placement if taking breaks.
Info :
For a table runner approximately 12-14" wide and 40-48" long (size will vary with yarn and tension), create 3-4 large poinsettias and join with 2-3 diamonds between. Add leaf clusters to each diamond tip and small flower accents between leaves as shown in photo.
— Stitch Count Summary & Tips :
Info :
Large poinsettia base: rounds 1-12 produce 72 sts for petal anchors. Each of the 12 petals uses 6 anchor stitches. Second petal layer anchors between first layer petals and is made in 12 repeats. Small poinsettia base: finished in 7 rounds with 6 small petals. Leaf modules are made from chains with symmetrical sides. Make extras of leaves and berry clusters — it's easier to add more than try to reconstruct later.
Info :
Keep a small notebook with counts for each motif once you make the first; repeating the same counts ensures consistency across the runner. When in doubt, compare motifs side-by-side and adjust petal height or tightness to match previously made pieces.
Finishing this runner is so satisfying — every layered petal and tiny berry cluster brings the holiday table to life. The working process mixes meditative lacework with a rewarding assembly stage that reveals a true heirloom piece. Block it, style it, and enjoy how the light plays across the raised petals. 🧶🌟 Your handmade runner will be the centerpiece of many festive meals. Happy stitching and don’t forget to share your finished creation! 🎄