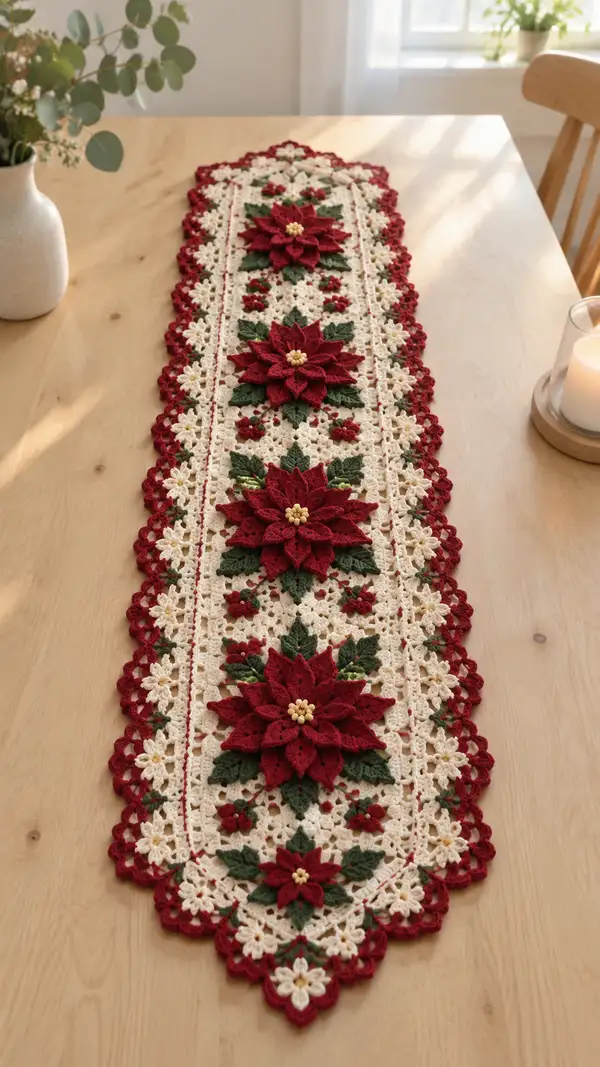
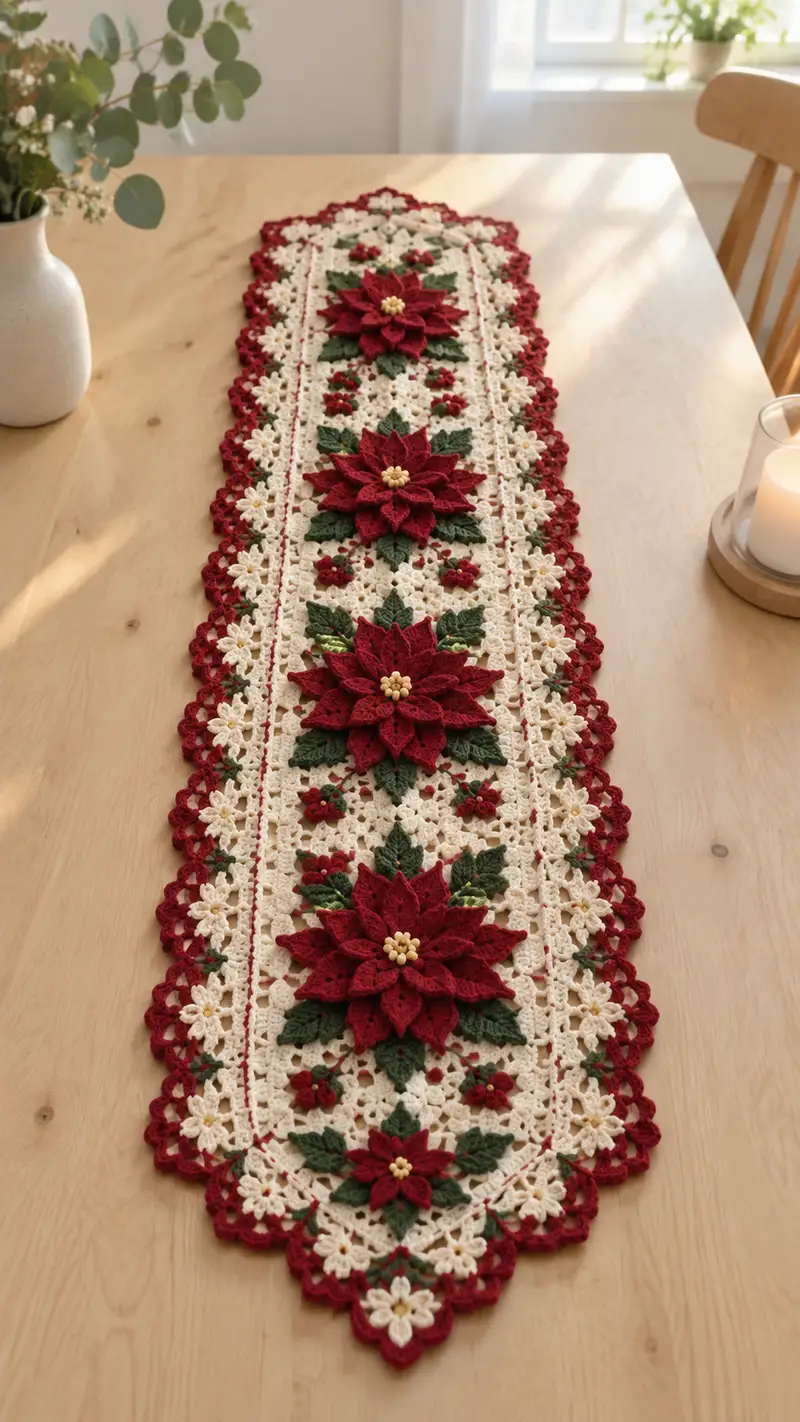
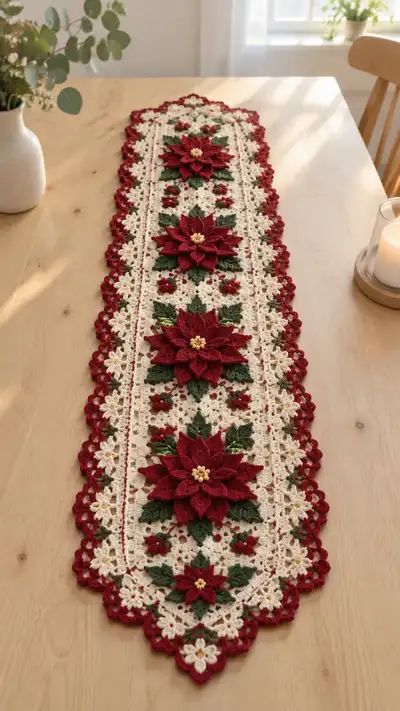
Create a stunning holiday table runner featuring layered 3D poinsettias in deep red set on a delicate cream lace lattice, accented with evergreen leaves and tiny berry clusters. This pattern includes step-by-step instructions to crochet motifs, assemble the runner, and add the scalloped border seen in the photo. Perfect as a centerpiece for holiday tables or seasonal decor, the finished runner has an elegant vintage-inspired look with modern construction.
Progress Tracker
0% Complete
— Overview and Construction Method :
Info :
This runner is constructed from repeating lacy floral motifs (cream) joined together to make a long central band. Large layered poinsettia appliques (deep red) are made separately and sewn to selected motif positions. Leaves (green) and small berry clusters (red with golden centers) are made and sewn around poinsettias. Finally, a scalloped red border is worked around the full assembled runner for a finished edge.
Info :
Work motifs flat in rounds; block each motif flat before assembly for best results. Use 3.5mm hook unless tighter petals are desired, then use 3.0mm for petals and leaves to make them crisp.
— Lacy Square Motif (make 18 - repeat to desired runner length) :
Round 1 :
Ch4, sl st to form ring, ch3 (counts as dc), 11 dc in ring (12 dc total), join with sl st to top of ch3 (12)
Round 2 :
Ch3, dc in same st, ch2, *2 dc in next dc, ch2; rep from * around, join with sl st to top of ch3 (12 clusters, 12 ch2 corners)
Round 3 :
Sl st to next ch2 sp, ch3, 2 dc, ch2, 3 dc in same ch2 sp (corner made), ch1, *(3 dc, ch2, 3 dc) in next ch2 sp, ch1; rep around, join (12 corners, 12 ch1 sps)
Round 4 :
Sl st to corner ch1 sp, ch3, dc in same sp, ch1 *(dc, ch1) in each ch1 sp across side (3 dc groups separated by ch1), (3 dc, ch2, 3 dc) in next corner; rep around, join. This creates square lacy grid (counts will vary by cluster but keep same geometry)
Round 5 :
Ch1, sc evenly around working into dc clusters and chain spaces: 6 sc along each side section and 7 sc in corner spaces; place marker at first sc to denote start (approx 48 sc total)
Info :
At this point motifs measure approximately 12cm square depending on tension. Block to square. Make required number of motifs and set them blocked and dry before assembly.
Round 6 :
With cream, ch5 (counts as tr+ch2), *tr in next cluster top, ch2; rep around until you reach corner, at corner work (tr, ch2, tr) in corner; join with sl st to 3rd ch of starting ch5. This creates taller loops for lace joining (counts depend on motif)
Info :
Make 18 motifs for a runner similar to the photo spacing; place motifs in 3 columns of 6 motifs or a single long row depending on your assembled layout. Photo shows a long single central band; for that layout, make 6 central motifs and 12 filler motifs—adjust counts as needed for length.
— Small Cream Flower Motif (filler, make many) :
Round 1 :
Ch5, sl st to first ch to form ring, ch3, 11 dc in ring, join (12 dc)
Round 2 :
*Ch3, sl st into base of previous dc to make petal; rep 12× to form 12 small petals, finish off leaving tail for sewing
Info :
These small flowers are used between larger motifs and around the border. Make approximately 24-30 to decorate runner body and edges.
— Poinsettia Center Disk (make per flower, golden center) :
Round 1 :
With golden yarn, ch4, sl st to form ring, ch1, 8 sc in ring, join (8)
Round 2 :
*(Ch2, hdc) in next sc, sl st in next sc; rep 8× to form 8 tiny raised loops (16 stitch points total), finish off leaving long tail for sewing (8 loops)
Info :
Add a touch of fiberfill (very small) inside the golden ring for slight puffiness before sewing to flower center. If using beads, sew 4–6 small round beads into center instead of yarn loops.
— Poinsettia Petal Module (Make petal set for one flower: 12 large petals, 12 medium, 12 small) :
Round 1 :
With red and 3.0mm hook for crispness, ch6, sl st to form ring, ch1, 6 sc in ring, join (6)
Round 2 :
Ch3 (counts as dc), 2 dc in same st, ch1, *3 dc in next st, ch1; rep around, join (6 petals forming dome base)
Round 3 :
For each petal: sl st to petal base chain space, ch1, sc in base, hdc, 2 dc, tr, 2 dc, hdc, sc, sl st to base (this forms one pointed petal). Work this petal in each ch1 space around to make 6 petals total for this round (counts: after completing all petals you will have 6 pointed petals)
Info :
Small, medium, and large petals use the same construction but increase the stitch counts and height: for medium petals add an extra dc on each side (hdc, 3 dc, tr, 3 dc, hdc), for large petals add two extra dcs (hdc, 4 dc, tr, 4 dc, hdc). Use 12 petals in each layer for a fuller look—make two petals per current stitch by working into sides to increase total petals from 6 to 12 as described in expanded assembly below.
Round 4 :
Repeat Round 3 to complete petal set for this layer. Make 12 petals by creating two petal bases in each petal base space (work two petal repeats into each previous petal base ch-space), producing 12 pointed petals total for the layer
Round 5 :
Finish off petal layer leaving long tail for sewing. Create three layers in total: small layer (shorter petals), medium layer (mid-height), large layer (tall petals). Stagger layers so petals are offset and inner layers slightly rotated.
Info :
Make 4 large poinsettias for a runner as shown (one centered in each major motif area). Each flower uses 3 petal layers of 12 petals = 36 petals per flower. Prepare layers separately and block lightly to shape points.
— Detailed Poinsettia Construction (assemble layers into finished flower) :
Round 1 :
Lay the large petal layer flat with petal bases inward. Using red yarn tail from large layer, sew a running stitch through petal bases to gather slightly. Pull gather to form a small dome—knot and weave tail. (This readies the base for attaching medium layer)
Round 2 :
Place medium layer over large layer, rotate petals so medium petals sit between large ones. Using medium layer tail, tack medium layer to large layer at petal bases with mattress stitch at 6 evenly spaced points. Do not over-tighten; petals should stay slightly raised (no specific stitch count)
Round 3 :
Place small layer centered above medium; rotate to sit between medium petals and stitch small layer at 6 points as before. Sew golden center disk over the layered bases, pulling minimal stuffing into center before securing to create a small puff. Fasten off and weave tails thoroughly.
Info :
Stitch through the base of all three layers and the golden center with several passes to make the flower secure; trim tails and hide by weaving through the underside of the assembled flower. Block final flower gently to open petal points slightly for a natural look.
— Leaf (make 8 leaves per poinsettia) :
Round 1 :
With green and 3.0mm hook, ch11, sc in 2nd ch from hook, hdc in next, dc in next 2, tr in next 3, dc in next 2, hdc next, sc last (counts: 10 stitches worked along chain, leaf foundation)
Round 2 :
Turn, sl st into next stitch along other side of foundation chain, sc in next, hdc in next, dc in next 2, tr in next 3, dc in next 2, hdc next, sc last, sl st to base to form pointed leaf (total shape created)
Round 3 :
Fasten off leaving long tail for sewing. Add surface veins with contrasting green (lighter) by embroidering herringbone stitches along leaf center from base to tip.
Info :
Make 8 leaves per poinsettia: 4 larger leaves to sit under the bottom petals and 4 smaller leaves to tuck between layers. Use a lighter green for vein embroidery for visual depth.
— Berry Cluster (make 3 clusters per poinsettia) :
Round 1 :
With red, ch4, sl st to form ring, 6 sc in ring, sl st to join (6)
Round 2 :
Make 6 bobble stitches: *(ch2, bobble in next sc, ch1, sl st into base); rep 6× leaving long tail for sewing. If preferred, make 3 small bobbles and sew together into a triangular cluster (counts remain small)
Info :
Attach a tiny golden knot or bead to each berry cluster center to echo poinsettia centers. Use minimal stuffing inside each berry if you want a puffier look.
— Assembling Main Panel (layout and joining motifs) :
Info :
Layout motifs on a flat blocking board in desired order. For the photographed runner, align motifs into a single long central strip approximately 6 large square motifs long with alternating filler motifs and three large poinsettias placed evenly along the length.
Round 1 :
Join motifs using whip stitch or slip-stitch join through outer ch-loop edges. Work join across touching sides: insert hook through the ch-loop of motif A, then motif B, yarn over and sl st to join; repeat evenly across edge for a neat join. Join all motifs in row (number of joins will depend on motif count)
Info :
When joining, keep tension firm but not tight to avoid puckering. Use matching cream yarn to hide seams. Leave outermost edges open until border rounds to ensure consistent shaping when edging.
Round 2 :
After main strip assembly, reinforce joins by sewing with yarn needle using a mattress stitch along join seams on the underside. This prevents separation after washing.
Info :
If your runner measures slightly off, add or remove filler motifs to reach desired length — the modular approach allows easy scaling.
— Attaching Poinsettias, Leaves and Berries :
Round 1 :
Position each poinsettia on the assembled cream panel where you want the major focal points. Pin lightly with sewing pins through the underside to check alignment and spacing (photo shows three large flowers evenly spaced)
Round 2 :
Sew each poinsettia by threading the flower tail through a large-eyed yarn needle. Stitch through motif base and into the cream panel at 8-10 points around the petal bases to secure evenly. Work from underside so stitches aren't visible on top surface.
Round 3 :
Tuck leaves under the outer petals: place 4 larger leaves at 45-degree intervals around the flower and 4 smaller leaves interspersed above; tack each leaf at 2–3 points near its base through motif and flower base to hold shape (no specific stitch counts required)
Round 4 :
Sew 3 berry clusters in small groupings near petals and along the cream lattice to mimic photo details. Use small blind stitches and secure well. Weave in tails and trim ends.
Info :
Work slowly and check the top side frequently to ensure flowers sit flat but raised. If petals are too floppy, add a small running gather at each petal base and tack down in a couple of places to keep points lifted.
— Border Preparation (start before final edging) :
Round 1 :
With cream, sc evenly around entire assembled runner edge into outermost ch-loop spaces of motifs: place 6 sc per side segment and 8 sc in corner scallops. Use stitch markers every 10–12 sc to keep even counts. (approx total will vary with runner length)
Info :
Count stitches and note your total around the full perimeter — this number will be used to calculate scallop repeats for the red scalloped border that follows. Write this number down before continuing.
Round 2 :
Work one round of hdc around: 1 hdc in each sc from Round 1. This evens the edge and creates a base for the scalloped border (stitch count same as Round 1).
Round 3 :
Switch to red yarn—Info : Change to deep red yarn. Carry unused cream yarn inside along edge or weave in later. Begin scallop foundation by ch3, skip 2 sc, sl st in next sc; rep around as spacing guide for scallops (will produce ch-loop anchors for scallops)
Info :
Ensure your scallop anchor spacing results in an integer number of scallops. Adjust by adding or removing one sc in Round 1 to achieve even scallops across each long side.
— Scalloped Red Border (worked in repeated rounds) :
Round 1 :
With red, join at an anchor ch-loop: *(in anchor space work: sc, hdc, 3 dc, hdc, sc) - this forms one scallop; sl st into next anchor loop; rep around creating full scalloped edge. Repeat until entire perimeter is scalloped (no global stitch count because depends on anchor count)
Round 2 :
Turn scallops slightly higher by working into the backs of the scallop stitches: sl st to center dc of a scallop, ch2, 2 dc in same st, ch1, 3 dc in center dc of next scallop; rep around to create layered scallop appearance. Join and fasten off, weave ends.
Info :
If scallops pucker, block the entire runner while damp and pin scallops evenly spaced until dry. For a stronger border, reinforce junctions with a few invisible whip stitches under the scallop base to attach to cream edge.
— Decorative Row: Tiny Red Dots and Green Accents (worked after main assembly) :
Round 1 :
Using small scraps of red and green yarn, embroider tiny French knot-style knots across cream lattice by winding yarn 3× around needle and pulling through to create a raised dot; secure on underside. Place dots symmetrically around each poinsettia (approx 3–4 per quadrant)
Info :
Instead of embroidery, you can crochet tiny 3-stitch knots (ch2, 3 sc in ring) and sew them onto lattice for a neater crocheted embellishment that matches texture of runner.
— Finishing Touches and Blocking :
Round 1 :
Weave in all ends into the underside using yarn needle, taking care to pass through several motifs to hide tails. Trim close to fabric after burying.
Round 2 :
Block final runner: dampen lightly or use steam blocking. Pin runner onto blocking board, stretching gently to open lace and even scallops. Allow to dry fully for crisp finish.
Info :
Final runner dimensions will depend on how many motifs you made; photo version measures approximately 120-140cm long and 26-30cm wide. Adjust motif count to desired table size.
— Advanced Stitch Notes and Variations :
Info :
To convert this pattern to another size, change the number of middle motifs and proportionally increase filler motifs. For a fuller runner, add an extra column of motifs on each side and adjust border scallop counts accordingly.
Info :
For a glossier holiday effect use a cotton-acrylic blend with slight sheen or a mercerized cotton yarn. For heirloom matte look use wool-blend yarn — keep in mind blocking and wash care differences.
Completing this poinsettia table runner is a rewarding journey of lacy motifs, layered petals, and careful assembly — a true holiday centerpiece you can be proud of. The dimensional flowers pop against the cream lace background, and the scalloped red border frames everything beautifully. Take your time with blocking and placement; the result is stunning and makes a perfect handmade gift or festive heirloom. 🎄🧶✨