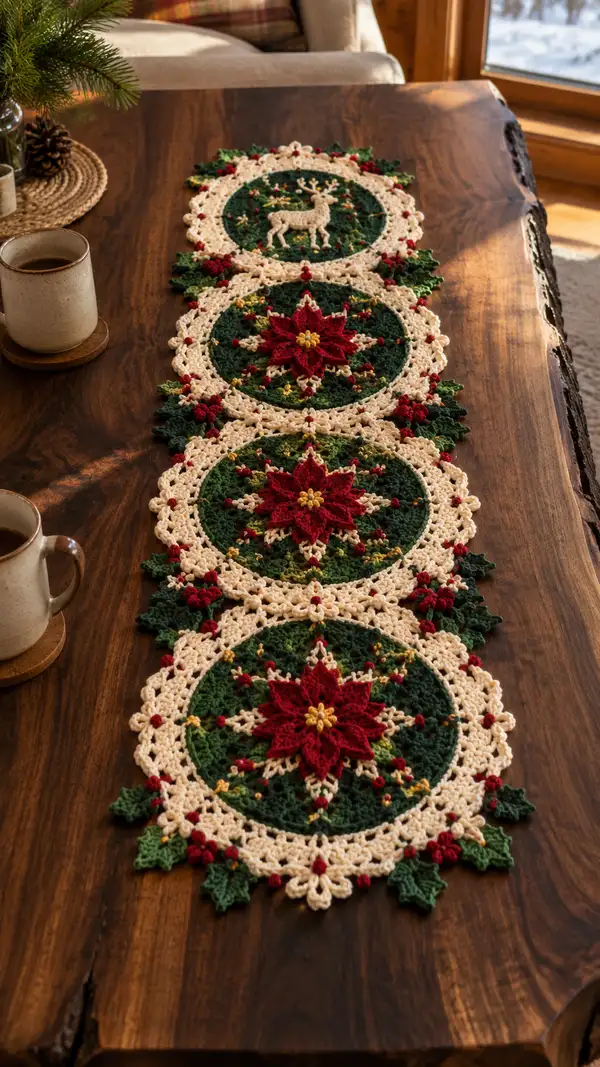
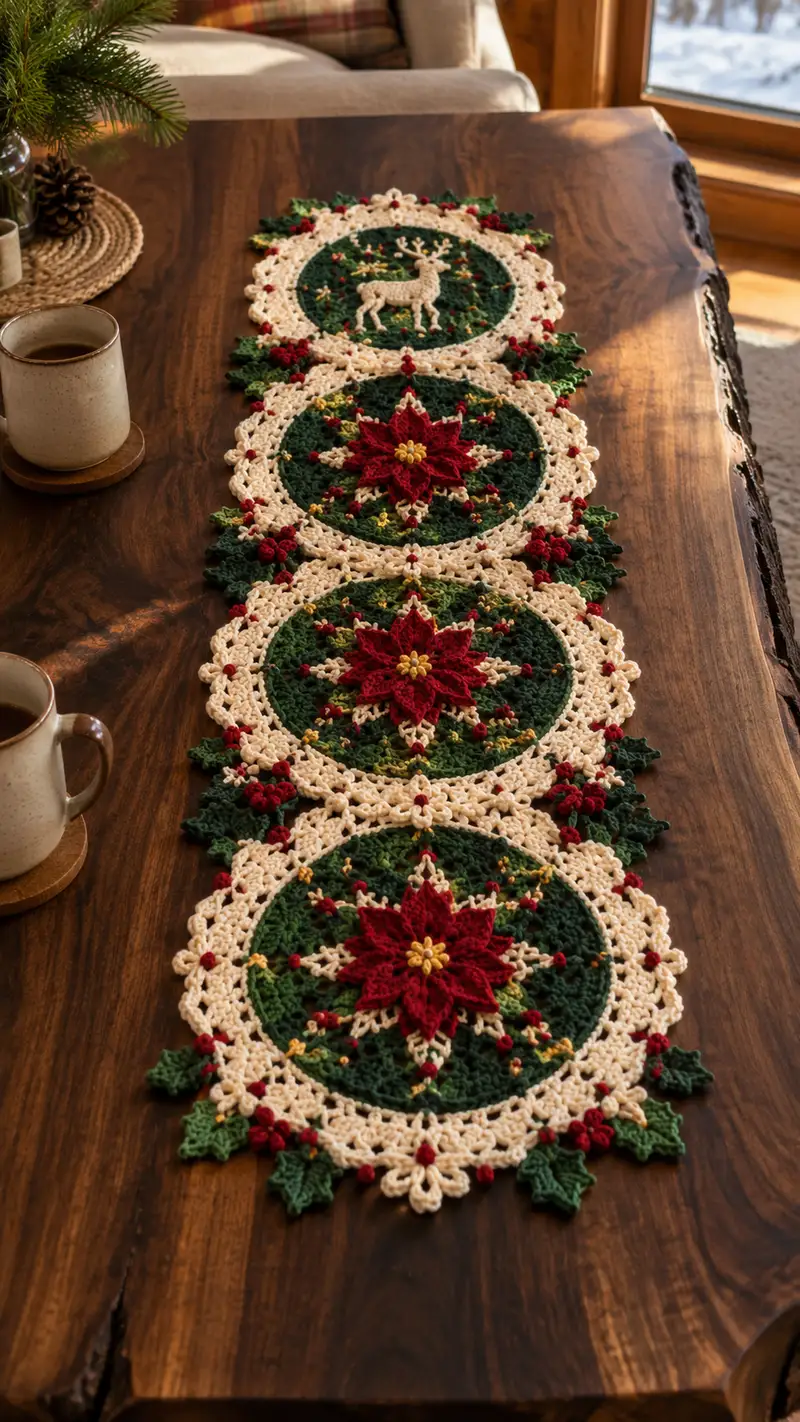
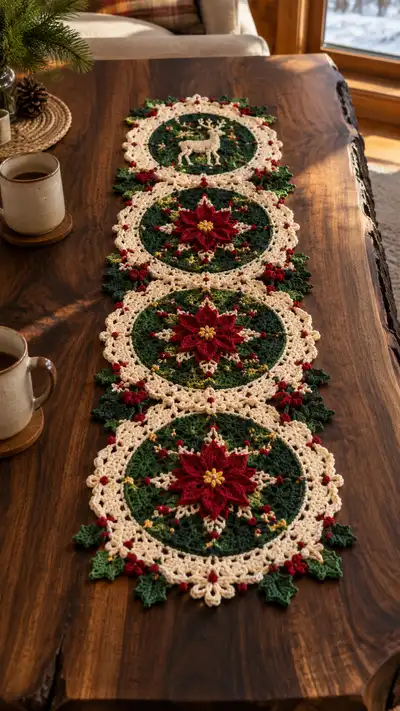
Create a stunning holiday table runner featuring layered poinsettias, holly leaves and tiny berries on rich forest-green medallions framed in warm cream. This modular runner is made from circular motifs joined in a row with delicate lace edging and textured, raised petals. The finished piece is decorative and flat — perfect as a centerpiece for festive dinners or seasonal decor. Pattern includes detailed motif, leaf and berry instructions, join-as-you-go guidance, and assembly notes.
Progress Tracker
0% Complete
— Pattern Notes :
Info :
This pattern creates modular circular motifs that join to make a table runner. Make 4 motifs (or adjust to desired length). Work flat in rounds; most motifs are crocheted in the round. All stitch counts are given for US crochet terms. Use a 3.5mm hook for the main work and a 3.0mm hook for tightly detailed petals if you prefer sharper definition. Block motifs before joining for best results.
Info :
Gauge is not critical for overall look, but consistent tension ensures motifs stack and join evenly. I recommend working one motif completely and blocking it to use as a gauge for subsequent motifs so borders match perfectly.
— Motif A: Poinsettia Medallion (Make 3 or 4 identical) :
Round 3 :
(1 sc, inc) x 6 (18)
Round 4 :
(2 sc, inc) x 6 (24)
Round 5 :
(3 sc, inc) x 6 (30)
Round 6 :
(4 sc, inc) x 6 (36)
Round 7 :
(5 sc, inc) x 6 (42)
Round 8 :
(6 sc, inc) x 6 (48)
Round 9 :
(7 sc, inc) x 6 (54)
Info :
Use Forest Green yarn for these rounds to form the green medallion center. Work in continuous rounds or join and ch1 as you prefer. Place a stitch marker at the beginning of each round to keep your count and align petals later.
Round 10 :
(8 sc, inc) x 6 (60)
Round 11 :
(9 sc, inc) x 6 (66)
Round 12 :
(10 sc, inc) x 6 (72)
Round 13-16 :
1 sc in each st (72)
Info :
Work even for 4 rounds to create a flat disc. This is the background on which the poinsettia petals will be anchored. If using variegated green, these rounds will create subtle tone variation in the center.
Round 17 :
*ch 5, sk 4, sl st in next st* repeat around to create 12 loops (72 still counted but 12 loops created)
Info :
These ch-5 loops mark the 12 anchor points around the medallion where you will place decorative spokes and later anchor petal bases. Keep the loops evenly spaced using your stitch marker if needed.
Round 18 :
Join Red yarn at the base of a loop: *(sc, hdc, dc, hdc, sc) in loop, sl st in next sc on base* repeat 12 (creates 12 decorative spokes)
Round 19 :
Switch to Cream yarn: ch3 (counts as dc), *ch2, sk next spoke, dc in next spoke base* around to create a delicate lattice (72 dc positions)
Info :
Round 18 builds small star points that act as anchors for the petals. Round 19 begins a light lace that separates the green center from the cream frame. Carry unused yarn loosely on the inside of motif or cut and weave later depending on whether you want tidy backs.
Round 20 :
1 dc in each dc and ch-space around (72)
Round 21 :
*ch 3, sk 2, sc in next, ch 3, sl st in next dc* repeat around forming 12 small pointed arches (72 stitch positions remain)
Info :
These arches will become the base for attaching the layered poinsettia petals—mark every other arch with a removable stitch marker if you intend to place the larger petals every second arch for symmetry.
Round 22 :
Switch to Red yarn: in every marked arch, make petal foundation: ch2, work 5 tr in arch, ch2, sl st at base (this begins the raised petal centers). Do this at 6 anchor arches (6 petal foundations)
Round 23 :
Petal shaping round (working into each petal foundation): *sl st into first tr, sc, hdc, 3 dc, hdc, sc across the tr cluster; sl st to base* repeat 6 (this forms 6 larger petals) (each petal spans 12-14 sts visually)
Round 24 :
Info :
At this stage the motif has 6 large petals evenly spaced. If you prefer 8 or 12 petals, plan anchors on Round 17 accordingly. The pattern here uses 6 large petals to mirror the photographed design.
Round 25 :
Return to Cream at the base between petals: *ch4, sc at petal root, ch4, sl st in next base dc* repeat to create tiny loops between petals (creates delicate frame)
Round 26 :
1 sc in each st and in each ch-space around to even the cream frame (count 72 approx. adjust if necessary to keep border even)
Round 27 :
Info :
Before continuing to the outer lace border, make the small gold centre: with gold yarn embroider tiny French knots or make 6 small bullion knots placed tightly in the center of the red flower to form the poinsettia center. Secure and weave ends beneath the green disc for tidy finish.
Round 28 :
Outer lace base (Cream): ch3 (counts as dc), *(dc, ch2, dc) in next sc, sk 3, sc in next* repeat around forming 12 scallops (72 dc positions)
Round 29 :
1 sc in each st around (72) — this evens the edge and prepares for decorative cluster round
Round 30 :
Switch to Forest Green: in the spaces between cream scallops, work small holly anchors: *(sc, ch3, sc) in ch-space, sl st in next sc on cream base* repeat 12 — these are anchor points for holly leaves and berry clusters
Round 31 :
Switch to Red for berries: in each cream scallop tip, work bobble cluster: *(ch1, 5 dc bobble in same st, ch1, sl st in same st)* repeat in 12 positions (these create raised red berries around motif)
Round 32 :
Switch to Cream for finishing border: *sl st in next 2 sts, ch5, sl st to create picot-loop, sl st in next 2 sts* repeat to create delicate picot edging around full motif. Fasten off and weave in ends.
Info :
Block motif flat, pinning evenly to a circular form or using round object to keep shape while drying. Make 3 identical poinsettia motifs for a 3-motif runner or 4 motifs for longer runner as shown. Repeat all rounds for each motif, maintaining consistent blocking and tension.
— Motif B: Reindeer Medallion (Make 1 centerpiece motif) :
Round 3 :
(1 sc, inc) x 6 (18)
Round 4 :
(2 sc, inc) x 6 (24)
Round 5 :
(3 sc, inc) x 6 (30)
Round 6 :
(4 sc, inc) x 6 (36)
Round 7 :
(5 sc, inc) x 6 (42)
Round 8 :
(6 sc, inc) x 6 (48)
Round 9-12 :
1 sc in each st (48)
Info :
Work forest green base rounds as for poinsettia but slightly smaller radius here (48 sts) to allow space for reindeer applique. Place markers at the top and bottom positions as references for mounting the reindeer later.
Round 13 :
Switch to Cream: ch3 (counts as dc), *dc in each st around to form even cream frame (48)*
Round 14 :
Work cream scallop foundation: *(ch3, sk 2, sc) across to make 12 small arches around the cream ring*
Round 15 :
Switch to Gold yarn: embroider small seed-accents across the green background using French knots placed at even spacing (12-16 tiny knots) to mimic scattered golden flecks visible in design.
Info :
The reindeer is created as a separate applique worked flat and sewn into the motif center. Working the applique separately gives more precise shaping for legs and antlers.
Reindeer Applique Round 1 :
With Cream yarn, ch 16, sc in 2nd ch from hook and across to form a small rectangle base for body (15 sc). Fasten off leaving long tail for sewing.
Reindeer Applique Round 2 :
Using continuous-row shaping, pick up along one long edge and work short rows of sc to shape body: Row 1: 15 sc. Row 2: dec,11 sc, dec (13). Row 3: 1 sc, dec, 9 sc, dec, 1 sc (11). Row 4: 11 sc. Row 5: dec, 7 sc, dec (9). Row 6: 9 sc. Fasten off; this tapered rectangle forms the torso shape.
Reindeer Applique Legs (Make 4 small legs) :
With cream yarn: mr, 6 sc in mr (6); R2: 6 inc (12) OR for slender leg do 6 sc for length across 4-6 rounds to desired leg length, then leave long tail for sewing. Make 4 legs; attach to underside of torso with yarn and whip stitch aligning spacing to create two front and two hind legs as shown.
Reindeer Applique Neck & Head :
From top of torso, sew a short neck: ch 5, sc back along chain (4 sc), sl st to top of torso. For head: ch 6, sc back along chain (5 sc), fasten off leaving tail for sculpting and sewing. Embroider an eye with a tiny French knot or sewing a 2mm black bead. Add small antler shapes by making two small branched shapes: ch4, sl st back in ch2 to form fork; fasten off. Attach antlers to top of head.
Info :
Sew applique to the green medallion center: position the reindeer centered in the disc using pins. Use long tail to whip stitch around the torso edges through the green background so the applique is secure and flat. Add a tiny mouth stitch with matching yarn if desired.
Round 16 :
Finish cream frame with a decorative picot: *sl st, ch3, sl st into same st (picot), skip 2, sc* repeat around to create delicate points. Fasten off and weave tails. Block flat.
— Poinsettia Petal Detail (Make 6 petals per poinsettia) :
Petal Round 1 :
With red yarn and smaller 3.0mm hook, ch 8, sc in 2nd ch from hook and across (7 sc). Turn. (foundation)
Petal Round 2 :
Inc, 5 sc, inc (9)
Petal Round 3 :
1 sc, inc, (3 sc, inc) x2, 1 sc (11)
Petal Round 4 :
1 sc in each st (11)
Petal Round 5 :
*sc, hdc, 3 dc, hdc, sc* across the top of petal to create a smooth arched tip (petal now measures 5-6 rows high)
Petal Round 6 :
Edge the petal with cream slip-stitches: sl st evenly around the petal edge (this provides contrast and helps the petal pop when sewn down)
Info :
Sew petals to the red petal foundations on motif using stab stitches at the petal base. Layer an inner set of 6 smaller petals between the large ones if you desire additional depth — make inner petals by repeating rounds with fewer increases (petals with 7-9 sts). For the photographed look, use two layers: 6 larger outer petals and 6 smaller inner petals.
Petal Inner Layer Round 1 :
ch 6, sc 5; Round 2: inc, sc3, inc (7); Round 3: 1 sc in each st; Round 4: sc, 2 dc, sc across top; finish with cream edging sl st. Make 6 inner petals.
Info :
Pin and sew inner petals first, then add outer petals offset between them. Use tiny stitches through the motif and petal base to keep the petal anchored but with a slight lift at the tip to mimic natural poinsettia shape.
— Holly Leaf (Make 8–12 leaves per motif cluster) :
Leaf Round 1 :
With Forest Green: ch 8, sc in 2nd ch from hook and across (7 sc)
Leaf Round 2 :
Change direction, 1 sc in first 2 sts, hdc, 3 dc, hdc, 1 sc in last 2 sts (9 sts shaped)
Leaf Round 3 :
Ch1, sc in each st across, then along the outer edge work *picot (ch3, sl st into top of picot), sc* to form serrated holly edge. Fasten off leaving tail to sew to motif.
Info :
For a more dimensional leaf, add a row of fpdc and bpdc at the base to create a center vein before working the outer picot serration. Pin leaves into the green/cream junction areas and sew through the cream frame for solid anchoring.
— Berry (Make multiple small bobble berries) :
Berry Round 1 :
With red yarn: mr, ch1, 5 dc in mr, pull to close to form a tiny berry bobble (counts as one small berry). Fasten off leaving tail to sew. For raised berries use 'bobble' made of 5 dc cluster worked into one stitch on motif.
Info :
Sew berries in clusters of 2–3 at the holly anchors you created in Round 30 of each motif. Secure with extra stitches and hide tails beneath the motif when finished.
— Joining Motifs & Runner Assembly :
Info :
You will make 4 motifs total (3 poinsettia + 1 reindeer centerpiece) and join them in a linear fashion. Decide layout: place reindeer motif in the second position from the top for a balanced look or center it as the focal point. Block all motifs identically first.
Join Round 1 :
With Cream yarn and starting at the outer edge of motif 1, align motif 2 so their cream edges meet; use join-as-you-go: hold motifs RS together and sl st through both loops of corresponding outer picot loops at every 3rd picot to create a sturdy seam. Repeat for subsequent motif joins until all motifs are joined in a straight row.
Join Round 2 :
After motifs are joined along their long edges, reinforce the joins by stitching through the back loops only around the seam from the WS with matching cream yarn using whip stitch or mattress stitch for flat seaming. Weave tails into seam.
Info :
Ensure spacing is even: when joining, keep a pin at the top and bottom of the seam to ensure motifs do not skew. Count picots and anchor points to line up symmetrical elements (berries and holly) across the join.
Edge Integration Round :
Once motifs are joined, work a final unified edge along the entire runner: with Cream yarn, pick up along the outermost picot edges of the end motifs and work a continuous lace edge: *ch4, sl st in next picot gap, ch4, sl st in next* repeat along whole runner length to create a scalloped continuous border. Fasten off and weave ends.
Info :
When adding the continuous edge, work gently to avoid pulling joins tight. Use blocking pins to hold runner straight while you stitch the edge so it lays flat. This final edge visually unites the circular motifs into a single runner piece.
— Alternative Join Option (Sew-on Lace Panel) :
Info :
If you prefer a sewn join rather than join-as-you-go, create a narrow cream lace strip: ch 6, work 2 rows of dc, then a row of picot loops sized to match motif picots. Block and hand sew the strip to the back of motifs aligning picots, then add the final outer edging as above.
— Finishing Touches & Blocking :
Info :
Once all motifs are joined, wet-block or steam-block the entire runner to even the lace and shape the petals. Pin each petal gently to keep points crisp if desired. Use rust-proof pins and mild soap for wet-blocking. Allow to dry completely before removing pins.
Info :
Sew on any additional decorative beads or tiny seed beads to the poinsettia center with gold thread for extra shimmer. Add a few embroidered gold stitches across the green background to echo the photographed gold accents.
— Suggested Color Placement Guide :
Info :
Forest Green = central medallion rounds and holly leaves; Red = raised petals and berries; Cream = lace frame, outer scallops and picots; Gold = embroidered tiny knots in centers and scattered accents. Keep consistent color use across motifs for cohesive finish.
— Pattern Summary Rounds Count (per poinsettia motif) :
Info :
Base expansion rounds 1–12 (12 rounds), even rounds 13–16 (4 rounds), decorative spokes 17–19 (3 rounds), cream frame 20–26 (7 rounds), petal attachments and outer lace 27–32 (6 rounds) = 32 rounds total per poinsettia motif. Reindeer motif follows a similar exacting count with additional applique steps totaling 36 rounds when counting applique shaping rounds. Leaves and berries are made as separate small motifs (3–6 rounds each) and attached as clusters across outer joins.
Info :
Across 4 motifs (3 poinsettia + 1 reindeer) plus join rounds and final edge you will work approximately 140–160 rounds worth of crocheting when counting each small applique and leaf as discrete rounds—this yields the richly detailed, layered runner pictured.
— Tips for Success :
Info :
Always pin and block each motif before joining. When sewing petals and appliques, use small, invisible whip stitches at the base so the top of each petal remains slightly free to create shadow and depth. Keep a small pair of sharp embroidery scissors for tidying thread ends near delicate lace picots.
Completing this table runner is a wonderfully rewarding holiday project — each motif becomes a small vignette of poinsettia petals, tiny berries and lace. The layered textures, gold accents and delicate cream edging make it feel like an heirloom. I'm always thrilled when a finished runner finds its place as the centerpiece of a festive table. 🧶✨🎄