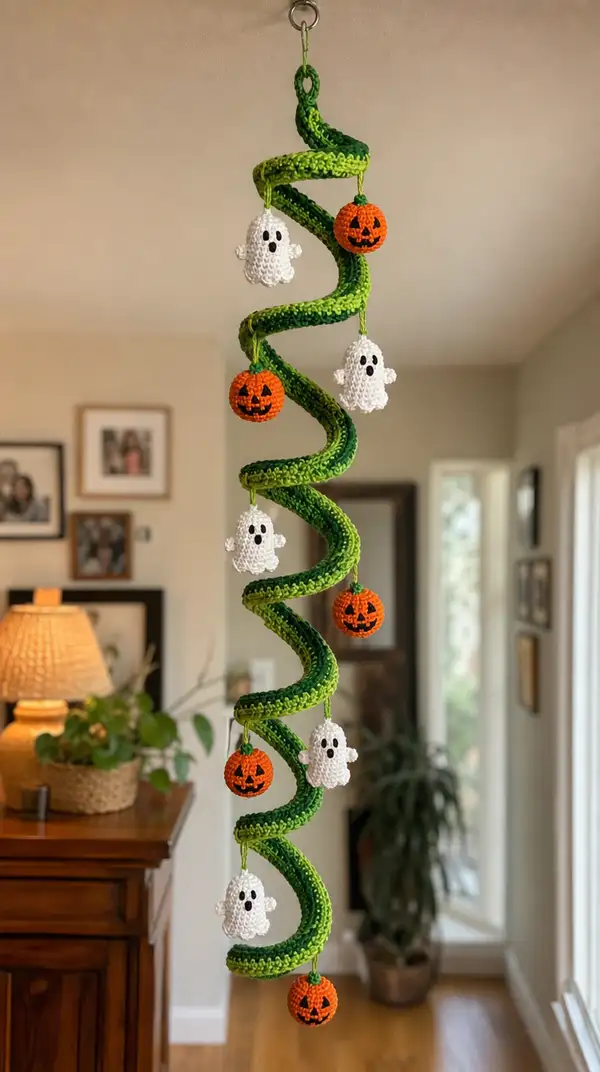
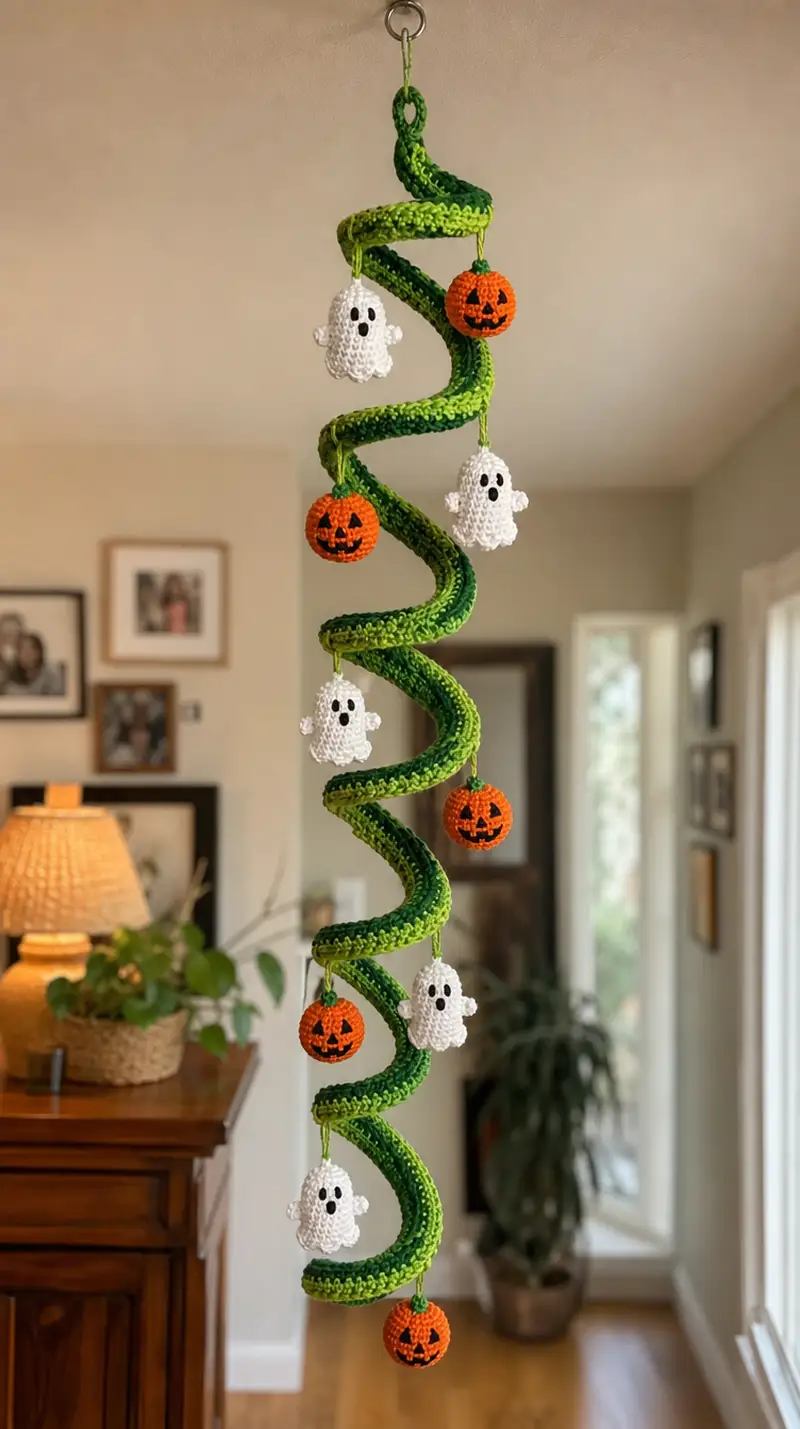
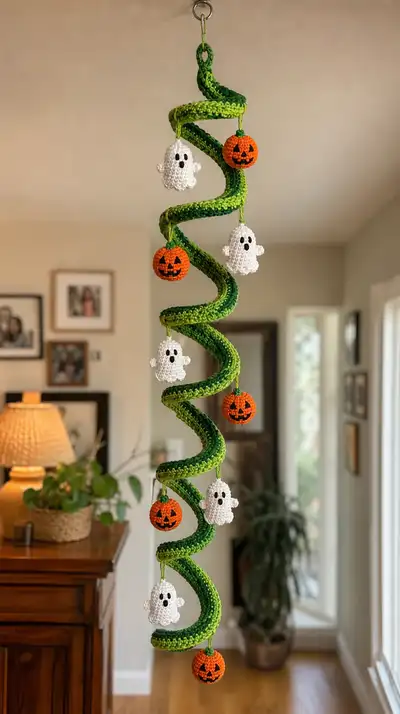
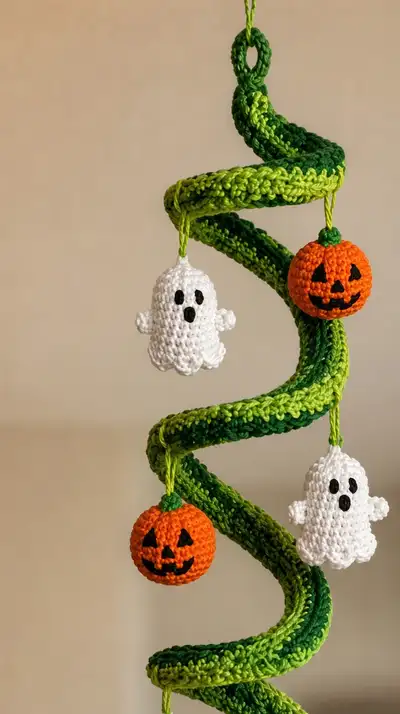
This hanging spiral garland features a long green spiral vine dotted with cheerful crocheted jack-o-lanterns and tiny floating ghosts. The striking two-tone green spiral, tiny orange pumpkins with embroidered faces, and scalloped white ghosts make a playful seasonal decoration. Designed to hang from ceilings or doorways, the garland is lightweight, portable, and full of Halloween charm.
Progress Tracker
0% Complete
— Materials & Gauge :
Info :
Use worsted weight cotton yarn for structure and durability. Gauge is not critical for this decorative piece, but the spiral tube should be firm enough to hold shape when coiled. Aim for approx 4.5 - 5 sc per inch in the finished tube walls. If using non-cotton, you may need to add a flexible wire inside to maintain the spiral.
— Spiral Vine (Main Tube) :
Round 1 :
6 sc in magic ring (6)
Round 3 :
(1 sc, inc) x 6 (18)
Round 4 :
(2 sc, inc) x 6 (24)
Round 5 :
(3 sc, inc) x 6 (30)
Round 6 :
(4 sc, inc) x 6 (36)
Round 7 :
(5 sc, inc) x 6 (42)
Round 8 :
(6 sc, inc) x 6 (48)
Info :
These initial rounds set the tube circumference. 48 sts gives a tube about 1.0-1.25 inches in diameter depending on yarn and tension. If you prefer a thicker or thinner tube, adjust increases to reach a multiple of 6 with your target count (e.g., 36 for smaller, 60 for larger).
Round 9-14 :
1 sc in each st (48)
Info :
Change to the alternate green (light) at the end of rnd 14 to create a stripe band. Carry the unused yarn along the inside of the tube, or fasten off and join color for a cleaner look. If using variegated yarn, you can skip color changes.
Round 15-19 :
1 sc in each st BLO (48)
Info :
Working the next few rnds in BLO creates a subtle ridge that helps the spiral hold a curved profile when coiled. Keep tension consistent. Use stitch marker to indicate the start of round.
Round 20-24 :
1 sc in each st (48)
Round 25 :
(7 sc, inc) x 6 (54)
Info :
Very lightly increase at interval points to help the spiral flare slightly in places for a natural look. These small, periodic increases create gentle undulations.
Round 26-30 :
1 sc in each st (54)
Round 31 :
(8 sc, inc) x 6 (60)
Round 32-36 :
1 sc in each st (60)
Info :
Switch back to dark green for the next band at the end of rnd 36 for two-tone effect. Alternate color bands roughly every 12-20 rounds to create visible stripes along the spiral.
Round 37-44 :
1 sc in each st (60)
Round 45 :
(9 sc, inc) x 6 (66)
Round 46-54 :
1 sc in each st (66)
Info :
If you want a firmer spiral core, insert a thin strip of craft wire or rolled cardboard inside the tube at this point. To keep the tube flexible and natural, omit wire and let stuffing hold curves.
Round 55-60 :
1 sc in each st BLO (66)
Round 61-66 :
1 sc in each st (66)
Info :
Continue alternating BLO rounds every 10-15 rounds to add texture ridges: this helps the spiral catch light and hold a consistent curl when suspended. Mark rounds where you change between BLO and full rounds.
Round 67 :
(10 sc, inc) x 6 (72)
Round 68-74 :
1 sc in each st (72)
Round 75 :
(11 sc, inc) x 6 (78)
Round 76-82 :
1 sc in each st (78)
Info :
At this point you have a long tube that can be coiled into multiple loops. If you want a shorter garland, reduce the number of even rounds and end sooner. For the pictured garland that holds 6 ornaments, aim for around 80-95 rounds total in the tube before finishing shapes.
Round 83-86 :
1 sc in each st BLO (78)
Round 87 :
(11 sc, dec) x 6 (72)
Round 88 :
(10 sc, dec) x 6 (66)
Info :
Begin gentle tapering near the top and bottom ends of the spiral so it finishes neatly. These decreases help form smaller loops at the start and end for hanging or finishing.
Round 89 :
(9 sc, dec) x 6 (60)
Round 90 :
(8 sc, dec) x 6 (54)
Round 91 :
(7 sc, dec) x 6 (48)
Round 92 :
1 sc in each st (48)
Round 93 :
1 sc in each st BLO (48)
Round 94 :
1 sc in each st (48)
Info :
Create a hanging ring at the top of the tube: ch 12, sl st back along chain to form loop, then sc around the tube over the loop base to secure it. Alternatively slip the top through a metal ring and sc around to anchor. Leave long tail to sew closed at the top.
Round 95 :
Fasten off leaving a long tail for weaving. Stuff the tube lightly and close the final opening by sewing through the front loops only to create a neat seam. Weave in end securely (48)
Info :
To achieve the pictured curled spiral shape, coil the stuffed tube around a dowel or round object in a helix, then allow it to relax slightly. If using wire inside, bend to desired spiral tightness. Pin the coil while sewing ornaments on to ensure even spacing.
— Ghost (Head/Body) (Make 6) :
Round 1 :
6 sc in magic ring (6)
Round 3 :
(1 sc, inc) x 6 (18)
Round 4 :
(2 sc, inc) x 6 (24)
Round 5 :
(3 sc, inc) x 6 (30)
Info :
Switch to white yarn if not already using it. These increases make the body start to ball out for a rounded top; place safety eyes or mark embroidery placement between rnds 10-12 if you prefer sewn eyes instead of embroidered dots.
Round 6 :
1 sc in each st (30)
Round 7 :
1 sc in each st (30)
Round 8 :
1 sc in each st BLO (30)
Round 9-12 :
1 sc in each st (30)
Info :
Place eyes approximately between rnds 9-10, spaced about 6-8 sts apart depending on expression. If embroidering, use black yarn or embroidery floss and work small ovals or French knot style eyes. For safety eyes, use small sizes (6mm) and secure backs before stuffing.
Round 13 :
(3 sc, dec) x 6 (24)
Round 14 :
1 sc in each st (24)
Round 15 :
(2 sc, dec) x 6 (18)
Info :
Begin stuffing here moderately firm to maintain puffed body. Use small amounts of fiberfill placed evenly; the ghost body needs to be soft but hold shape so the scalloped bottom sits nicely.
Round 16 :
(1 sc, dec) x 6 (12)
Round 18 :
Fasten off leaving a long tail for sewing. Finish stuffing and close hole (6)
Info :
We will add the scalloped skirt and arms next. Do not weave in the end yet — use it to sew on the bottom scallops and arms securely.
Round 19 :
Attach white yarn at a stitch around base. *Ch 1, sc in same st, (sc, ch 1, sc) in next st* around to create spacing for scallops. Work into each stitch across to prepare scallop shaping (approx 12 pairs)
Round 20 :
*In next chain loop: (sc, hdc, sc) to form scallop* around; join (12 scallops)
Info :
Create 6-12 small scallops depending on base stitch count. The pictured ghosts have a subtle scalloped edge of 6 scallops; if your base has 12 sc, space scallops every 2 stitches for charming waves.
Round 21 :
Make two tiny arms: Attach white yarn at side stitch, ch 1, (sc 3) in same st, fasten off leaving tail. Repeat on opposite side. Sew both arms to body with tail.
Info :
Sew arms in a little forward curve to mimic a waving ghost. Use small whip stitches and hide tails inside body. Embroider eyes and mouth now: small oval eyes and an O-shaped surprised mouth centered lower than eyes.
— Pumpkin (Body/Head) (Make 6) :
Round 1 :
6 sc in magic ring (6)
Round 3 :
(1 sc, inc) x 6 (18)
Round 4 :
(2 sc, inc) x 6 (24)
Round 5 :
(3 sc, inc) x 6 (30)
Info :
Switch to orange yarn at the end of rnd 5. These increases form the bottom hemisphere of the pumpkin. Keep tension somewhat tight to prevent show-through of stuffing.
Round 6-8 :
1 sc in each st (30)
Round 9 :
(3 sc, dec) x 6 (24)
Round 10 :
1 sc in each st (24)
Info :
Begin stuffing the pumpkin firmly but not overstuffed — it should keep a nice round shape. At this stage it's easiest to embroider the face slightly before the pumpkin is fully closed, so the fabric is flat and stable.
Round 11 :
(2 sc, dec) x 6 (18)
Round 12 :
(1 sc, dec) x 6 (12)
Round 14 :
Fasten off leaving long tail for closing (6)
Info :
Before closing fully, embroider jack-o-lantern face with black yarn or embroidery floss: two triangular eyes, triangular nose, and jagged grin. Use backstitch to outline the grin and satin stitch to fill eyes for bold contrast. Doing this now ensures face is tidy and centered.
Round 15 (Stem) :
Join dark green to top center. Ch 1, sc 6 in same st around to form tiny cap (6)
Round 16 :
*Ch 4, sl st back into first ch to create short stem loop; repeat once more and fasten off. Weave tail inside and secure.*
Info :
Alternatively for a sturdier stem: sc 6 in magic ring, work rnds 2-4 as 1 sc in each, then sc around the post to form a small cylinder. Attach stem centrally and sew securely through the pumpkin.
Assembly Instructions
- Attach the hanging loop: at the top of the spiral tube secure a small ring or create a chain loop (12 ch) and sc around the tube to anchor it. Make sure the loop is centered and strong; reinforce with a few extra sewing passes.
- Coil the spiral: gently coil the stuffed tube into an even helix. Use pins or clips to hold shape while you mark positions for ornaments. Aim for equal spacing between loops for balanced look (e.g., 6 ornament positions spaced evenly along tube).
- Prepare ornaments: make 6 ghosts and 6 pumpkins. For each ornament, leave long tails for attaching. Thread the tail through the hole in the spiral tube at the chosen location and tie or sew through the tube to secure; knot at the inside and weave ends into the tube.
- Spacing guide: measure approximate distances by eye or using the photographed layout — ornaments are alternated (ghost/pumpkin) and hang from short 3-4 inch yarn cords. Attach cords to the top of each ornament (securely knot) and sew the other end to the tube's inside so ornaments hang freely and face outward.
- Sewing technique: use the yarn needle to sew through both the ornament top and the inner wall of the tube several times using whip or mattress stitch to prevent rotation. Add a dot of fabric glue inside for extra security if desired.
- Final shaping: once all ornaments are attached, suspend the garland from the loop and adjust the coil so ornaments hang evenly. Tweak wire or stuffing if necessary, and trim any stray ends after weaving them in.
- Secure faces: ensure pumpkin face embroidery is firmly knotted and ends woven into the interior. For ghost eyes/mouth, use black yarn or felt pieces glued/sewn on—double-check stability if for children.
- Finish: tuck and weave all tails into the tube with the yarn needle. If using wire inside, bend wire ends inward and tape to avoid sharp points. Hang and enjoy!
Important Notes
- 💡Use stitch markers consistently at the beginning of each round to avoid counting errors and maintain proper shaping.
- 💡Stuff body parts gradually as you work rather than waiting until the end, especially for narrow openings like the spiral tube.
- 💡For embroidered faces, work them before the final closure for neater lines; secure knots and weave ends inside before final stuffing.
- 💡When sewing ornaments to the spiral, pin them in place first to check spacing and alignment before stitching permanently.
- 💡For a stable spiral, add a thin flexible wire inside the core before stuffing; bend gently to hold the coil shape and wrap the wire ends securely.
- 💡Work with tight enough tension so stuffing does not show; change hook size down if your stitches are too loose.
- 💡If making this for a small child, use embroidered or sewn eyes/mouths rather than glued-on felt or safety eyes to avoid choking hazards.
- 💡Keep a small pair of long-nose tweezers or stuffing tool handy to push stuffing neatly into small ornaments.
This spiraling Halloween garland is full of charm and movement — the two-tone green spiral makes an eye-catching backdrop for the happy pumpkins and shy ghosts. Each ornament is quick to make, and assembling them into the helix is a satisfying finish. Hang it in an entryway or from a ceiling hook for playful seasonal decor. 🎃👻🧶