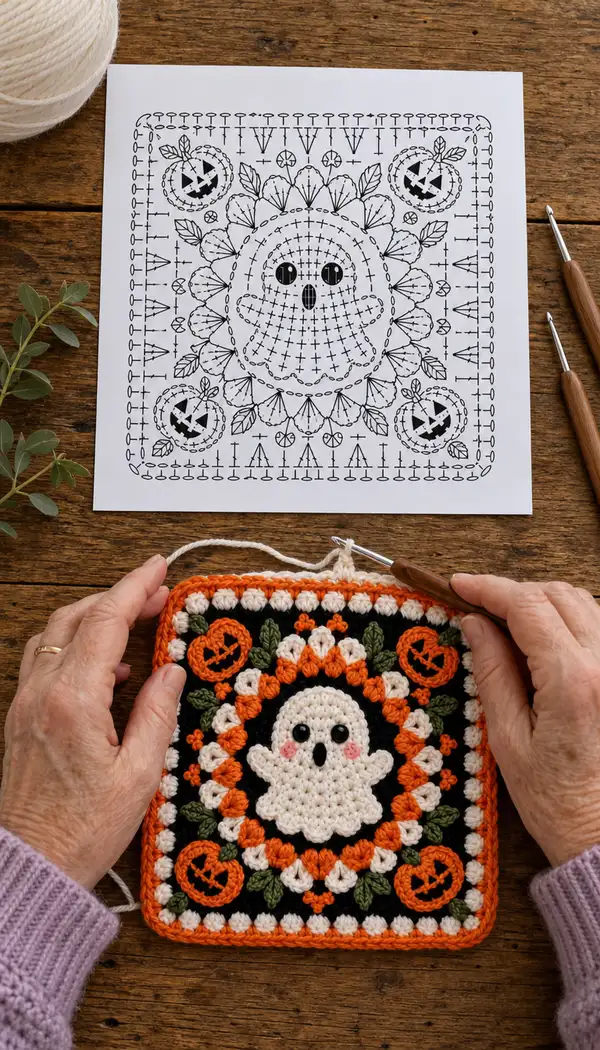
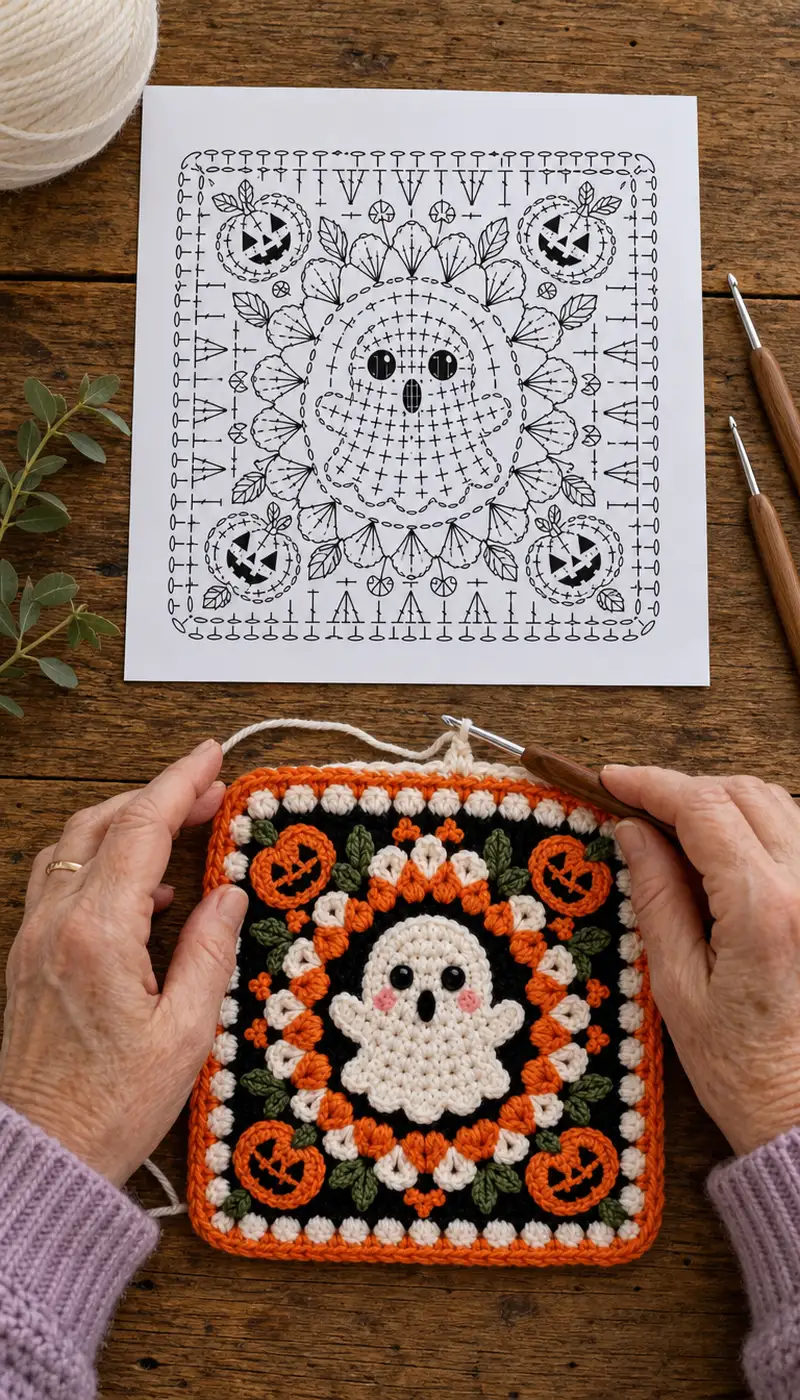
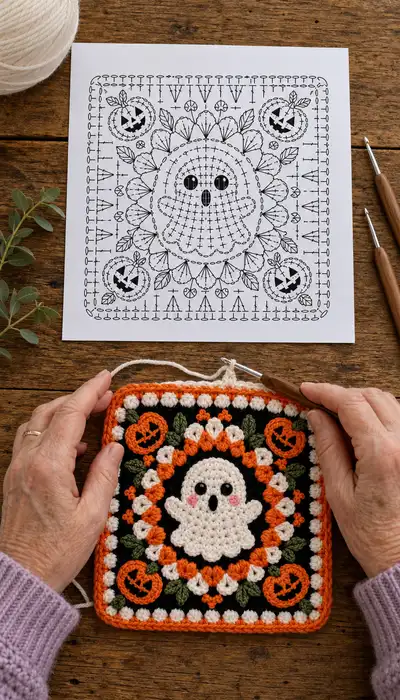
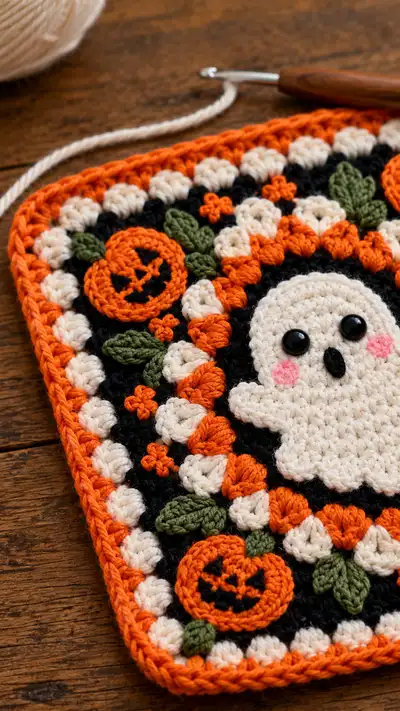
A charming Halloween-themed granny square featuring a sweet cream ghost applique9, jack-o-lantern pumpkins, leafy accents and a bold orange border. This square combines textured popcorns, small applique9 motifs and neat colorwork to create a festive, frameable piece or a coaster-sized panel. Worked in worsted weight yarn with clear round-by-round shaping and applique instructions, ite2bcs perfect for seasonal blankets, wall hangings or mug rugs.
Progress Tracker
0% Complete
— Ghost Applique9 (Center) :
Round 1 :
6 sc in magic ring (6)
Round 3 :
(1 sc, inc) x 6 (18)
Round 4 :
(2 sc, inc) x 6 (24)
Round 5 :
(3 sc, inc) x 6 (30)
Info :
Switch to cream/ivory if you weren't already using it. Keep tension even so the applique9 lies flat. This round reaches the face width; begin thinking about eye placement.
Round 6 :
(4 sc, inc) x 6 (36)
Round 7 :
(5 sc, inc) x 6 (42)
Round 8 :
(6 sc, inc) x 6 (48)
Round 9-11 :
1 sc in each st (48)
Info :
Place two 8mm safety eyes between rounds 10 and 11, approximately 8-10 stitches apart depending on how wide-eyed you want the ghost to look. Use stitch markers to mark eye centers before inserting eyes. If using embroidered eyes, mark with washable fabric pen.
Round 12 :
(6 sc, dec) x 6 (42)
Round 13 :
1 sc in each st (42)
Round 14 :
(5 sc, dec) x 6 (36)
Round 15 :
1 sc in each st (36)
Info :
At this stage the head of the ghost is settled. We will create the little scalloped bottom and the arms in the next rounds. Keep the piece flat; do not stuff. If you want slightly raised applique9, add a tiny amount of stuffing under the center before scalloping.
Round 16 :
(4 sc, dec) x 6 (30)
Round 17 :
(3 sc, dec) x 6 (24)
Round 18 :
(2 sc, dec) x 6 (18)
Round 19 :
(1 sc, dec) x 6 (12)
Info :
We will now build the scalloped edge for the ghost body by working around the bottom half only. To keep the ghost centrally located on the square, note which stitches form the lower 1/2 by folding the applique9 in half and marking the side points.
Round 20 :
Work across the lower 12 sts in continuous rounds for a scalloped skirt: *ch1, 3 sc in next st, sl st into next st* rep across 6 shells (36 scallop stitches effectively forming ruffles)
Round 21 :
Rotate and attach to the remaining 36 sts (the top half) by working 1 sc in each of the top 18 sts and creating scallops across the lower 12 again to create the wavy outline. Final count remains visually 48 across the edge; exact stitch count is 48 edge loops.
Round 22 :
Even the edge by working 1 sc in each st around entire applique9 (approx 48)
Info :
Use small safety eyes (8mm) and embroider a small vertical oval mouth with black yarn beneath eyes. Add two tiny pink felt or embroidered cheeks if desired. Weave ends to the back so the front remains clean.
Round 23 :
Fasten off cream, leaving long tail for sewing applique9 to the background square. If you prefer to join in place, leave tail and slip stitch into background at attachment time.
— Square Background :
Round 1 :
In black yarn, 6 sc in magic ring (6)
Round 3 :
(1 sc, inc) x 6 (18)
Round 4 :
(2 sc, inc) x 6 (24)
Round 5 :
(3 sc, inc) x 6 (30)
Round 6 :
(4 sc, inc) x 6 (36)
Round 7 :
(5 sc, inc) x 6 (42)
Round 8 :
(6 sc, inc) x 6 (48)
Info :
We will transform the circular rounds into a square framework by adding corner increases every round from here. Mark four corner points roughly 12 stitches apart on round 8 to remind yourself where to add the extra corner stitches each round.
Round 9 :
Work 1 sc in each st across, but at each corner marker work (sc, ch2, sc) to form a turn, overall adding 8 sts across the round (56)
Round 10 :
1 sc in each st (56)
Round 11 :
Add another corner increase cycle: work evenly, and at each corner work (sc, ch2, sc) in the chain space to expand the corner. Total now 64 (56+8) (64)
Round 12 :
1 sc in each st (64)
Info :
At this stage you have a round black background large enough to place the ghost applique9. Center the ghost and pin into place. We will build decorative rounds around it, including puff/cluster rounds in orange and cream.
Round 13 :
Change to orange. Work 1 sc in each st (64)
Round 14 :
Working in orange, *ch1, skip 1 st, (3 dc) in next st, skip 1 st, sc in next st* repeat around to create a ring of v-shaped clusters. Count remains 64 visible units but cluster grouping creates texture.
Round 15 :
Change to black. 1 sc in each st around (64)
Round 16 :
Change to cream. Work a round of small puff stitches to create the cream bobble ring: *yo, insert, pull up loop 3x in same st, yo and draw through all loops, ch1 to close puff, sc in next st* rep around creating 32 puff motifs (count approx 64 foundation stitches)
Info :
Puff/bobble stitches can be adjusted by using 3 or 4 loops; keep uniform. Pull yarn loops firmly but not so tight they close the puff completely; the round should be textured but lie flat.
Round 17 :
Change to orange. Work 1 sc in each st around (64)
Round 18 :
In orange, work a decorative round: *(sc, ch1, sc) in next st as a tiny picot pair, skip 1* rep around (64)
Round 19 :
Change to black. 1 sc in each st around (64)
Round 20 :
Begin corner pumpkin placement: mark four corner zones approximately at each of the four corner chain spaces. Work 1 sc in each st while keeping these four zones free for later applique attachment (64)
Info :
The black background rounds are intentionally even to create negative space for the orange and cream motifs. Use your pin placement to check symmetry: ghost center, then four pumpkin positions at the corners.
Round 21 :
Change to orange. Work a round of v-stitches to echo the inner orange round: *(dc, ch1, dc) in next st, sc in next st* around. This adds decorative petals around the ghost (64)
Round 22 :
Change to black. 1 sc in each st around (64)
Round 23 :
Change to cream. Work alternating small shell clusters around the square edge: *(2 dc, ch1, 2 dc) in next st, sc in next 2 sts* repeat to create an additional scallop (final structural count remains built on 64 foundation spaces)
Round 24 :
Change to orange. 1 sc in each st around (64)
Info :
From rounds 13-24 the counts remain based on 64 foundation locations (4 sides x 16 per side). The decorative stitches change visual texture rather than increasing major stitch counts. This helps keep the square size controllable.
Round 25 :
Work a colour pop round: With cream, *sc in next 3 sts, picot (ch2, sl st in top of last sc)* around to create small cream dots (64)
Round 26 :
Change to black. 1 sc in each st around (64)
Round 27 :
Preparing outer border: Change to orange. Work evenly around in sc (64)
Round 28 :
In orange, work 1 sc in each st BLO to create a defined ridge (64)
Info :
At this point the background and decorative rounds are complete. The next sections will create the four pumpkin applique9s, leaves and tiny flowers that attach to the black background. Work these small motifs separately and sew them in place.
— Pumpkin Applique9 (Make 4) :
Pumpkin Round 1 :
In orange, 6 sc in magic ring (6)
Pumpkin Round 2 :
6 inc (12)
Pumpkin Round 3 :
(1 sc, inc) x 6 (18)
Pumpkin Round 4 :
(2 sc, inc) x 6 (24)
Pumpkin Round 5 :
Switch to BLO and work 1 sc in each st BLO to create a ridge that gives the pumpkin a slight ribbed look (24)
Pumpkin Round 6 :
Switch to orange, *sc in next 2 sts, (3 dc cluster in next st) rep around to create 8 small plump pumpkin ribs (24)
Pumpkin Round 7 :
Work 1 sc in each st around to tidy up the ribs (24)
Pumpkin Round 8 :
Change to black. Using black yarn, embroider the jack-o-lantern face: stitch two small triangles for eyes and a jagged smile in the center of the pumpkin. Fasten off and leave tail for sewing.
Info :
The pumpkins are flat applique9 discs. Pin each pumpkin at the corner chain spaces on the black background and stitch through both layers using whip stitch or mattress stitch. Make sure the facial embroidery is centered before attaching.
Pumpkin Round 9 :
Create a tiny brown/olive stem: ch3, sl st back in 2nd ch from hook and in base; fasten off leaving tail for sewing. Attach to top of each pumpkin (approx 1-2 cm).
Pumpkin Round 10 :
Fasten off pumpkin leaving a 20-25 cm tail for sewing. Make 4 identical pumpkins and pin to corners of the square until you like the spacing.
— Leaves (Make 8) :
Leaf Round 1 :
In olive green, ch6, sc in 2nd ch from hook, hdc, dc, hdc, sc along chain; sl st into base to form leaf (5 stitches along leaf body)
Leaf Round 2 :
Rotate and sc around the opposite side of the chain for symmetry: sc, hdc, dc, hdc, sc. Fasten off leaving a sewing tail.
Info :
Sew leaves in pairs around pumpkins and in small clusters between the cream/ orange rounds. Tuck leaf stems under the pumpkin edges for a natural look.
— Tiny Flowers (Make 8) :
Flower Round 1 :
In cream or orange, ch2, 5 sc in 2nd ch from hook, sl st to join making a small rosette (5)
Flower Round 2 :
Fasten off leaving tail for sewing. Attach flowers in small gaps between scallops and pumpkins to mimic the photographed tiny clustered blossoms.
Info :
These tiny flowers are decorative and help camouflage seams. Use them to balance the composition; try 2-3 near the ghost arms and 1-2 between each pumpkin and leaf cluster.
— Ghost Face Embroidery :
Info :
Position 8mm safety eyes on the ghost if you used them earlier. If you prefer embroidered eyes, use black yarn and satin stitch small round eyes. For the mouth use vertical oval embroidered with black yarn, stitched firmly. Add tiny pink blush circles with embroidery thread or a small dab of fabric-safe paint.
— Assembly and Attachment :
Round 1 :
Pin the ghost applique9 to the center of the black square using fine-tipped pins. Ensure the scalloped skirt faces the lower side of the square oriented toward the corner pumpkins.
Round 2 :
Sew the ghost using a whipstitch with the long tail left from finishing the ghost. Use small, even stitches hidden in the cream edge; aim for 8-10 stitches per side to create a smooth join (approx 40-48 stitches total around).
Info :
Use a matching cream yarn for sewing the ghost to hide joins. Sew through back loops of the applique9 and front loops of the black background to create a neat inset look.
Round 3 :
Pin pumpkins in the four corner positions (approximately 8-10 sts from each corner point) and sew each pumpkin using the long tail left after making them. Add leaves beside each pumpkin and small flowers to fill gaps.
Round 4 :
Weave in all loose ends to the back of the square and trim. Use small backstitches to secure any embroidered faces and reinforce attachments with a dab of fabric glue on the back if desired.
— Outer Border and Rounded Corners :
Border Round 1 :
With orange yarn, pick up in any stitch at outer edge. Work 1 sc in each stitch around to produce a clean orange frame (count 64). At each corner ch2 space, work (sc, ch2, sc) to keep square corners.
Border Round 2 :
Work 1 sc in each st BLO around to create a neat ridge (64)
Border Round 3 :
For rounded corner effect, work *(sc in next 6 sts, 3 sc in corner ch2 sp)* repeat for four sides; this rounds the corners while maintaining side length. Final count will be 64 + 8 = 72 (72)
Info :
If you prefer a thicker border, repeat a textured round: *fpdc around each sc across a side, with bpdc on rows beneath corners to emphasize corner curve. Keep tension consistent.*
Border Round 4 :
Fasten off and weave in ends. Block square to final measurements by pinning to a blocking board and lightly spritzing with water, shaping the corners and smoothing puff stitches as needed.
— Finishing Touches :
Info :
Check all applique attachments and reinforce with small stitches if any loosen. Add final embroidered veins on leaves with a darker green if desired. Secure safety eyes with washers or glue if used. Give the square a final press under a damp cloth if necessary to flatten edges.
Round Final :
Enjoy your finished spooky ghost granny square. Use it as a single mug rug, sew multiples into a seasonal blanket, or frame as a piece of Halloween decor.
This Halloween granny square brings playful spooky charm to your handmade collection. The little ghost and smiling pumpkins create an instantly joyful seasonal accent youe2bll love to display! Add several squares for a festive blanket or enjoy a singular mug rug for cozy nights. 🧶🎃✨