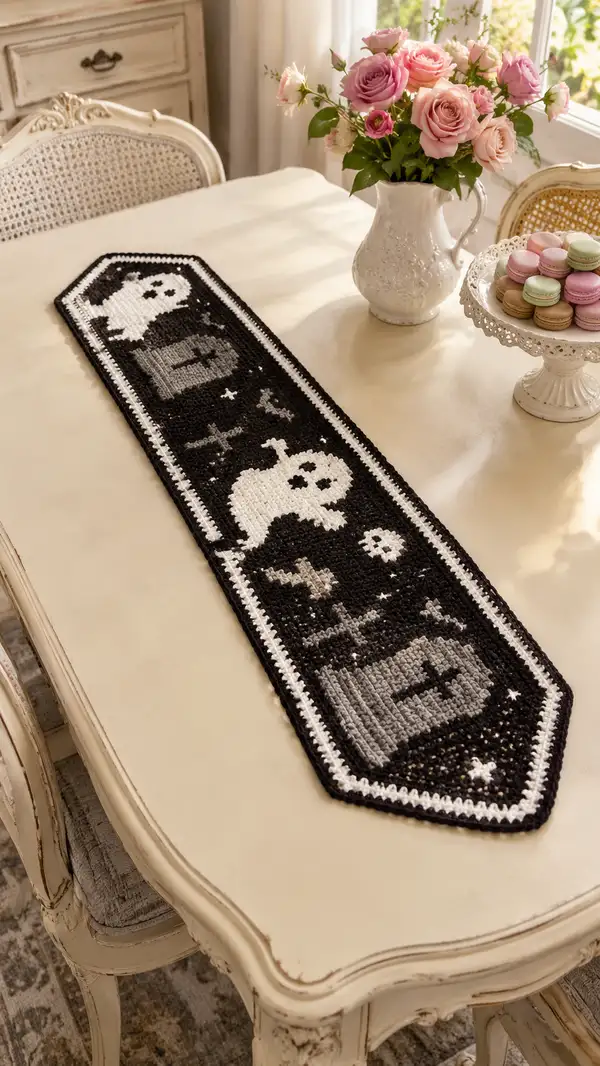
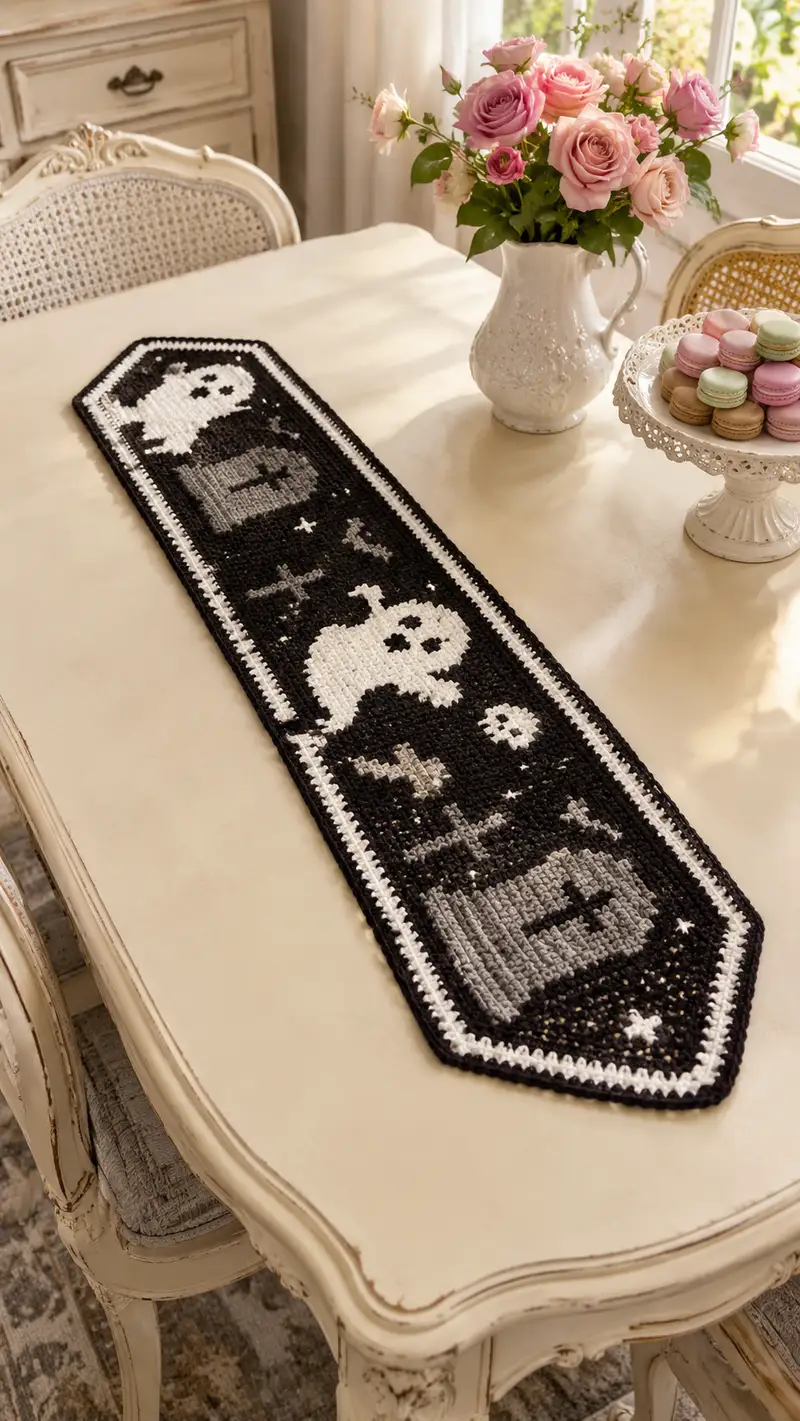
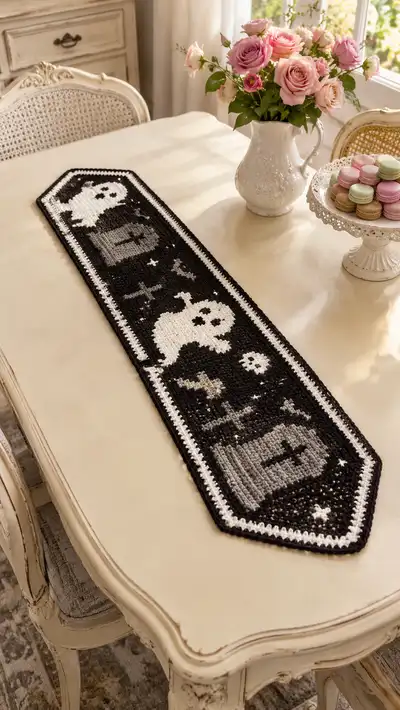
A chic Halloween table runner worked in high-contrast black, white and gray tapestry crochet. This narrow pointed-end runner features playful ghost motifs, gravestones, tiny stars and a crisp three-row border for a finished, gallery-ready look. Worked flat in single crochet colorwork, it’s perfect for seasonal decor on a dining or console table.
Progress Tracker
0% Complete
— Notes & Gauge :
Info :
This runner is worked flat in rows using tapestry colorwork (one sc per pixel). Gauge with worsted yarn and 4.0mm hook: approximately 16 sc x 18 rows = 4" (10 cm). Final measurements approximately 36" (91 cm) long x 8.5" (22 cm) wide before blocking. Adjust number of rows to lengthen or shorten as desired.
Info :
Charting method: each single crochet equals one pixel on the motif chart. I specify exact color changes in the motif zone rows; outside motif zones the background is black. Use tapestry technique: carry unused color loosely across the WS and catch every 6-8 sts or work floats and secure occasionally.
— Materials Prep :
Info :
Wind yarn into manageable center-pull balls for black, white and gray so color changes are easier. Keep color bobbins tidy. Place stitch markers at both edge stitches of the foundation chain to count width easily.
— Foundation Row & Begin Main Panel :
Row 1 :
Chain 62. (This creates 61 foundation stitches to work into.) Turn. 1 sc in 2nd ch from hook and in each ch across — 61 sc. (61)
Info :
Turning chain not counted as stitch. Mark the first stitch of each WS row if you prefer; this helps keep consistent edge shaping and color alignment.
Row 2 :
Ch 1, turn. 1 sc in each st across in black — 61 sc. (61)
Rows 3-6 :
Ch 1, turn. 1 sc in each st across in black — 61 sc. (61)
Info :
These first six rows create a stable base and register the width. Work tightly enough so that carried floats do not show through the RS. If you need a sturdier edge, work Row 6 in BLO to create a subtle ridge.
— Motif Layout & Stitch Map Overview :
Info :
The full working width is 61 sc. The motifs are centered along the length: a top ghost motif centered on the first half of the runner, a bottom ghost motif centered on the second half, and gravestones near each pointed end. Each motif is composed of white and gray pixels on a black background. Small stars (single white pixels) are sprinkled in the black field.
Info :
I will detail the motif rows from Row 7 through Row 120. Each row below lists the exact sequence of color blocks left to right across the 61 stitches using shorthand: B = black, W = white, G = medium gray. For long stretches of the same color I use repeats like (B x 12) to denote 12 black single crochets in a row. Count each pixel as one sc.
— Main Panel Motif Rows (Rows 7-120) :
Row 7 :
Ch 1, turn. Work across in color sequence: (B x 6),(W x 3),(B x 7),(G x 4),(B x 12),(G x 4),(B x 7),(W x 3),(B x 6) — 61 sc.
Info :
Row 7 begins the upper ghost motif head area. Carry colors and catch floats every 6-8 sts. Change colors by completing last yarn over of previous st with new color to avoid gaps.
Row 8 :
Ch 1, turn. (B x 5),(W x 5),(B x 6),(G x 4),(B x 12),(G x 4),(B x 6),(W x 5),(B x 5) — 61 sc.
Row 9 :
Ch 1, turn. (B x 4),(W x 7),(B x 5),(G x 4),(B x 12),(G x 4),(B x 5),(W x 7),(B x 4) — 61 sc.
Row 10 :
Ch 1, turn. (B x 4),(W x 3),(B x 2),(W x 2),(B x 4),(G x 4),(B x 12),(G x 4),(B x 4),(W x 2),(B x 2),(W x 3),(B x 4) — 61 sc.
Info :
Rows 7-10 describe the upper ghost top and eyes. If you're following a chart, plot these pixel counts. Eye placement: small black pixels (B) inside W area create the eyes—ensure the two black pixels are symmetrically spaced relative to center.
Rows 11-16 :
Ch 1, turn. Work rows 11-16 as background with ghost body shaping and gray gravestone outlines when noted: each row is 61 sc. Specifics by row: Row 11: (B x 4),(W x 8),(B x 3),(G x 4),(B x 12),(G x 4),(B x 3),(W x 8),(B x 4). Row 12: (B x 3),(W x 10),(B x 3),(G x 4),(B x 12),(G x 4),(B x 3),(W x 10),(B x 3). Row 13: (B x 3),(W x 4),(B x 2),(W x 4),(B x 3),(G x 4),(B x 12),(G x 4),(B x 3),(W x 4),(B x 2),(W x 4),(B x 3). Row 14: (B x 2),(W x 12),(B x 3),(G x 4),(B x 12),(G x 4),(B x 3),(W x 12),(B x 2). Row 15: (B x 2),(W x 10),(B x 5),(G x 4),(B x 12),(G x 4),(B x 5),(W x 10),(B x 2). Row 16: (B x 3),(W x 8),(B x 7),(G x 4),(B x 12),(G x 4),(B x 7),(W x 8),(B x 3).
Info :
Rows 11-16 fill the ghost torso and create gravestone upper shading (G). If you prefer more subtle gravestones, substitute lighter gray for G. Make sure to keep symmetry at each side of center stitch (stitch 31).
Rows 17-20 :
Ch 1, turn. Row 17: (B x 4),(W x 6),(B x 9),(G x 3),(B x 12),(G x 3),(B x 9),(W x 6),(B x 4). Row 18: (B x 5),(W x 4),(B x 10),(G x 2),(B x 12),(G x 2),(B x 10),(W x 4),(B x 5). Row 19: (B x 6),(W x 3),(B x 11),(B x 12),(B x 11),(W x 3),(B x 6). Row 20: (B x 7),(W x 2),(B x 13),(B x 13),(B x 2),(W x 2),(B x 7) — verify counts add to 61 (adjust center block to equal 61).
Info :
Rows 17-20 shift the shapes toward more solid background so ghosts read clearly; check that each row sums to 61. If your stitch count is off, recount blocks rather than individual stitches to quickly find the error.
Rows 21-30 :
Ch 1, turn. Work a run of mainly black background to create negative space between top and center motifs. Rows 21-30: each row is 61 sc of black (B x 61) — 10 rows straight. (61 each)
Info :
This black field gives breathing room and makes the second ghost motif read clearly. When working long single-color stretches, carry only one color and tuck unused colors to the side to avoid tangles.
Rows 31-36 :
Ch 1, turn. Begin bottom ghost motif top: Row 31: (B x 6),(W x 3),(B x 7),(G x 4),(B x 12),(G x 4),(B x 7),(W x 3),(B x 6). Row 32: (B x 5),(W x 5),(B x 6),(G x 4),(B x 12),(G x 4),(B x 6),(W x 5),(B x 5). Row 33: (B x 4),(W x 7),(B x 5),(G x 4),(B x 12),(G x 4),(B x 5),(W x 7),(B x 4). Row 34: (B x 4),(W x 3),(B x 2),(W x 2),(B x 4),(G x 4),(B x 12),(G x 4),(B x 4),(W x 2),(B x 2),(W x 3),(B x 4). Row 35: (B x 3),(W x 8),(B x 3),(G x 4),(B x 12),(G x 4),(B x 3),(W x 8),(B x 3). Row 36: (B x 3),(W x 10),(B x 3),(G x 4),(B x 12),(G x 4),(B x 3),(W x 10),(B x 3).
Info :
These rows mirror the top ghost motif — using symmetry reduces the need to recount. If you are charting, you can copy the chart rows for the top ghost and place them here inverted along the length.
Rows 37-44 :
Ch 1, turn. Continue shaping the ghost lower body and gravestone details using exact blocks: Row 37: (B x 3),(W x 4),(B x 2),(W x 4),(B x 3),(G x 4),(B x 12),(G x 4),(B x 3),(W x 4),(B x 2),(W x 4),(B x 3). Row 38: (B x 2),(W x 12),(B x 3),(G x 4),(B x 12),(G x 4),(B x 3),(W x 12),(B x 2). Row 39: (B x 2),(W x 10),(B x 5),(G x 4),(B x 12),(G x 4),(B x 5),(W x 10),(B x 2). Row 40: (B x 3),(W x 8),(B x 7),(G x 4),(B x 12),(G x 4),(B x 7),(W x 8),(B x 3). Rows 41-44: (B x 61) each row to create background separation under bottom motif.
Info :
Rows 37-44 finalize the bottom ghost and return to background black. At Row 41 begin reducing floats and preparing for the border area by ensuring edge black stitches are solid and neat.
Rows 45-60 :
Ch 1, turn. Work 16 rows of black (B x 61) — Rows 45 through 60 inclusive are 61 sc of black each. (61)
Info :
This long black run is the central field that gives the runner its long, skinny silhouette. If you wish the runner longer, add additional all-black rows in multiples of 2 for balance.
Rows 61-66 :
Ch 1, turn. Begin top internal border stripe: Row 61: (B x 6),(W x 3),(B x 7),(B x 38),(B x 7),(W x 3),(B x 6) — in effect this is (B x 61) but we change color placement to create subtle internal white stripe starting at Row 62. Row 62: (B x 6),(W x 49),(B x 6). Row 63: (B x 6),(W x 49),(B x 6). Row 64: (B x 61). Row 65: (B x 61). Row 66: (B x 61).
Info :
Rows 61-63 are where a thin internal white line runs close to the border for visual interest (this is optional). If you prefer a fully black field until the outer border, simply work these rows all black.
Rows 67-80 :
Ch 1, turn. Continue 14 rows of black (B x 61) — Rows 67 through 80 inclusive are solid black rows to separate motif band from pointed end shaping. (61)
Info :
At this stage the working length is approaching the distance where you will prepare to shape the first pointed end. Count how many rows you have made; my sample places 120 total main-panel rows before beginning the pointed-decrease sequence that forms the tapered tip.
Rows 81-86 :
Ch 1, turn. Work 6 rows of black (B x 61) — Rows 81-86 inclusive solid black. (61)
Info :
We will now begin the subtle taper that creates the angled point at the runner ends. The taper is made by working decreases at both edges every other row so that the center remains straight and the ends form a long, shallow point.
— Pointed End Shaping (Rows 87-120) :
Info :
Shaping method: At the start of a shaping row remove 1 st (skip the first stitch) and at the end of the row stop 1 st earlier (work to last but one stitch) then fasten off normally (or complete the row). To maintain clean edges, work the first normal row after each decrease row without decreases to allow the fabric to square up.
Row 87 :
Ch 1, turn. Decrease row: sc2tog over first two sts, 1 sc in each st across until last two sts, sc2tog — total stitches: 61 - 2 = 59 sc.
Row 88 :
Ch 1, turn. Even row: 1 sc in each of 59 sts. (59)
Row 89 :
Ch 1, turn. Decrease row: sc2tog first 2 sts, 1 sc across to last two sts, sc2tog — 57 sc.
Row 90 :
Ch 1, turn. Even row: 1 sc in each of 57 sts. (57)
Info :
Continue this decrease-every-other-row pattern to shape the point. Always work the even row in full to keep the angle smooth. Maintain any carried colors exactly in the positions they fall; if motif pixels occur in the tapered area, those pattern stitches should still follow color chart positions relative to the current stitch indices.
Rows 91-120 :
Ch 1, turn. Repeat decrease pattern: Row 91: decrease to 55, Row 92: even 55, Row 93: decrease to 53, Row 94: even 53, Row 95: decrease to 51, Row 96: even 51, Row 97: decrease to 49, Row 98: even 49, Row 99: decrease to 47, Row 100: even 47, Row 101: decrease to 45, Row 102: even 45, Row 103: decrease to 43, Row 104: even 43, Row 105: decrease to 41, Row 106: even 41, Row 107: decrease to 39, Row 108: even 39, Row 109: decrease to 37, Row 110: even 37, Row 111: decrease to 35, Row 112: even 35, Row 113: decrease to 33, Row 114: even 33, Row 115: decrease to 31, Row 116: even 31, Row 117: decrease to 29, Row 118: even 29, Row 119: decrease to 27, Row 120: even 27.
Info :
At Row 120 you should have a narrow tip width; these rows create a long shallow point when mirrored at the opposite end. Fasten off leaving a long tail for the joining seam if you intend to join pointed tips or to block them neatly. If you want a longer point, continue the same decrease sequence until desired narrowness.
— Mirror Second Pointed End (Rows 121-154) :
Info :
Turn the work and repeat the shaping in reverse to recreate the opposite pointed end unless you worked the runner in one continuous piece and have both ends pointed already. For a mirror-symmetric runner, reattach yarn at the remaining working edge and mirror the decrease sequence back to full width. Below I outline the reverse increases to return to full width 61 stitches.
Row 121 :
Ch 1, turn. Increase row: In first st work 2 sc in same st (inc), 1 sc across until last st, 2 sc in last st — 29 + 2 = 31 sc.
Row 122 :
Ch 1, turn. Even row: 1 sc in each of 31 sts. (31)
Row 123 :
Ch 1, turn. Increase row: inc at first and last st — 33 sc.
Row 124 :
Ch 1, turn. Even row: 1 sc in each of 33 sts. (33)
Info :
Continue mirroring increases every other row. This symmetry will recreate the full rectangular center with pointed ends at both sides. If you prefer to make each end identical to the sample, work exactly until you reach 61 stitches wide again.
Rows 125-154 :
Ch 1, turn. Continue increase-every-other-row sequence: Row 125: 35, Row 126: 35, Row 127: 37, Row 128: 37, Row 129: 39, Row 130: 39, Row 131: 41, Row 132: 41, Row 133: 43, Row 134: 43, Row 135: 45, Row 136: 45, Row 137: 47, Row 138: 47, Row 139: 49, Row 140: 49, Row 141: 51, Row 142: 51, Row 143: 53, Row 144: 53, Row 145: 55, Row 146: 55, Row 147: 57, Row 148: 57, Row 149: 59, Row 150: 59, Row 151: 61, Row 152: 61, Row 153: 61, Row 154: 61 (stabilize rows). Each even row is worked in full without increases.
Info :
At Row 151 you will be back to full width (61 stitches). Work three additional even rows (152-154) in black to stabilize the join and create an even surface for the border. Fasten off and weave in ends along the carried floats and color joins as you go.
— Border (Worked After Main Panel) :
Info :
I recommend adding a three-row worked border around the entire runner to give a crisp finished edge. You can either pick up stitches around the perimeter or work single crochet rows into the live edge if you left one side unfastened. For best results, use a 3.5mm hook for a slightly tighter border.
Border Round 1 :
With RS facing and white yarn, join at one corner tip. Ch 1, work 1 sc evenly around the entire perimeter placing 3 sc in each pointed corner to keep shape. Work 1 sc in each row end and 1 sc in each stitch along straight edges. The total will vary depending on gauge; keep even tension. Join with sl st to first sc.
Info :
Work evenly: place 2-3 sc at each corner tip so it lays flat. If the border ripples, adjust by adding or skipping single crochet at intervals until flat.
Border Round 2 :
Ch 1, turn. With black yarn, 1 sc in each st around, placing 2 sc in each corner stitch to create a crisp black line. Join with sl st to first sc.
Border Round 3 :
Ch 1, turn. With white yarn, 1 sc in each st around to create the outer white edge accent. Join with sl st and fasten off. Weave in ends and trim.
Info :
Optional finishing: for a more refined edge, work final round in BLO only to create a slight raised ridge or add a slip-stitch round for a subtle decorative finish. Block lightly to set border and flatten motifs.
— Finishing & Blocking :
Info :
Weave in all ends carefully on the WS. Gently wet-block the runner: pin to blocking mat or towel to the precise desired dimensions and allow to dry. Steam blocking is an alternative; do not press too hard on acrylic yarns. Blocking evens rows and makes pixel motifs sit flat.
Info :
If you plan to store the runner, fold along the long axis with acid-free tissue to avoid permanent creasing. For added stability when displayed under plates, consider a thin non-slip liner under the runner.
— Customization Notes :
Info :
To change the runner width, increase or decrease the foundation chain by multiples of 2 so center motifs remain symmetrical. To lengthen or shorten the runner, add or remove full black rows in multiples of 2 to keep motifs centered. For a different seasonal look, swap gray for orange and white for cream for an autumnal palette.
Info :
If converting charts to tapestry crochet grids, print the motif and assign one sc = one square. Mark the center stitch (31) as a reference line to place motifs equally from center.
This Spooky Ghost & Gravestone Table Runner transforms a simple table into seasonal magic with bold contrast and charming pixel motifs. The tapestry colorwork creates crisp ghosts and gravestones that read beautifully from across the table, and the pointed ends give it vintage-inspired flair. Work it as shown or customize colors for your own seasonal twist — either way it will become an instant holiday favorite on your table. 🕯️🧶