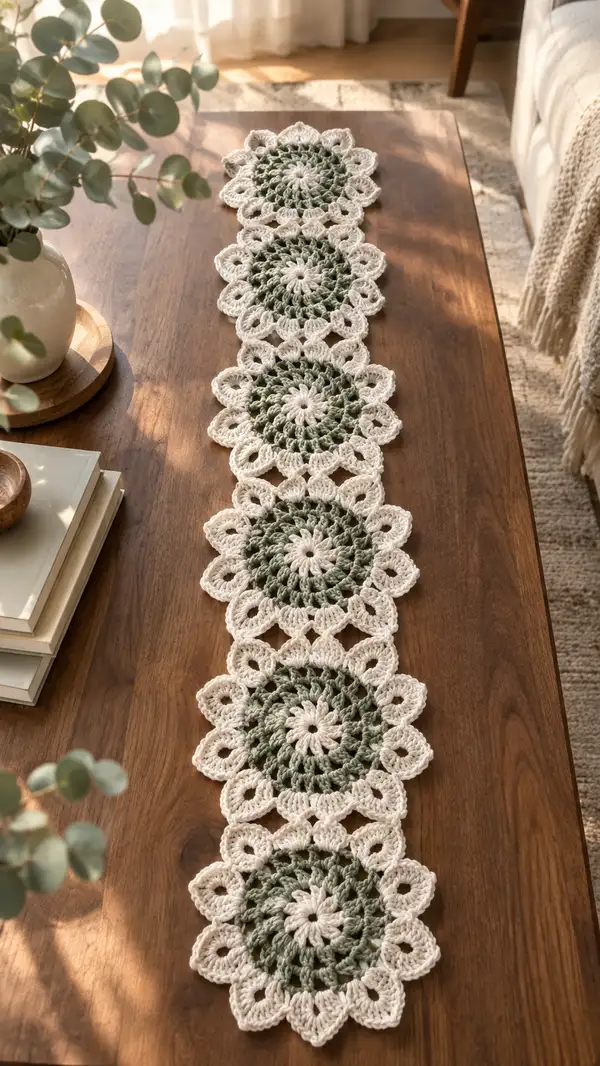
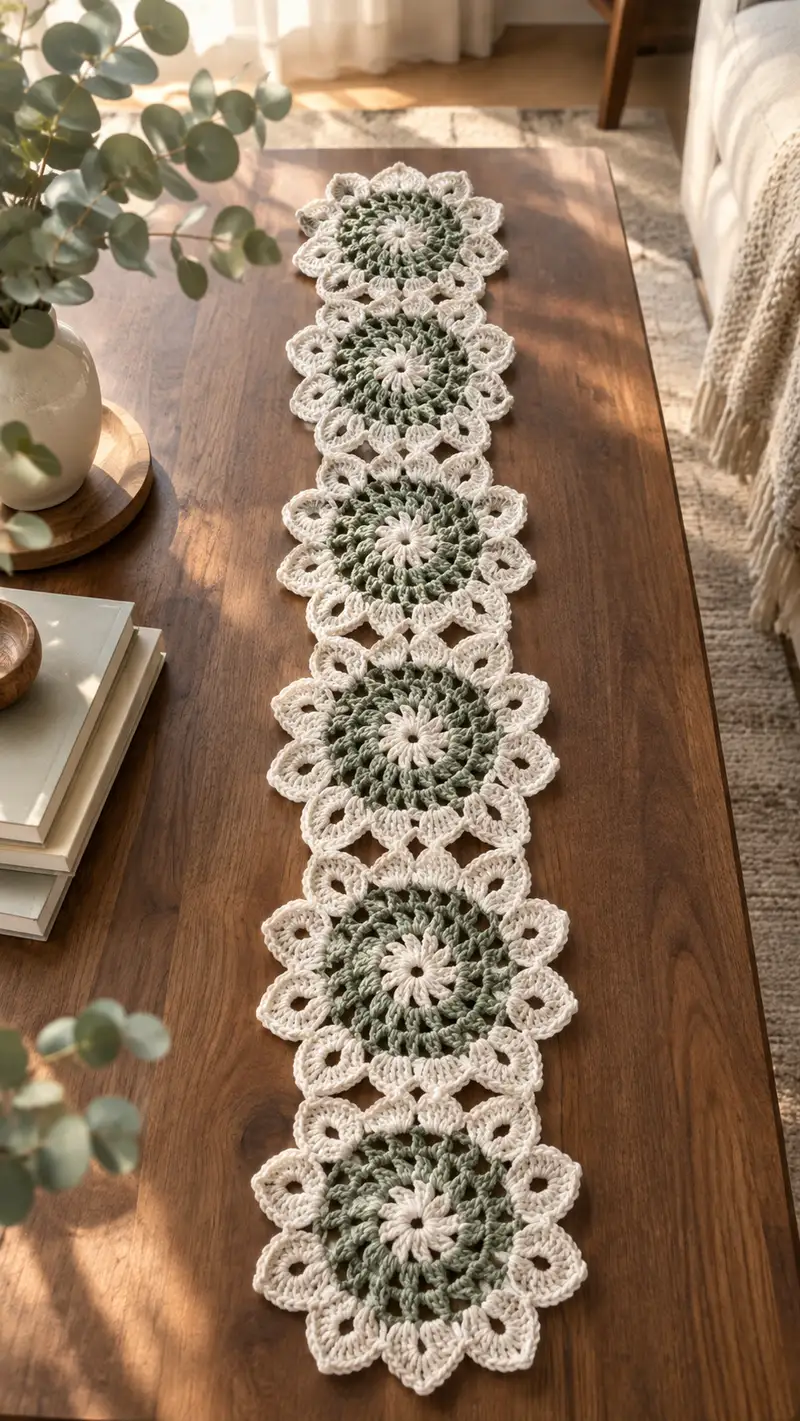
Create a beautiful sunburst lace table runner featuring five linked floral motifs in soft sage green and warm cream. This runner showcases layered circular motifs with openwork petals and delicate connecting diamonds—perfect for tabletops, dressers, or a cozy dining setup. The pattern uses basic stitches, puff/shell shaping, and strategic color changes to make an elegant, farmhouse-inspired accent. Ideal for intermediate crocheters who enjoy repetitive motif work and thoughtful finishing.
Progress Tracker
0% Complete
— Overview :
Info :
This runner is made of five identical circular motifs joined in the last round to form a continuous strip. Each motif has a cream center round, expands into sage rounds for the body, then returns to cream for the lacy petal and connector rounds. Make 5 motifs then work the joining/edging rounds to connect them horizontally. Gauge: one finished motif measures approximately 6.5-7 inches (16.5-18cm) diameter blocked. Adjust hook or yarn weight to change size.
Info :
Abbreviations used throughout: mr, ch, sc, hdc, dc, tr, pc (puff cluster), sl st, inc, sk. Use stitch markers to mark the start of each round. For clarity this pattern repeats the motif instructions for Motif 1 through Motif 5—each motif is identical. Be sure to change colors exactly where noted to achieve the pictured two-tone effect.
— Motif 1 :
Round 1 :
With cream color, make a magic ring, ch 2 (counts as first dc), 11 dc into ring (12)
Round 2 :
Working in back loops of Round 1 if you prefer a little texture: (1 dc, inc) x 6 (18)
Round 3 :
(2 dc, inc) x 6 (24)
Info :
At this point the motif center is formed. If you want a more pronounced cream center as in the photo, maintain cream for Round 4 and switch to sage for Round 5. In the pictured runner the cream center is small; we will change to sage on the next round.
Round 4 :
Change to sage green with last yarn-over of previous round, sl st to join if needed, ch 2 (counts as dc), (3 dc, inc) x 6 (30)
Round 5 :
(4 dc, inc) x 6 (36)
Round 6 :
(5 dc, inc) x 6 (42)
Round 7 :
(6 dc, inc) x 6 (48)
Round 8 :
1 dc in each stitch around (48)
Info :
Begin forming the structural base for petals. The pattern below groups stitches so that each petal will use a defined ch-3 loop created by a shell; there will be 12 petals around. Keep stitch counts accurate — 48 stitches allow 12 repeats of a 4-stitch grouping.
Round 9 :
*(Sk next 3 sts, 3 dc) in next st, ch 3, sl st in same st*; rep from * to * 11 more times (12 shells with ch-3 loops; work completes around and you will have 12 ch-3 spaces)
Info :
Change to cream yarn for the petal rounds. Join cream into the first ch-3 space with a sl st; fastening color in the chain spaces yields clean, lacy petals.
Round 10 :
With cream, join in first ch-3 sp: ch 1, (5 dc) all in same ch-3 space, sl st into base between this shell and next shell to secure; *sl st into next ch-3 space, ch 1, (5 dc) in ch-3 space, sl st into base*; rep to make 12 tall petals (12 petals)
Info :
Petals are made as clusters of 5 dc to get the fullness seen in the image. Keep stitches loose enough to allow petals to fan slightly. After completing Round 10, arrange petals with fingers and adjust tension if some flare more than others.
Round 11 :
Working behind the petals, ch 3, sl st at the base between two petals to form an arch, *ch 5, sl st into the top of next petal base; rep from * around to create decorative loop arches between petals (12 ch-5 arches)
Round 12 :
Make a decorative scallop: in each petal top work (sc in top dc, ch 2, sc in same top stitch) then sl st into next base to secure; rep around to create a neat scalloped edge (12 scallops)
Info :
Make sure to maintain even tension on ch-5 arches so they’re uniform. This round begins shaping the lacy edge visible in the photo. Block this motif flat before joining for best alignment.
Round 13 :
Edge tidy: 1 sc in each st and chain space around to secure petals and arches, work 1 sc into each ch-5 mid point to keep arches from flaring (approx 84 sc total depending on your tension)
Round 14 :
Optional decorative picot round: *hdc, ch 3, sl st in hdc just made* around working into the top of each scallop to create small picot points (12 picots)
Round 15 :
Fasten off cream, weave ends. If not joining yet, block motif flat and set aside. (No stitch count change)
Info :
Motif 1 complete. Make additional motifs following the exact same 15-round sequence for Motif 2 through Motif 5. For consistent sizing: keep the same hook and tension, and block each motif to identical diameter before joining.
— Motif 2 :
Round 1 :
With cream color, make a magic ring, ch 2 (counts as dc), 11 dc into ring (12)
Round 2 :
(1 dc, inc) x 6 (18)
Round 3 :
(2 dc, inc) x 6 (24)
Info :
Change to sage on next round as with Motif 1. Repeat all shaping, petals, arches, and scallops exactly. Keep motifs unjoined for now; blocking first helps precise joining later.
Round 4 :
Change to sage: ch 2 (counts as dc), (3 dc, inc) x 6 (30)
Round 5 :
(4 dc, inc) x 6 (36)
Round 6 :
(5 dc, inc) x 6 (42)
Round 7 :
(6 dc, inc) x 6 (48)
Round 8 :
1 dc in each st around (48)
Round 9 :
*(Sk next 3 sts, 3 dc) in next st, ch 3, sl st in same st*; rep around for 12 ch-3 spaces
Info :
Change to cream for petal formation. If you plan to join Motif 2 to Motif 1 now, align petals so the joining points correspond and plan the connector stitches described later.
Round 10 :
With cream: join into first ch-3 sp, ch 1, 5 dc in same ch-3 sp, sl st to secure; *sl st into next ch-3 sp, ch 1, 5 dc in ch-3 sp, sl st to secure*; rep around for 12 petals
Round 11 :
Ch 3 and sl st at base to form arch, *ch 5, sl st into next petal base*; rep around to make 12 ch-5 arches
Round 12 :
Make scallops: in each petal top work (sc, ch 2, sc) and sl st to next base; rep (12 scallops)
Round 13 :
1 sc in each st and chain space around to tidy (approx 84 sc)
Round 14 :
Optional picot round: *hdc, ch 3, sl st in hdc* around (12 picots)
Round 15 :
Fasten off and weave ends. Block motif flat for joining.
— Motif 3 :
Round 1 :
With cream color, make a magic ring, ch 2, 11 dc into ring (12)
Round 2 :
(1 dc, inc) x 6 (18)
Round 3 :
(2 dc, inc) x 6 (24)
Round 4 :
Change to sage: ch 2, (3 dc, inc) x 6 (30)
Round 5 :
(4 dc, inc) x 6 (36)
Round 6 :
(5 dc, inc) x 6 (42)
Round 7 :
(6 dc, inc) x 6 (48)
Round 8 :
1 dc in each st around (48)
Round 9 :
*(Sk next 3 sts, 3 dc) in next st, ch 3, sl st in same st*; rep around (12 shells)
Round 10 :
With cream: join into first ch-3 sp, ch 1, 5 dc in ch-3 sp, sl st to secure; rep around for 12 petals
Round 11 :
Ch 3, sl st into base to create a small arch, *ch 5, sl st into next base*; rep around (12 arches)
Round 12 :
Scallops: in each petal top work (sc, ch 2, sc), sl st to next base; rep around (12 scallops)
Round 13 :
1 sc in each st and chain space around to finish edge (approx 84 sc depending on tension)
Round 14 :
Optional picot: *hdc, ch 3, sl st in hdc* around (12 picots)
Round 15 :
Fasten off and weave ends. Block before joining.
— Motif 4 :
Round 1 :
With cream color, make a magic ring, ch 2, 11 dc (12)
Round 2 :
(1 dc, inc) x 6 (18)
Round 3 :
(2 dc, inc) x 6 (24)
Round 4 :
Change to sage: ch 2, (3 dc, inc) x 6 (30)
Round 5 :
(4 dc, inc) x 6 (36)
Round 6 :
(5 dc, inc) x 6 (42)
Round 7 :
(6 dc, inc) x 6 (48)
Round 8 :
1 dc in each st around (48)
Round 9 :
*(Sk 3, 3 dc) in next st, ch 3, sl st in same st*; rep around (12 shells)
Round 10 :
With cream: join into first ch-3 sp, ch 1, 5 dc in same space, sl st to secure; rep for 12 petals
Round 11 :
Ch 3, sl st to base, *ch 5, sl st into next base*; rep around for 12 ch-5 arches
Round 12 :
Scallops: (sc, ch 2, sc) in top of each petal; sl st to next base; rep (12 scallops)
Round 13 :
1 sc in each st and chain space around (tidy edge)
Round 14 :
Optional picot round for decorative points (hdc, ch 3, sl st in hdc) around
Round 15 :
Fasten off and weave ends. Block flat for joining.
— Motif 5 :
Round 1 :
With cream color, make a magic ring, ch 2, 11 dc in ring (12)
Round 2 :
(1 dc, inc) x 6 (18)
Round 3 :
(2 dc, inc) x 6 (24)
Round 4 :
Change to sage: ch 2, (3 dc, inc) x 6 (30)
Round 5 :
(4 dc, inc) x 6 (36)
Round 6 :
(5 dc, inc) x 6 (42)
Round 7 :
(6 dc, inc) x 6 (48)
Round 8 :
1 dc in each st around (48)
Round 9 :
*(Sk next 3 sts, 3 dc) in next st, ch 3, sl st in same st*; rep 12 times to create ch-3 spaces
Round 10 :
With cream: join into first ch-3 sp, ch 1, 5 dc all in ch-3 sp, sl st to secure; rep around for 12 petals
Round 11 :
Ch 3 and sl st to base to form arch, *ch 5, sl st into next base*; rep (12 arches)
Round 12 :
Scallops on each petal top: (sc, ch 2, sc), sl st to next base; rep around
Round 13 :
1 sc in each st and chain space around to tidy edge
Round 14 :
Optional picot round if desired, then fasten off and weave ends. Block motif flat.
Info :
You now have five blocked motifs. Before joining: lay motifs face-up in a straight line, aligning petals and arches so joins fall at even points. The pictured runner uses joining points at three connectors across each motif pair: two small ch loops and one central arch forming a diamond-shaped connector. We will join motifs as we work the joining round.
— Joining Motifs (Make connections between Motif 1 + 2, then 2 + 3, etc.) :
Info :
Joining is worked with cream yarn to match outer petals. Use pins to align two motifs with petals slightly overlapping at connection points. We join through edges by slip-stitching into petal bases and chain arch midpoints to form diamond connectors that match the photo's openwork. Work left-to-right or right-to-left consistently.
Round 1 :
With cream yarn and right-side up, place Motif A and Motif B aligned. Start at the outer edge of Motif A at a chosen petal base. Sl st into the base, ch 1, *sc in next small space, ch 3, sl st in the corresponding ch-5 arch of Motif B (pull B close); continue across the three planned connection points so that you form a small diamond of chains linking two petals together.* Repeat for each connector point between the two motifs (3 connectors total)
Round 2 :
Work 1 sc around the diamond connectors on both motifs for stability: into each chain loop made previously work (sc, ch 2, sc) and anchor into both motifs with sl st where needed. This builds a small, neat diamond-shaped bridge between motifs.
Info :
This joining is symmetrical: between each pair of adjacent motifs you will make three diamond connectors spaced evenly—one near the top, one near the middle, and one lower—creating the stacked diamond lace seen in the photo. Pin motifs carefully and count stitches to place connectors evenly (aim for 3 connectors per pair).
Round 3 :
After making initial connectors for all motif pairs (four joins connecting five motifs), go back with cream yarn and round the entire runner's seam area with 1 sc across all sl st joins and in any ch spaces to tidy the joins. Work neat sc into stitches of both motifs where appropriate to flatten join seams (approx 8-10 sc per connector area).
Round 4 :
Work a stabilizing round: 1 hdc in each sc and space along the connected edges to ensure the joins are sturdy (this helps prevent sagging when the runner is laid out). Fasten off and weave ends when all connectors are secured.
Info :
At this point the five motifs should be joined into a continuous strip with decorative diamond connectors. Lay the runner flat to check spacing and tweak any connector tension so the runner lays straight and flat.
— Outer Edging and Final Border :
Round 1 :
With cream yarn, join at one end of the runner and work a tidy sc edging around the entire outer perimeter of the runner: 1 sc in each outer stitch and 2 sc in wider chain spaces to keep the edge flat. Work evenly—this round ties together outer petal edges (approx 300-360 sc depending on joins and tension)
Info :
When you reach the spaces between motifs (the diamond connectors), work 1 sc into each chain and 2 sc where the join is wide to preserve shape. Keep counts flexible—focus on even spacing and flatness rather than an exact number.
Round 2 :
Decorative shell border: *sk 2 sc, 5 dc in next sc, sk 2 sc, sl st in next sc; rep around* to create small shells scalloping the outer petals and connector edges. Adjust by skipping fewer or more sc if shells sit awkwardly. Fasten off and weave ends.
Round 3 :
Optional finishing row for extra definition: Join sage yarn and work 1 sc in each sc around the entire runner to add a faint colored line between petals and border. This can be skipped if you prefer an all-cream edge.
Info :
Final blocking: lightly steam or wet block the assembled runner to ensure motifs and connectors are flat and even. Pin outer scallops into position to emphasize petal points and maintain shape while drying.
— Finishing Touches :
Info :
Weave in all ends securely on the back side of the runner. Trim excess tails. If the runner will be used frequently, consider securing joins with a small dab of fabric glue under join points and then weaving the glue-treated tail into the join for added stability. Store flat to maintain shape.
Round 1 :
Care note: machine wash gentle in a mesh bag with cold water if yarn label allows; reshape while damp and lay flat to dry. Avoid tumble drying to preserve lace structure.
Completing this sunburst lace runner is a delightful mix of rhythmic stitch repetition and crisp finishing techniques. Each motif becomes a small celebration of petals and openwork, and joining them into a stripe transforms them into a graceful table accent. The blocking step truly brings the lace to life—pin those petals, steam lightly, and watch the runner settle into place. 🧶 The end result is a cozy, elegant piece that invites compliments and becomes a favorite table centerpiece. Enjoy every stitch and don't forget to share your finished piece! ✨