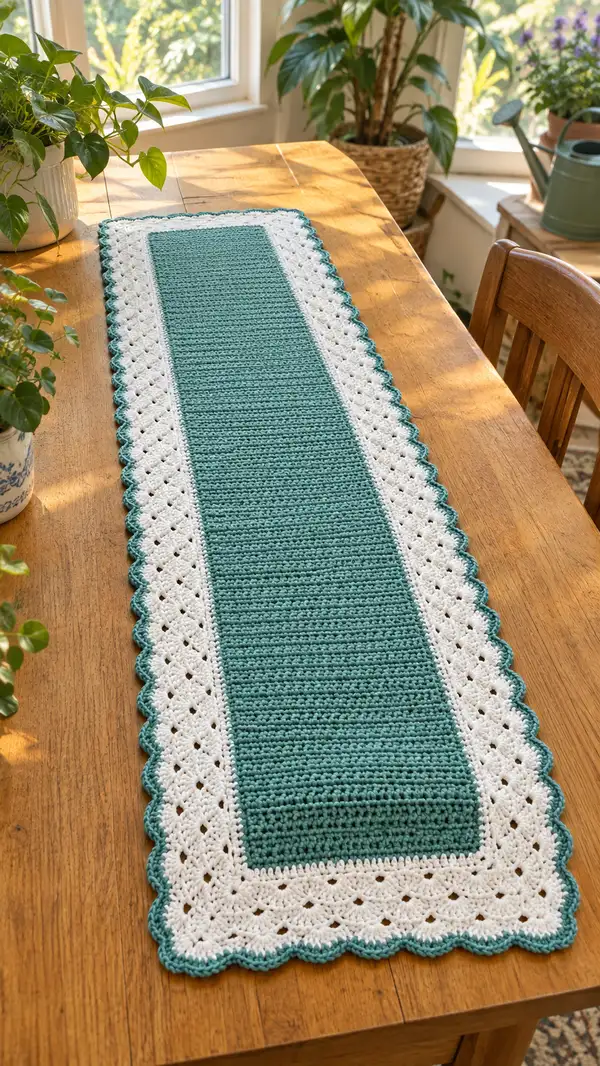
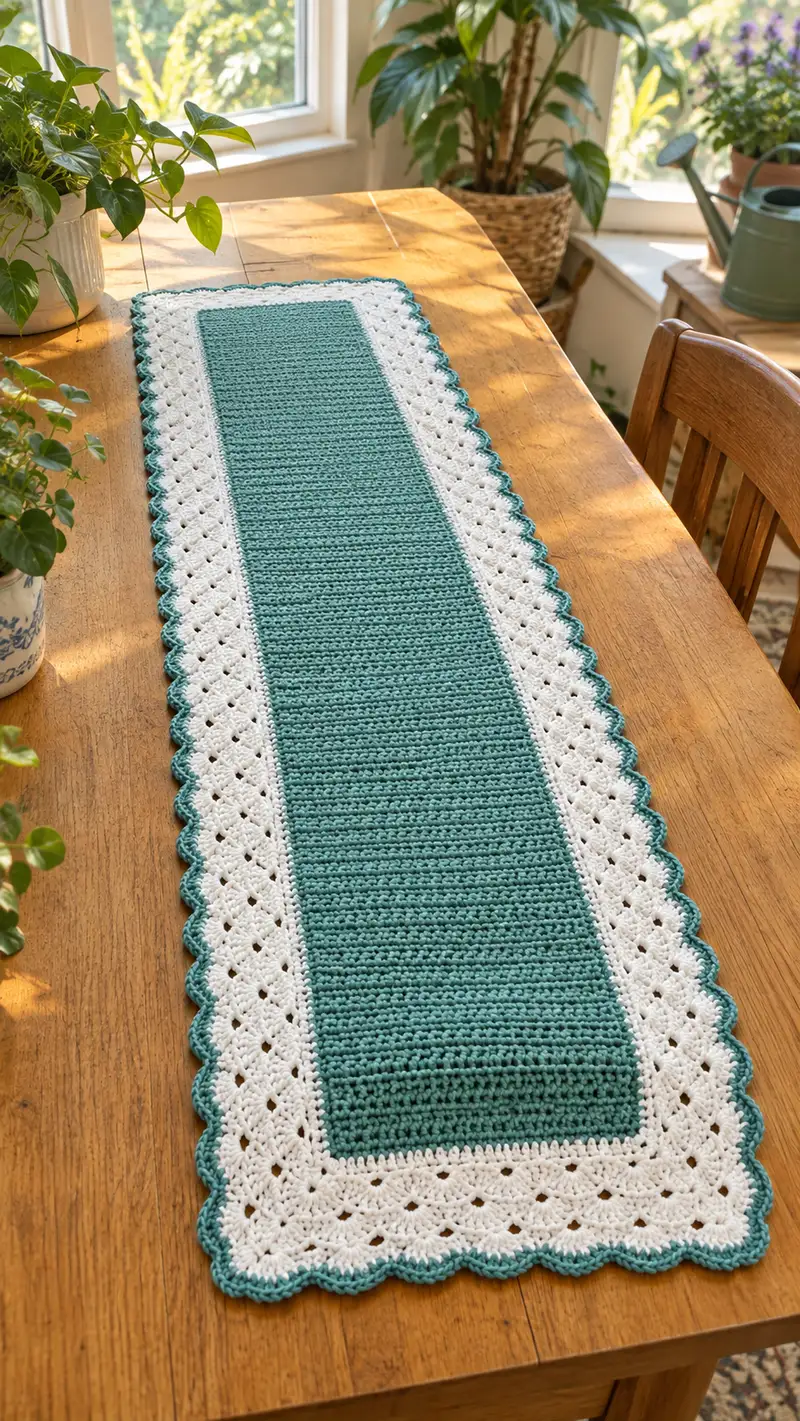
A timeless rectangular table runner with a solid teal center panel, airy white lace border, and a teal scalloped edging. Worked flat for the main panel and finished with rounds of lacy shell stitches and a neat scallop, this runner brings a handmade, cottage-chic charm to any table. Clear step-by-step instructions and helpful notes guide you from foundation chain to blocking and finishing.
Progress Tracker
0% Complete
— Materials & Gauge :
Info :
Gauge: 16 sc and 20 rows = 10 cm (4 in) in single crochet using recommended yarn and 4.0mm hook. Adjust hook size to match gauge. Finished sample measures approximately 120 cm (47") long x 25 cm (9.75") wide; adjust foundation chain or number of rows for preferred size.
— Notes Before You Begin :
Info :
This pattern is worked in two parts: a flat center panel worked in rows (teal) and a border worked in rounds (white) with an outer scalloped edge in teal. The center is worked on a foundation chain. When joining to work the border, all four corners receive 3 sc to maintain a square corner. Use stitch markers to mark the corner stitches and every 10th stitch while working the edge rounds for even spacing.
— Center Panel (Teal) - Worked Flat in Rows :
Round 1 :
Make foundation chain of 101 chains (this yields 100 working stitches across). Foundation chain count: 101.
Round 2 :
Row 1 (RS): Sc in 2nd ch from hook and in each ch across. Turn. (100 sc)
Round 3 :
Row 2 (WS): Ch 1, sc in each st across. Turn. (100 sc)
Round 4-9 :
Rows 3-8: Repeat Row 2. Keep tension even. (100 sc)
Info :
Use a stitch marker in the first stitch of each row (the stitch after the turning chain) to mark the row start and maintain even edges. Check width after 8 rows against gauge.
Round 10-19 :
Rows 9-18: Continue repeating Row 2. Keep edges tidy by slipping the last stitch tightly if you prefer a cleaner edge. (100 sc)
Round 20 :
Row 19: Ch 1, sc in each st across. Turn. (100 sc)
Round 21-29 :
Rows 20-28: Repeat Row 19. Keep checking that edges remain 100 sc wide. (100 sc)
Info :
If you prefer a reversible runner, try to keep your edge stitches symmetrical: sc the first and last stitch of every row through both loops for a firm edge that looks similar on both sides.
Round 30-39 :
Rows 29-38: Continue working sc rows, maintaining consistent tension. (100 sc)
Round 40 :
Row 39: Ch 1, sc in each st across. Turn. (100 sc)
Round 41-49 :
Rows 40-48: Continue Row 40 pattern. (100 sc)
Info :
Measure the runner as you work. For the sample runner length of approximately 120 cm, work 80 rows total in the center panel. To shorten or lengthen, adjust the total number of rows in multiples of 1; every 10 rows is roughly 10-12 cm depending on yarn tension.
Round 50-59 :
Rows 49-58: Continue Row pattern keeping the 100 sc across. (100 sc)
Round 60-69 :
Rows 59-68: Continue Row pattern. (100 sc)
Round 70-79 :
Rows 69-78: Continue Row pattern. (100 sc)
Round 80 :
Row 79: Ch 1, sc across last row. Do not fasten off. Align ends so RS faces outwards. (100 sc)
Info :
Center total rows in sample: 80 rows (including Row 1). Final measurement should be approx 120 cm by 25 cm; adjust rows to reach your desired length. Leave the working loop on the hook with RS facing up to join for border in white.
— Border Join & First Rounds (White) :
Round 81 :
Border Round 1 (Join): Join White yarn with slip stitch to the top-right corner stitch (or any corner you choose). Ch 1 (does not count as st), 3 sc into same corner stitch to form corner group. Working down the long side: work 1 sc into each row-end (these are the 80 row-ends on the side) until you reach the bottom corner. Work 3 sc in corner stitch. Along the bottom edge, work 1 sc into each of the 100 stitches across the bottom edge. Work 3 sc in corner stitch. Up the other long side, work 1 sc into each row-end (80). Work 3 sc in final corner, then work 1 sc into each of the remaining top edge stitches across (100) to meet the beginning. Join with sl st to first sc. Total approximate sc = 360 base perimeter + 8 extra corner sc = 368 sc. (368 sc)
Info :
Count carefully: top edge = 100, right side = 80, bottom edge = 100, left side = 80 = 360. Corner extras: placing 3 sc in each corner adds 2 extra sc per corner compared to a single sc, so +8 extras = 368 for the first round. Place markers into corner 3-sc groups to identify corners for shell placement in later rounds.
Round 82 :
Border Round 2: Ch 1, sc in each st around, placing 3 sc in each corner group (work into the center sc of the 3-sc corner group from previous round). Join with sl st to first sc. (368 sc)
Round 83 :
Border Round 3: Ch 1, sc in each st around working evenly. Start to ease the fabric so border sits flat; place an extra sc in any stitch that causes a dip or gap (additions should be balanced on opposite side to maintain shape). Join with sl st. (368 +/- adjustments)
Info :
If you find the border pulling in, add 2-4 evenly spaced increases along long sides on this round (e.g., (sc in next 10 sts, 2 sc in next st) repeat as needed) - aim to keep increases symmetrical so total remains even for later shell repeats.
Round 84 :
Border Round 4: Ch 1, sc in each st around. Place stitch markers at the midpoint of each long side and at corner centers to help count repeats for the shell round that follows. Join with sl st. (same count)
Round 85-87 :
Rounds 5-7: Work 3 rounds of sc around in white to build a base for the shell motif. Keep corners as 3 sc clusters. Join each round with sl st. (368 sc)
Info :
These rounds create an even, solid frame for the lacy shells. Stuffing is not used in this project; however, blocking later will open the shell pattern. Be mindful of tension: keep border rounds slightly looser than center if you notice curling.
— Lace Shell Border (White) :
Round 88 :
Shell Round 1: Ch 2 (counts as hdc), *sk next 2 sts, (dc, ch 1, dc) in next st (shell made), sk next 2 sts, hdc in next st; rep from * around, working shells centered across the long and short sides. In corners work (dc, ch1, dc) into the corner center and follow with hdc placement to keep shells sitting flat. Join with sl st to top of ch-2. Approx shell groups: 92 shells around (depends on adjustments). (pattern depends on spacing)
Info :
Shell spacing is critical for an even look. Aim for shells to be spaced evenly around the perimeter: if necessary, adjust by moving one sc earlier/later at corners to keep a consistent rhythm. Count shell groups and redistribute if you see two shells clustering.
Round 89 :
Shell Round 2: Ch 1, sc in first st, *5 dc in ch-1 space of each shell below, sc in next hdc (or in between shells) to anchor; rep from * around. In corners, work 5 dc into the corner ch-1 space and sc in adjacent anchor point. Join with sl st. This round builds high shells. (same number of anchor points as shells)
Round 90 :
Shell Round 3: Ch 1, sc in each st around to unify shell bases: sc in each dc across shells and sc between shells. Join with sl st. This evens the shells and prepares for open lacy row. (total stitches equals number of stitches used to anchor shells)
Info :
After building shells, take time to shape each shell with fingers so they sit flat. If the long sides are slightly longer due to shell volume, consider a balancing round of sc that reduces by a few evenly spaced sc's to prevent excessive flaring.
Round 91 :
Open Lace Round 4: Change to a lacy filet-style round in white: *ch 3, sk 3 sts, sc in next st* around to create small eyelet spaces between shells. In corners make ch-3 spaces centered in corner shells to maintain the pattern. Join with sl st. (count dependent on shell spacing)
Round 92 :
Lace Round 5: Ch 1, sc in each st and sc in each ch-3 space across to reinforce the lace pattern; where there are ch-3 spaces, work (sc, ch 3, sc) to keep openness. Join with sl st. (stitch count increased by the ch-3 closures)
Info :
The combination of solid sc rounds and taller shells gives a framed lace look: if your shells look too tall, you can replace the 5 dc shell with 3 dc and keep pattern consistent — just make sure repeats are evenly spaced for symmetry.
Round 93-95 :
Rounds 6-8: Repeat Shell Round 2, Shell Round 3, and an even sc round to stabilize. Aim to have two tiers of shells if you want a chunkier lace; if you prefer a single delicate shell, use just one shell tier and two sc rounds. (count varies)
Round 96 :
Anchor Round: Ch 1, sc in each st around, taking care to sc evenly across the sides and to place 3 sc in corner shells to preserve shape. Join with sl st. This gives a firm base for the outer scallop. (approx 368 sc or adjusted count)
Info :
Before changing color for scallops, ensure your lace sits flat. Pin the runner to a blocking surface and steam lightly or spritz with water and pin to shape; allow to dry and then proceed with scalloped edge for best results.
— Outer Scalloped Edge (Teal) :
Round 97 :
Change to Teal yarn: Join teal with sl st in any anchor sc of Anchor Round. Ch 1, sc in same st, *ch 2, sk next 2 sts, sc in next st* around to create small loops that will be base for scallops. Join with sl st. Total loops approx 92 (depends on perimeter adjustments).
Round 98 :
Scallop Round 1: Ch 1, *in each ch-2 loop work (sc, hdc, 3 dc, hdc, sc) to create a full scallop; sl st in next base sc to anchor; rep from * around until you reach the beginning. Join with sl st to first sc. Total scallops = number of ch-2 loops (approx 92).
Info :
The (sc, hdc, 3 dc, hdc, sc) shell forms a classic rounded scallop. If you want larger scallops, increase the number of dc (e.g., 5 dc center) but then you may need fewer loops; ensure scallops are evenly spaced by counting and adjusting every 10 scallops if needed.
Round 99 :
Scallop Round 2: Ch 1, sc in each st around to tidy the back loops of scallops and give a neat finish; in corners add an extra sc in the seam for reinforcement. Join with sl st. (count equals number of stitches formed by scallops)
Round 100 :
Finishing Round: Fasten off leaving an 18 cm tail for weaving. Using a yarn needle, weave the tail into the back of the last round for 6-8 stitches, then trim close. Make sure all joins are secure and ends are woven to the inside/back of the runner to avoid visible tails.
Info :
After finishing, wet-block the runner for best results: pin it to the exact rectangular dimensions you want, spread shells evenly, and allow to dry completely. This sets scallops and centers the lace around the runner.
— Optional Variations & Adjustments :
Round 101 :
Variation 1: Wider Runner - To create a wider runner, increase foundation chain in multiples of 10 and add rows in multiples of 10 to maintain proportion. Adjust shell spacing proportionally by adding more shells along each long side.
Round 102 :
Variation 2: Two-Color Shell - For a two-tone border, work the first shell tier in white and join a contrasting color to work the second shell tier and scallop in a second color (tie and weave ends neatly).
Round 103 :
Variation 3: Reversible look - If you want the runner to be reversible, work center rows in half double crochet (hdc) for a similar look on both sides and keep border sc rounds symmetrical.
Info :
When changing color between rounds, finish the last st of the previous round by pulling through the new color at the last yarn over to minimize ends. Carry color inside the work for short stretches or fasten off for long runs to keep back neat.
— Final Checks & Blocking :
Round 104 :
Blocking: Lay runner flat, pin to desired rectangular shape, spacing scallops evenly. Lightly mist with water or use steam; do not press shells flat with iron. Allow to dry fully. Remove pins and check for any loose tails to weave in.
Round 105 :
Care Instructions: Hand wash cold or gentle machine wash in a mesh bag on delicate cycle. Reshape while damp and dry flat. Avoid heavy detergents and bleach to maintain color vibrancy.
Info :
Optional: Add a small non-slip felt backing to the underside center for use on highly polished surfaces if runner will be regularly moved or used with centerpieces that slide.
This table runner brings warmth and handmade charm to your dining space with its tidy teal center and airy white lace border. Blocking and finishing will give the scallops a beautiful, professional look. I hope this pattern becomes a favorite seasonal accent or a thoughtful handmade gift! 🧶🌿