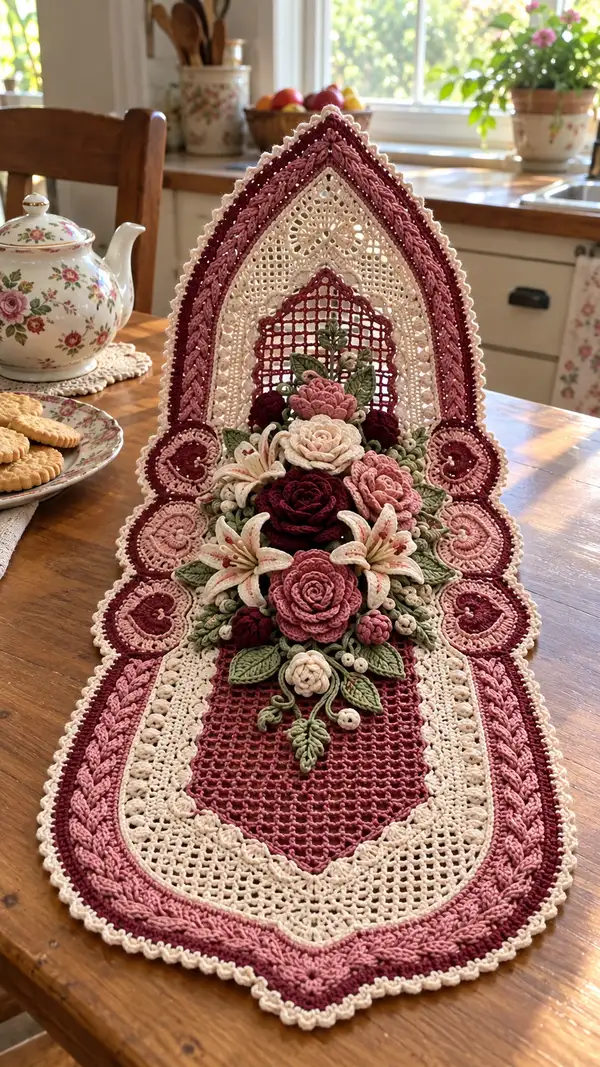
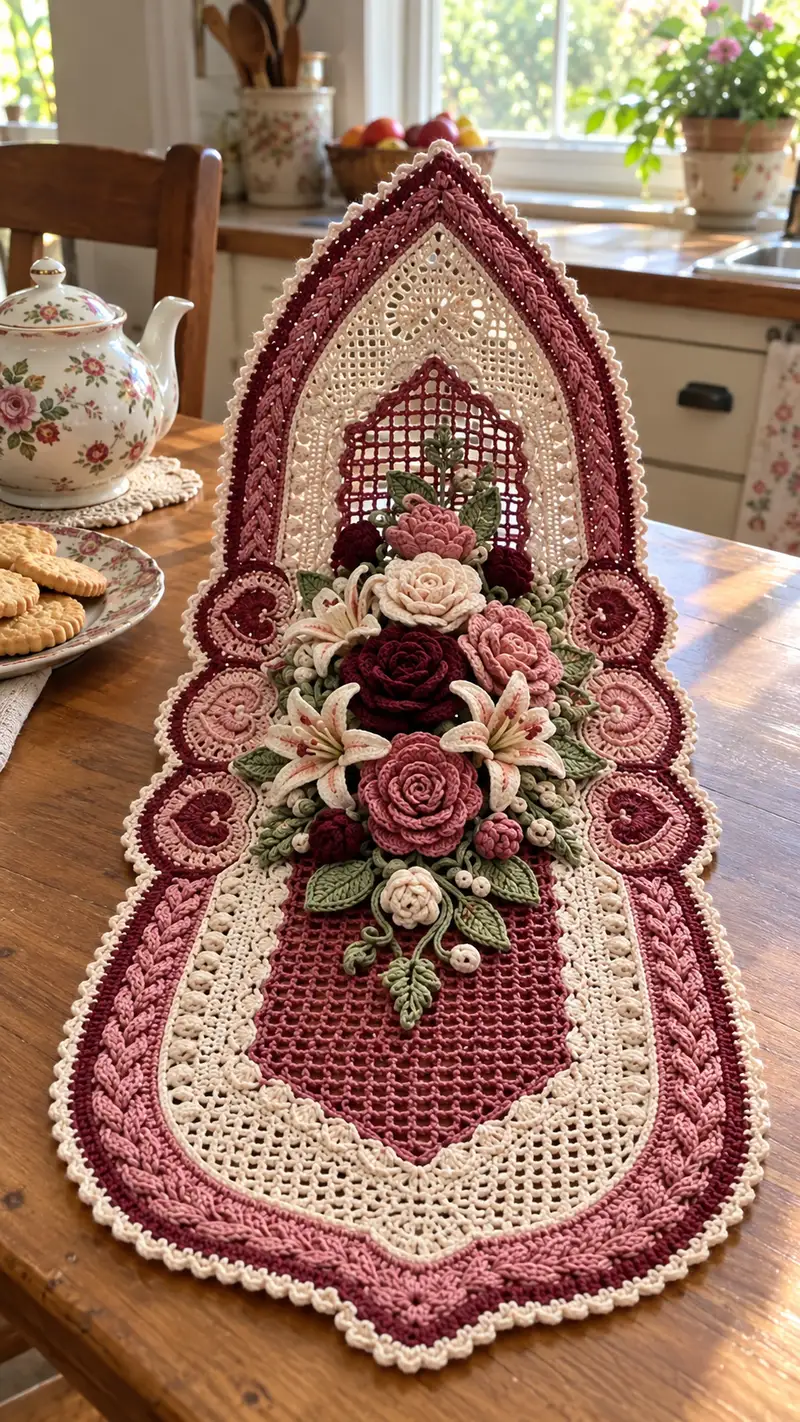
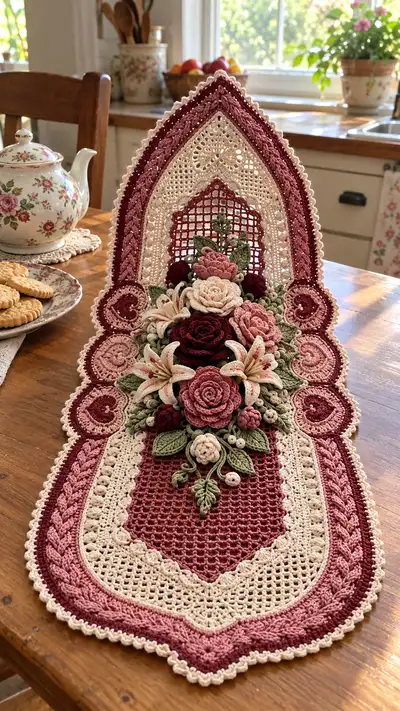
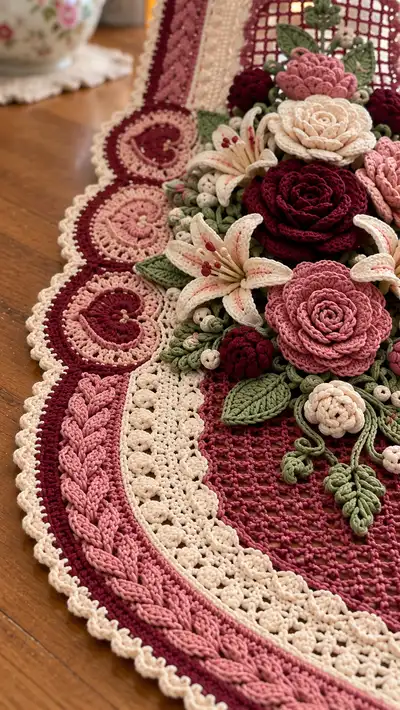
A romantic, cathedral-style crochet table runner featuring an upright lace arch and a lush 3D bouquet of roses, lilies, buds and leaves. Worked in warm cream, dusty pink, deep burgundy and soft sage green, the piece combines filet mesh, braided panels and scalloped edging for a layered, heirloom look. Perfect for a dining table centerpiece, mantel or special occasion display, this pattern gives step-by-step instructions to recreate each floral and lace element.
Progress Tracker
0% Complete
— Overview :
Info :
This runner is worked in three main components: the lower oval base (flat), the tall cathedral arch panel (vertical, shaped and blocked), and the 3D floral appliques. The base and arch are worked separately then joined; many decorative rounds are joined using slip-stitch or whip-stitch. Work tightly so the motifs hold their shape. Use the 3.0mm hook for most sections and the 2.5mm hook for tight flowers and small buds.
Info :
Throughout this pattern rounds for flat panels are worked continuously in the round. Use a stitch marker to mark the beginning of each round and move it up as you go. Info sections provide guidance for color changes, blocking and assembly; read them carefully before continuing.
— Lower Oval Base (make 1) :
Round 1 :
Ch 30, join with sl st to form a ring (do not twist). Ch1, 28 sc across foundation chain, 3 sc in last ch, rotate and sc 28 along opposite side of chain, 3 sc in the first ch; join with sl st to first sc (70)
Info :
Chain foundation creates an elongated oval. Count carefully at each round – increases occur at both chain ends (3 sc clusters) to maintain the oval shape.
Round 2 :
Ch1, 1 sc in same st, sc 11, (sc, inc) in next st, sc 12, (sc, inc) at corner, sc 12, (sc, inc) at corner, sc 11, (sc, inc) at corner, join (86)
Round 3 :
Ch1, 1 sc in same st, sc 13, (2 sc, inc) x 4 across each quarter point, sc remaining; join (102)
Round 4 :
Ch1, sc in each st around (102)
Round 5 :
Ch2 (counts as hdc), hdc in next 4 sts, (hdc, inc) at each of the four rounded ends to add gentle fullness, hdc remaining; join (110)
Round 6 :
Ch1, sc in each st around working in BLO for subtle ridge (110)
Info :
Change to deep burgundy for inner central panel on next round. Carry cream inside if you plan to alternate later; otherwise, fasten off and rejoin color.
Round 7 :
Join burgundy with sl st, ch2, (1 hdc, ch1, sk1) across central length to create filet mesh foundation across the oval center: work into each of the next 40 sts (mesh width) then continue sc/hdc around ends to maintain shape (110)
Round 8-14 :
Filet mesh section: ch2, *hdc, ch1, sk1* repeat across the central panel rows for 7 rounds total to build height (110)
Info :
Keep mesh tension even; this will become the platform that supports the bouquet. If your mesh is loose, the bouquet may sag. Block mesh flat after completing base.
Round 15 :
Change to cream. Ch1, sc in each st around working a scallop pattern at outer perimeter: *sc 3 in next st, sk1, sc in next 5* repeat evenly to create small scallops (110)
Round 16 :
Ch1, sc in each st around (110)
Round 17 :
Ch1, *sc in next 8, (fpdc, bpdc, fpdc) over next 3 sts* repeat to form cable-braid suggestion along inner band; sc remaining (110)
Round 18-20 :
Alternate rounds of sc around and a textured round: Round 18: sc around (110). Round 19: work 1 sc BLO in each st (110). Round 20: sc around (110)
Info :
These rounds form the inner decorative band that frames the mesh. You can substitute any braided stitch you prefer; FPDC/BPDC creates raised ribs that look like a woven braid when worked in sequence.
Round 21 :
Change to dusty rose. Sc around creating small picot edging where indicated every 6 sts: *sc5, (ch3, sl st into 1st ch as picot), sc1* repeat (110)
Round 22 :
Switch to burgundy. Ch1, 1 sc in same, sc around adding a decorative oval shoulder: on each long side work 3 sc, (hdc, 2 dc in same st, hdc) in every 22nd st to form raised rounded motifs (110)
Round 23 :
Ch1, sc around (110)
Info :
Fasten off burgundy and block the base shape flat. Leave a long tail in the center-top region for attaching the upright arch later.
— Tall Cathedral Arch Panel (make 1) :
Round 1 :
With cream, ch 22, join with sl st to make a ring; ch1, 22 sc into ring (22)
Round 2 :
Ch1, (sc, inc) x 11 (33)
Round 3 :
Ch1, (2 sc, inc) x 11 (44)
Round 4 :
Ch1, sc around (44)
Round 5 :
Ch2, hdc in each st around (44)
Info :
The arch is shaped by alternating increases and a long point at the top. We will elongate the panel upward by working longer even rounds and then creating the pointed tip with decreases and shaped rounds.
Round 6 :
Change to burgundy. Ch1; sc around in BLO to create a subtle ridge (44)
Round 7 :
Ch2, *1 dc, ch1, sk1* across central length to begin filet mesh for the arch inner window; at the curved sides continue hdc/sc to maintain shape (44)
Round 8-18 :
Continue filet mesh in burgundy for 11 rounds total across the central arch (work 11 mesh rows). Maintain 44 sts around; the sides remain solid with sc to keep structure (44)
Info :
Place a temporary cardboard form behind the arch while blocking to achieve the pointed cathedral shape. Wet-block the panel after the mesh is complete and pin to shape, allowing to dry thoroughly.
Round 19 :
Change to cream. Ch1, sc around adding a decorative crocheted window-lace motif: *(ch3, sk1, sc) repeat across central mesh intersections* to form a lacy lattice (44)
Round 20 :
Ch1, sc in each st around (44)
Round 21 :
Ch1, (2 sc, dec) x 11 to begin forming the pointed top (33)
Round 22 :
Ch1, (1 sc, dec) x 11 (22)
Info :
Work decreases gradually until the arch tapers to a pointed tip then reverse with increases to form a decorative raised frame. Begin stuffing the lower edge slightly with thin batting for rigidity, or stiffen with light fabric stiffener if you want a freestanding upright arch.
Round 23 :
Ch1, sc around keeping stitches even; if working point, place two partial sc in the tip to keep curve (22)
Round 24 :
Change to dusty pink. Ch1, work one round of fpdc, bpdc alternating around the outside to create a raised braided frame (22)
Round 25 :
Ch1, sc around in cream; add picot edging at the uppermost tip for a delicate finish (22)
Round 26-30 :
Reinforce the arch by working 5 rounds of sc around, alternating colors cream and dusty rose for contrast (22)
Info :
Block the arch pinned over a cardboard template. For a freestanding piece you may insert light wire across the base inside the panel before final joining to the runner base for extra rigidity.
Round 31 :
Fasten off leaving long tail for joining. When attaching to base, line up the arch with the mesh center top and whip-stitch through the long tail and base foundation securing every 6 sts.
— Side Circular Motifs (make 12: 6 per side) :
Round 1 :
With burgundy, mr, 6 sc in magic ring (6)
Round 3 :
(1 sc, inc) x6 (18)
Round 4 :
(2 sc, inc) x6 (24)
Round 5 :
Change to dusty pink. Sc around (24)
Round 6 :
Ch2, *dc, ch1, sk1* across to create hearteye indentation; finish with sc around (24)
Round 7 :
Change to cream. Work sc around and add a picot at each 6th stitch to create scallop (24)
Info :
Sew circular motifs evenly along each side of the oval base aligned with the braided band rounds 16-20. Pin in place and secure with matching stitches. For the heart center you can embroider a small contrasting heart using extra burgundy yarn sewn on after motif is attached.
— Braided Side Panel (decorative cable band) :
Round 1 :
With dusty rose, join at edge of base, ch1, sc in each st around following the oval contour for 2 rounds (110)
Round 2 :
Ch1, sc around (110)
Round 3 :
Change to burgundy. Ch2, fpdc around selected sts to form raised braid: *fpdc 2, bpdc 2* repeat around (110)
Round 4 :
Change to dusty rose. Work sc around hiding posts (110)
Round 5 :
Switch to cream. Sc around and add small picot edging to mirror outer scallops (110)
Info :
This band frames the runner and coordinates with the braided rows on the arch. Work slowly when doing post stitches to keep tension consistent so the braid lays flat.
— Edge Scallop Finish :
Round 1 :
With cream, sc around outermost edge, placing *5 sc, (ch3, sl st into 1st ch for picot), sc5, sl st into next st* repeat (approx 110 picots)
Round 2 :
With burgundy, sc around placing larger scallops every 8 sts: *sc3, (5 dc in same st) as shell, sc3* repeat to create deep scallops that echo the image (110)
Info :
Finish with a final thin row of cream sc to neaten the edges; wet-block entire runner and arch to final shape and ensure scallops are evenly pinned.
— Large Spiral Rose (make 3) :
Round 1 :
With burgundy, ch 60 (longer for larger rose), sl st to join into a long strip for spiral; ch1, sc in same st, sc across chain creating a flat spiral foundation (60)
Round 2 :
Work ruffled spiral: *in next st 1 sc, 1 hdc, 2 dc, 1 hdc, 1 sc* along entire strip to create ruffle edge (60)
Round 3 :
When complete, roll the strip tightly from one end into a spiral, stitch base firmly with matching yarn to secure (Finished rose approx 6-7cm diameter)
Info :
For a fuller rose add a second spiral strip and stitch together at the base for layered petals. Use the 2.5mm hook if you want very tight, petite roses instead.
— Medium Layered Rosette (make 4) :
Round 1 :
With dusty rose, mr, 6 sc in magic ring (6)
Round 3 :
(1 sc, inc) x6 (18)
Round 4 :
Ch1, sc around to create a short cup (18)
Round 5 :
Attach an outer ruffle: ch30, work ruffle cluster across chain (1 sc, 1 hdc, 3 dc, 1 hdc, 1 sc) across the chain, fasten and stitch spiral to base creating layered petals
Info :
These rosettes are formed by a small cupped base and an outer ruffle strip. Stitch the ruffle into place and gently shape petals outward. Use small amounts of starch or fabric glue if you want petals to hold a more pronounced curl.
— Small Rosettes / Buds (make 8) :
Round 1 :
With cream or dusty rose, mr, 6 sc in magic ring (6)
Round 3 :
Ch1, sc around, pull center tight and secure to form a small bud (12)
Info :
Stuff these slightly with a small pinch of stuffing or leave flat—use them to fill gaps in the bouquet for a natural clustered look.
— Lily Petals (make 4 lilies with 6 petals each) :
Round 1 :
With cream, ch 12, turn, in 2nd ch from hook: sc, hdc, 3 dc, hdc, sc (petal made). Repeat 6 times to create 6 separate petals, leave long tail for joining
Round 2 :
Shape each petal edge with a slip-stitch picot: *sc across petal edge, (ch3, sl st into 1st ch) at tip*, fasten off each petal after finishing all six
Round 3 :
Arrange petals around central base (a small 6-sc circle), sew petals down overlapping slightly to create a lily bloom (approx 6-7cm across)
Info :
Optional: brush lightly with diluted fabric paint for pink streaks as seen in the image. Insert a few small bead-tipped stamens in the center (use thin floral wire covered with embroidery thread) for realism.
— Leaves (make 12-16 assorted) :
Round 1 :
With sage green, ch 12, sc in 2nd ch from hook, hdc, dc, tr, dc, hdc, sc to end; turn and work along opposite chain edge returning with sc, hdc, dc on edges to form pointed leaf (approx 11 sts per side)
Round 2 :
Work 1 round of sl st for neat edge; work surface ribbing by embroidering a central vein with stem stitch using a strand of darker green (use yarn needle)
Info :
For curled leaves, work leaves slightly longer and block with a tiny drop of fabric stiffener. Vary the sizes to create a natural bouquet; some leaves are small 6-ch leaves, others are full 12-ch leaves.
— Curled Tendrils and Stems (make multiple) :
Round 1 :
With sage green, ch 40, into 2nd ch from hook work sc along chain to end, then hold strip and wind around a pencil to create a spiral; secure base with a few sts (40)
Info :
These are flexible for tucking under flowers. Make several in varying lengths. You can optionally add a thin wire inside prior to winding for poseable tendrils.
— Small Berry Clusters (make 10 clusters) :
Round 1 :
With cream, mr, 6 sc in ring (6)
Round 2 :
Inc x6 (12); pull center tight creating a small bead-like berry and secure with few stitches at base
Info :
Make berries in both cream and dusty pink. Cluster three berries together and secure to a short stem for natural look.
— Assembly of Bouquet :
Info :
Arrange appliques on a flat surface atop the mesh central panel before sewing. Start by placing the largest roses centrally then add layered rosettes, lilies and smaller buds radiating outwards. Leaves and tendrils tuck under and are sewn from the underside of the mesh to keep tops neat.
Round 1 :
Sew the 3 large spiral roses in the central triangle area: fasten each with 6-8 secure stitches through the rose base and the mesh foundation, bringing a needle up through the mesh near the points where petals sit to avoid pulling the mesh too tight
Round 2 :
Position 4 medium layered rosettes around the large roses, sewing base with tight, hidden stitches; use small blanket stitch across the base of each flower to anchor them well (approx 6 stitches per flower)
Round 3 :
Place 4 lilies towards the front of the bouquet. Sew lily bases onto mesh using long stitches that pass through the mesh and under neighboring motif bases; ensure lilies sit slightly forward for dimensional layering
Round 4 :
Add small rosettes and berries to fill gaps. Sew leaves around the perimeter with winged stitches so that leaf veins remain visible on the top. Use two or three secure passes for each leaf base (hidden stitching)
Info :
Work slowly and rearrange until balance is pleasing. Use pins to temporarily hold shapes, then remove pins and replace with sewn stitches. Keep the underside neat by trimming tails and weaving ends through several stitches before trimming close to work.
— Finishing Touches and Reinforcement :
Round 1 :
Check all seams; add a second pass of stitching to any large heavy flower that shows play. Sew washers (small fabric discs) behind large flowers on the underside for extra stability if needed
Round 2 :
Block the entire finished piece one more time: dampen, pin flat on a mat, shape scallops and arch; allow to dry fully
Info :
If you want the arch freestanding, add thin wire inside the base seam or use a hidden cardboard insert between the mesh and arch layers before final stitching; this will help the arch maintain a vertical position.
Round 3 :
Weave in all loose ends with a yarn needle following the stitches path to secure and trim closely; use fabric glue on a few hidden tail ends for longevity
Info :
Label and document your placement while assembling (take a photo) so if you need to remove and rework a motif you can restore the original composition.
This vintage floral table runner pattern brings together lace, braids and sculptural flowers to create a truly special heirloom piece. The careful shaping, blocking and layered appliques produce an effect reminiscent of floral arrangements framed in lace. Enjoy the slow stitching rhythm as the runner takes shape — each rose, lily and leaf adds personality and charm. Display proudly as a centerpiece or gift to someone who loves traditional, romantic crochet. 🌸🧶