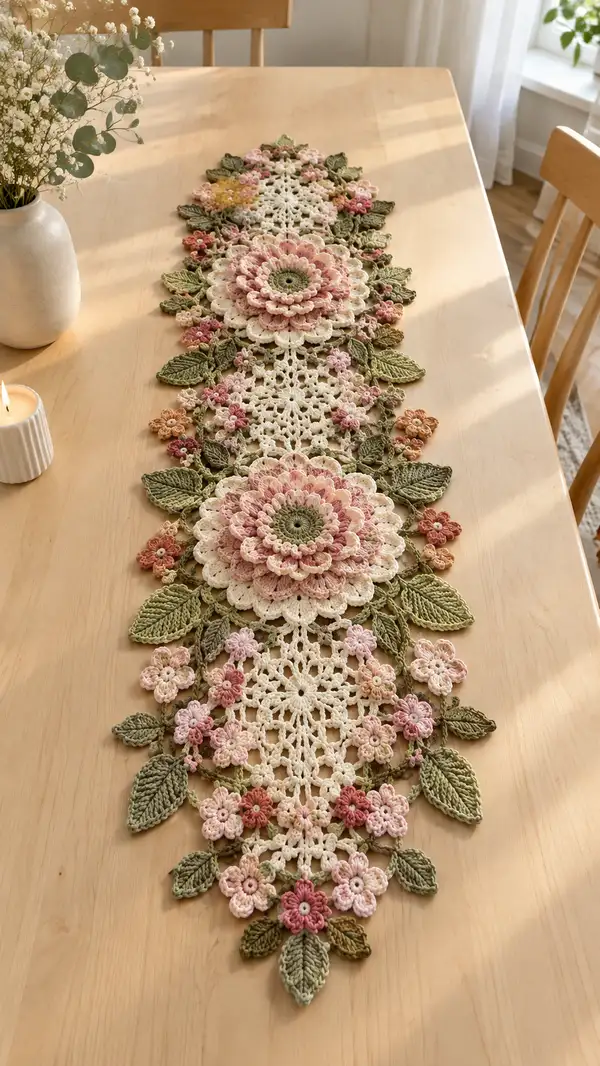
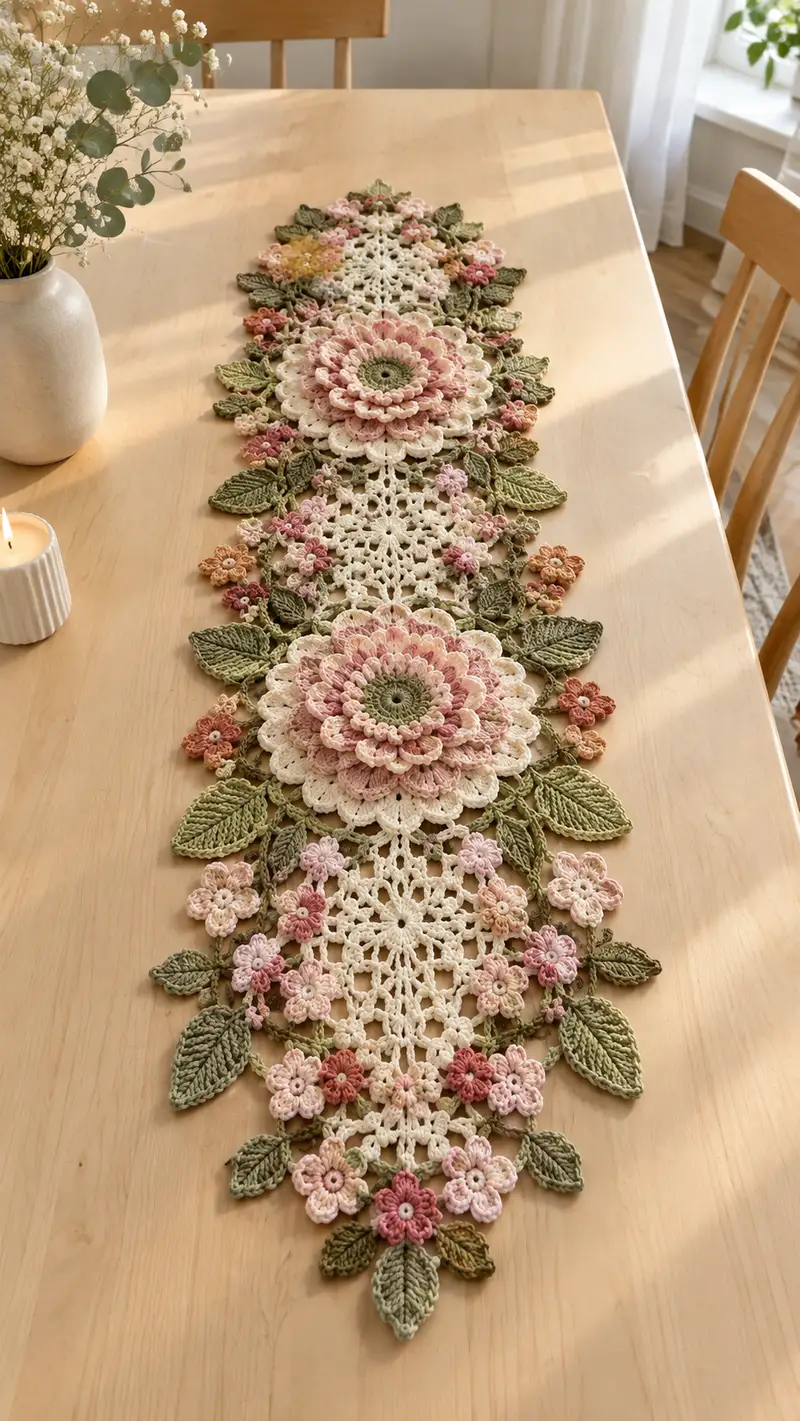
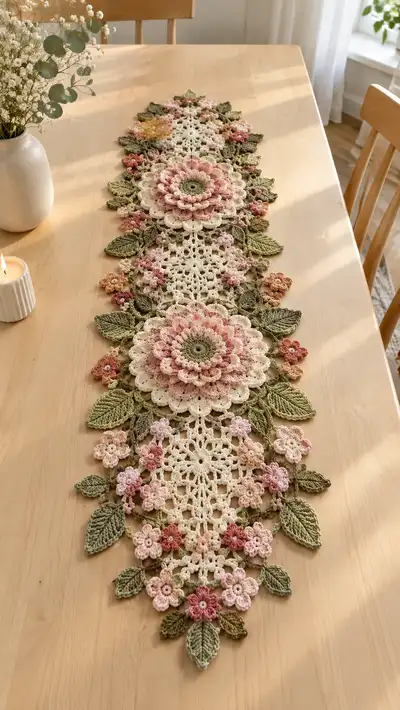
Create a romantic vintage-style floral table runner featuring three large layered rosettes, delicate lace doily connectors, sculpted leaves and tiny blossoms. This runner uses soft cream, dusty rose and sage greens for a subtle, timeless palette. The pattern combines motif crochet, puff petals and textured leaves to produce a dimensional, heirloom-quality centerpiece. Detailed step-by-step rounds, assembly notes and finishing tips make this a rewarding home-decor project.
Progress Tracker
0% Complete
— Materials & Gauge :
Info :
Gauge is flexible for a decorative runner. Using sport/fingering cotton and a 3.0mm hook the large rosette motif measures approximately 18cm (7") across. Adjust hook or yarn weight to change size. Work loosely enough for lace sections but tight enough that puff petals maintain shape. Keep stitch markers handy to mark beginning of rounds and motif joining points.
— Large Layered Rosette (Make 3) :
Round 1 :
With cream or center color, make mr, ch1, 8 sc into ring, sl st to first sc (8)
Round 2 :
Inc in each st around (16)
Round 3 :
(1 sc, inc) x8 (24)
Round 4 :
(2 sc, inc) x8 (32)
Round 5 :
(3 sc, inc) x8 (40)
Round 6 :
1 sc in each st (40)
Info :
Center rounds form a firm base for petals. Use a smaller hook (2.75-3.0mm) here for a tight starting round to keep the center neat. Place a marker at the beginning of Round 7 for petal alignment.
Round 7 :
Ch3 (counts as dc), *skip next st, (5 dc) in next st, skip next st, sl st in next st; rep from * around to create 10 large petal bases (40)
Round 8 :
Join dusty rose in back loop of a dc base, ch2, (hdc, dc, tr, dc, hdc) into same petal base top, sl st to next petal top; rep around to form first full petal row (10 petals)
Info :
Change to soft peach for a subtle highlight on the next petal layer. Fasten off dusty rose and join peach in the top of any petal; carry or weave tails to the back.
Round 9 :
Ch3, in same st make 3 dc, ch2, 4 dc across the top of each underlying petal, sl st into the sl st join between petals to secure; rep around for 10 wider petals (10 clusters of 8 dc)
Round 10 :
Switch to dusty rose again; work a round of (sc, ch3, sc) into the chain-2 arch over each petal to create loops for the next puff round (10 loops)
Round 11 :
Puff Petal Round: Into each chain-3 loop work 7-loop puff: *yo, insert hook, yo pull up loop; rep 7 times, yo pull through all loops, ch1 to close puff, sl st in base; rep around (10 puff petals)
Info :
Puff petals are the main textured layer — keep tension slightly loose on puff loops so stitches do not split. After completing this round, lightly block these petals on a foam mat to define shape (optional).
Round 12 :
Switch to cream. Around each puff petal, work (sc in puff, ch2, sc) into the joining sl st between puffs to anchor and form a scallop. This creates a firm platform for a second petal tier (10 scallops)
Round 13 :
Ch4 (counts as tr), *in each scallop work (2 tr, ch2, 2 tr), sl st in next base stitch; rep around to create tall petal arches (10 arches)
Round 14 :
In each tall arch work 6 dc, ch3, 6 dc evenly across the arch, sl st to next arch base (10 large petal caps of 12 dc each)
Info :
At this point your rosette has three distinct layers: inner center rounds, mid puff petals, and outer large petals. Use pins to shape outer petals radially so they sit flat when blocked.
Round 15 :
Switch to a slightly darker dusty rose and work a decorative cluster round on top of the outer petals: *sl st at petal top, ch1, (5 dc cluster) in top stitch, ch1; rep into every petal top around (10 clusters)
Round 16 :
Using cream, work single crochet evenly around outer petal bases connecting clusters with (sc, ch1, sc) into spaces to create a lace edge (approx 120 sc around — count will vary slightly by tension)
Round 17 :
Work a round of picot scallops: *sc in next 5 sts, (ch3, sl st in 3rd ch) as a picot, sc in next 5 sts; rep around to add delicate points (approx 12 picots depending on spacing)
Info :
Fasten off leaving 20-25cm tail for joining. Block rosette gently to flatten and open petals. The rosette should measure roughly 18cm/7"; if larger or smaller adjust hook for future motifs.
Round 18 :
Optional central finishing: Using a green contrast, embroider a small 6-sc round in the very center: mr, ch1, 6 sc into ring, sl st, fasten off. Sew into center to simulate a seed pod.
— Lacy Doily Connector (Make 4) :
Round 1 :
With cream, mr, ch3 (counts as dc), 11 dc into ring, sl st to top ch3 (12)
Round 2 :
Ch4 (counts as tr), *ch1, tr in next dc; rep around to create 12 tr with ch1 spacings, sl st to top (12 tr)
Round 3 :
(Ch5, sl st) into every tr to create small open loops; rep around for 12 loops
Round 4 :
In each ch-5 loop work (sc, ch3, 3 dc, ch3, sc) to make petal-like arches (12 petals)
Round 5 :
Ch1, *skip to next petal top, sl st into top, ch5, sl st in next petal top to form connector arches between petals; rep around to create a mesh chain network (12 arches)
Info :
These doilies are the lace panels between larger rosettes. Keep tension even to ensure panels lie flat. You will join these to rosettes with sl st or whip stitch later.
Round 6 :
Switch to cream; work a round of (sc in each st, ch2 at small arches) to even out edges (approx 48 sts)
Round 7 :
Work decorative openwork: *ch7, dc in next sc; rep to create elongated loops across the doily surface (approx 12 chains)
Round 8 :
Stabilize loops by working sc around each long chain anchoring them into the mesh (approx 72 sc total — adjust as needed for tension)
Round 9 :
Edge the doily with (sc, ch3, sc) into repeat around to create small points for joining to leaves and flowers
Info :
Fasten off leaving long tail for joining. Light blocking will help the doily sit open and match the rosette spacing. Make four doilies for the pictured runner layout.
— Small Five-Petal Flower (Make 28-36) :
Round 1 :
With pastel pink, mr, ch1, 6 sc into ring, sl st to first sc (6)
Round 2 :
Ch2, *in next st work (2 dc, ch2, sl st) to form petal; rep around to form 6 small petals (6 petals)
Round 3 :
Switch to a contrasting centre color (light mauve). Sew tiny French-knot-like center by threading a small bead or using a few tightly worked sc in the center: ch1, 6 sc into center over previous ring, sl st and fasten off.
Info :
These little flowers are abundant accents around the runner. Make 28–36 depending on your final runner length. Block lightly and, if desired, glue or sew tiny pearl beads to centers for the look in the photo.
— Sculpted Leaf (Make 24-30) :
Round 1 :
With sage green, ch8; working in 2nd ch from hook, sc in next, hdc in next, dc in next 2, hdc in next, sc in next, sl st in last ch to form one side of leaf, then work along opposite side of foundation chain: sc, hdc, dc, dc, hdc, sc; sl st to first sc to close leaf (14 sts perimeter)
Round 2 :
Ch1, 2 sc in first st, sc in next 2, hdc in next 2, (2 dc in each dc across center) to add thickness, hdc, sc, 2 sc in last st; fasten off leaving tail for sewing (approx 18-22 sts depending on increases)
Round 3 :
Using darker olive, embroider central vein: with yarn needle and surface slip stitch or fpdc, work a raised post stitch from base to tip, adding 2-3 lateral veins with short fpdc or sl st branches.
Info :
Leaves are sculpted with post stitches to give a raised midrib and definition. Make 24–30 leaves in varying greens, and block each leaf slightly domed to hold shape when assembled.
Round 4 :
Optional edging: work a round of picots (sc in next 2, picot) around the leaf for decorative finish. Fasten off.
— Runner Joining & Extended Lace Strip (Make 1 long strip) :
Round 1 :
Working from the long edge of a doily panel, join cream yarn and work sc evenly along the edge of the doily to create a uniform border (approx 48 sc for each side of doily)
Round 2 :
Ch4, skip 2, sc in next, *ch4, skip 2, sc in next to make repeated arches along the edge; rep across to form the connecting ladders between motifs
Round 3 :
Into each ch-4 loop work (sc, ch3, sc) to stabilize arch; rep across length
Info :
This extended lace strip is what visually connects the rosettes and keep the runner length consistent. Work strips matching the spacing of rosettes (approx 3 strips between each large rosette in pictured layout).
Round 4 :
Repeat a mesh-building round: *ch7, sl st in next sc; rep to create larger open lace that echoes the doily interior. Fasten off and block into a long rectangle strip that will be joined to rosettes.
— Petal Accent Rounds for Rosette Variation :
Round 1 :
After Round 14 of the rosette, you may add an extra petal fringe: join peach and in each long arch work (ch3, sl st, ch3) to form little fans; rep around.
Round 2 :
Fold each fan and secure with a sc at base to create a layered look. Fasten off and weave in ends.
Info :
These small accents increase complexity and visual depth. Use sparingly if trying to match the image exactly (two tiers of small fan edging were used in the photo).
— Assembly: Join-as-you-go Motif Layout :
Info :
Layout plan: Large rosette, doily panel, long lace strip, large rosette, doily, long lace strip, large rosette. Arrange leaves and small flowers around rosettes: typically 6–8 leaves radiate from each rosette and 8–12 small flowers cluster between leaves and doily edges.
Round 1 :
Position first rosette on table, pin doily panel adjacent to it aligning outer edges; using cream and tapestry needle, whip stitch through the outermost sc/picot round of rosette and edge of doily every 6–8 stitches to make a flat join. Repeat for the opposite side.
Round 2 :
Join the long lace strip to the doily panel by sl st or mattress stitch through the ch-arch points. Ensure strip tension matches both sides so motifs lie flat without puckering.
Round 3 :
Sew leaves around the rosette seam: place a leaf with its base under the rosette edge and secure with small neat whip stitches at rounds equivalent to outer petal base points; space leaves evenly (6–8 per rosette).
Info :
Use flower pins to temporarily hold leaves and small flowers while sewing — this helps maintain symmetry and achieve the organic flow seen in the photo. Stitch through the leaf base only, not the detailed vein, to avoid distortion.
Round 4 :
Sew small five-petal flowers into clusters in gaps between leaves and along the lace strip. Use contrasting tiny beads or a few tight sc for centers. Vary placement for a natural look.
Round 5 :
Secure all joins with small back-and-forth stitches then weave tails through several stitches and trim flush. Apply gentle blocking steam (or light starch) to set shape.
— Finishing Touches & Edge Scallop :
Round 1 :
Work a final edging around the entire runner: join cream at any point, work sc evenly around entire outer edge, increasing slightly at corners and between leaf points to accommodate shape (approx 2 sc per inch — varies by tension)
Round 2 :
Ch3, *sc in next 3 sts, picot (ch3, sl st in 3rd ch), sc in next 3 sts, ch5, sl st to create a scalloped point; rep along outer edge around leaf tips for a delicate lace finish
Info :
If any areas appear slack after joining, add a few catches made with invisible ladder stitches between motifs for reinforcement. Use matching yarn and small stitches to keep joins discreet.
Round 3 :
Weave in all remaining ends, trim close and press with a low-heat iron over a damp cloth for a crisp finish. Optionally mist with a fabric stiffener and allow to dry flat for a slightly stiffer runner.
— Variation: Single-Color Elegant Runner :
Info :
If you prefer a monochrome look, work all petals and leaves in graduated shades of one color family (e.g., all greens or soft grays). The stitch pattern and texture will still read beautifully without multiple colors.
— Extended Tips & Notes :
Info :
When working many small motifs, keep them organized by placing finished pieces into labeled bags. Block each type together so shapes are consistent. Keep a single spool of background cream near your workspace for neat joins and consistent tension when doing the join-as-you-go steps. Use pins to position heavy petals as you sew to prevent shifting. Always weave tails at least 5cm/2" into the body of motifs to prevent slipping when laundered.
Completing this floral table runner is such a satisfying experience — you’ll see lacy motifs, layered petals, and sculpted leaves come together into a cohesive, heirloom centerpiece! The color variations and textured petals create a romantic, vintage feel that transforms any table. Enjoy the slow, meditative process of building and joining motifs, and take pride in a handmade piece that will be admired for years. 🧶🌸✨