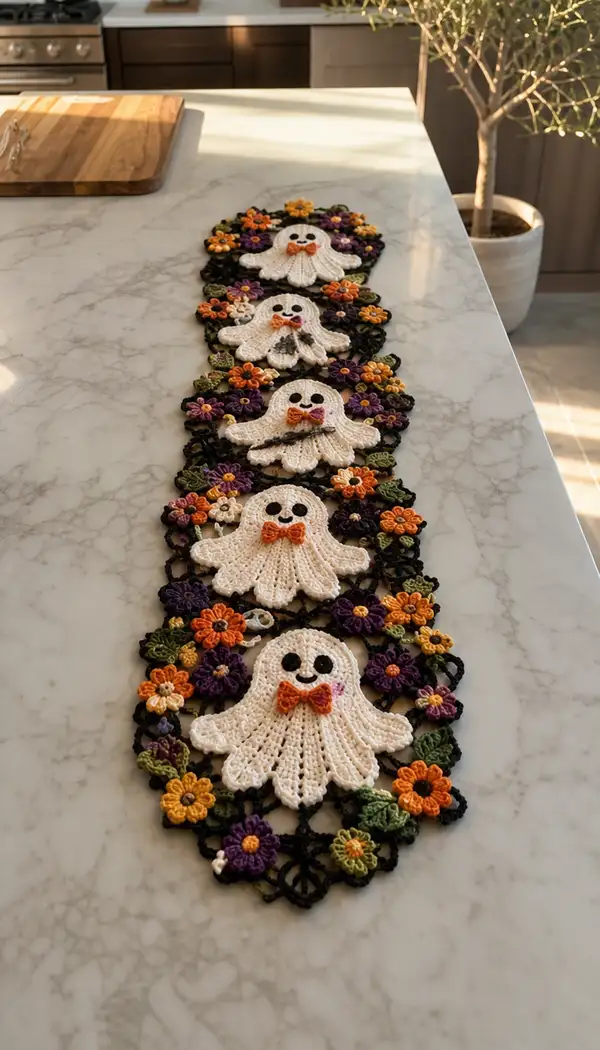
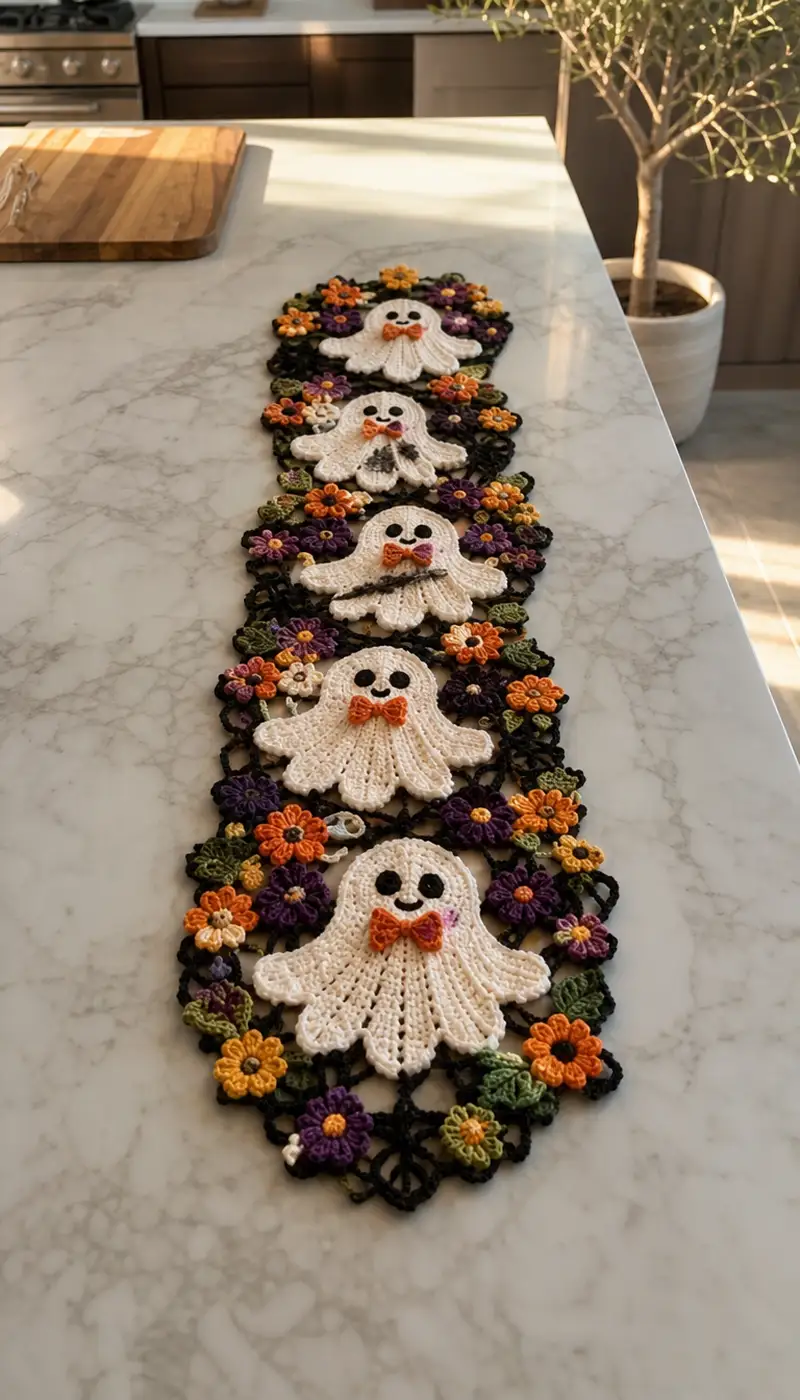
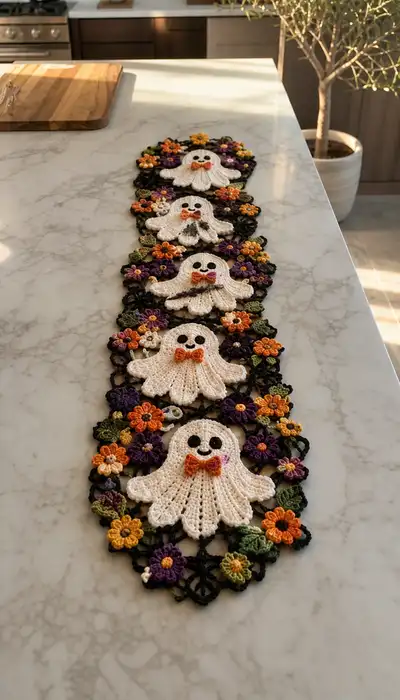
This charming Halloween table runner combines five delicate white crochet ghost motifs with a dramatic black lattice and clusters of orange, purple and green floral elements. Each ghost features a scalloped skirt edge and a tiny orange bow tie, all joined into a continuous runner. Perfect for a seasonal centerpiece or mantel accent, the design balances spooky-sweet charm with floral elegance.
Progress Tracker
0% Complete
— Overview & Notes :
Info :
This pattern is modular. You will make: 5 Ghost motifs, 25 small flower motifs (mix of 3 sizes), 18 leaves, 5 bow ties, a black lattice/joining mesh worked as long strips, and final edging. Work with worsted weight yarn and 3.5mm hook for the main motifs. Block all pieces before final assembly to even tension and shape. The rounds below are written to be precise and numerically consistent; read Info notes carefully and use stitch markers to keep track of round starts.
— Ghost Motif (Make 5) :
Round 1 :
6 sc in magic ring (6)
Round 3 :
(1 sc, 1 inc) x 6 (18)
Round 4 :
(2 sc, 1 inc) x 6 (24)
Round 5 :
(3 sc, 1 inc) x 6 (30)
Round 6 :
(4 sc, 1 inc) x 6 (36)
Info :
Use cream/white yarn. Keep tension consistent; these early rounds build the ghost head and upper body. Place a stitch marker at the start of each round.
Round 7 :
(5 sc, 1 inc) x 6 (42)
Round 8 :
(6 sc, 1 inc) x 6 (48)
Round 9 :
1 sc in each st (48)
Round 10 :
1 sc in each st (48)
Info :
Rounds 9-12 create the ghost chest/shoulder width. Decide eye placement now; place safety eyes or mark spots for embroidery between Rounds 10-11 about 10-12 sts apart depending on desired expression. For this runner, eyes are centered and 10 sts apart for a friendly face.
Round 11-12 :
1 sc in each st (48)
Round 13 :
(6 sc, 1 dec) x 6 (42)
Round 14 :
(5 sc, 1 dec) x 6 (36)
Info :
At the end of Round 14 begin to shape the ghost 'neck' slightly inward. Start very light blocking when motif is complete to keep head round and flat.
Round 15 :
1 sc in each st (36)
Round 16 :
1 sc in each st (36)
Round 17 :
(4 sc, 1 dec) x 6 (30)
Round 18 :
(3 sc, 1 dec) x 6 (24)
Info :
Rounds 15-18 taper under the arms to create the top of the ghost skirt. Keep the piece flat—do not stuff. If adding embroidered mouth, mark mouth center between rounds 11-12 before adding scallop work.
Round 19 :
1 sc in each st (24)
Round 20 :
1 sc in each st (24)
Round 21 :
(2 sc, 1 inc) x 6 (30)
Round 22 :
(3 sc, 1 inc) x 6 (36)
Info :
Begin increasing to flare the skirt. The scalloped lower edge will be created with shell/tassel rounds. Keep work flat and measured—this controls the final ghost width.
Round 23 :
(4 sc, 1 inc) x 6 (42)
Round 24 :
1 sc in each st (42)
Round 25 :
1 sc in next 2 sts, *shell in next st, 2 sc in next 2 sts; rep from * around (42)
Info :
Shell = (2 dc, ch 1, 2 dc) worked in same st. This round places shell anchors for scallops; count carefully—shells are spaced to create 14 scallops around the skirt.
Round 26 :
*Skip to shell ch-1 space, (3 dc, ch 1, 3 dc) in ch-1 sp, sl st to next sc; rep from * around (14 shells)
Round 27 :
Sl st into center of each shell, ch 1, 1 sc in same st, (ch 3, sl st in center of next shell) rep around to create scallop loops (14 loops)
Round 28 :
Working into each ch-3 loop: (sc, hdc, 5 dc, hdc, sc) in each loop to create full scallop (14 scallops)
Info :
These decorative rounds give the ghost the frilly skirt. Work loosely on these rounds to keep scallops open and lacy. Block each ghost flat with scallops pinned evenly spaced.
Round 29 :
Reverse single crochet (crab stitch) evenly around scallop edges where desired to tidy and provide slight stiffness. Work 1 crab st per dc cluster across scallop tops (approx 14 x 11 = 154 crab sts)
Round 30 :
Fasten off leaving a long tail for assembly. Weave tail through back of round 22 to secure and hide. Repeat for all 5 ghost motifs.
Info :
Eyes/mouth: Embroider two black circles approx 6-7 mm in diameter using satin stitch; position eyes between rounds 10 and 11, 10 stitches apart. Embroider small smile below eyes using black yarn. Alternatively, use small black felt circles glued on under the scallop round before final join.
— Tiny Bow Tie (Make 5) :
Round 1 :
With orange yarn ch 6, sl st to form ring, ch 1, 6 sc in ring; do not join (6)
Round 2 :
Inc in each st around (12)
Round 3 :
(1 sc, 1 inc) x 6 (18)
Round 4 :
Work 3 rows of sc even (18), then fasten off leaving long tail
Info :
Fold the rectangle formed by rounds 1-4 in half widthwise; cinch center with matching orange yarn by wrapping 6-8 times and secure with a knot. Weave tail through back of ghost motif at round 16 center to attach bow tie. Slight stuffing with 1-2 grams of fiberfill optional for puffiness.
— Small Flower Motif (Make 25 in three sizes) :
Small Flower Round 1 :
6 sc in magic ring (6)
Round 2 :
(ch 3, sl st in next st) x 6 to form 6 petals base (6 loops)
Round 3 :
Into each loop: (sc, hdc, 3 dc, hdc, sc) to form petal (6 petals)
Round 4 :
Fasten off leaving tail for sewing. For medium flowers: after Round 1 change to petal color and work Round 2-3 then add an outer round of (ch 4, sl st) loops and (sc, 5 dc, sc) in each loop to produce larger petals (12 petals approx). For large flowers add another outer round of picot tips.
Info :
Vary color combinations: mustard centers with purple petals, orange centers with cream petals, etc. Make 25 total mixing medium and small sizes as pictured: approx 12 small, 8 medium, 5 large.
— Leaf Motif (Make 18) :
Round 1 :
Ch 8, sc in 2nd ch from hook, hdc, dc, tr, dc, hdc, sc (7 sts) fasten off leaving tail (leaf curve)
Round 2 :
Edge the leaf with picots: join at base, work (sc, ch 3, sl st) along outer edge at regular intervals; repeat on inner edge if desired for fuller leaf. Make 18 leaves.
Info :
Use olive/leaf green yarn. Leaves are worked flat and sewn in clusters beside flowers to create natural composition. Starch lightly or use spray stiffener if you want leaves to hold shape.
— Black Lattice Unit (Make strips to connect ghosts) :
Info :
The black lattice is the structural connector. You will work a repeating open chain and cluster mesh strip that measures approx 7-8 inches wide and long enough to hold 5 ghosts with floral inserts. Make 3 long strips: center and two narrow side strips for edge reinforcement, or work one continuous strip joining motifs as you go.
Round 1 :
With black yarn ch 60 (or adjust to desired width), turn and sc in 2nd ch from hook and across (59 sc)
Round 2 :
Ch 4 (counts as tr + ch1), *sk 1 sc, tr in next sc, ch 1; rep from * across, ending last ch1, turn
Round 3 :
Working into chain spaces: *ch 5, sl st into top of next tr, ch 2; rep across to make a ladder of chain arches (approx 29 arches)
Round 4 :
Into each ch-5 arch: (sc, ch 3, sc) to form loop anchors (approx 29)
Round 5 :
Join with sl st to first loop center, *ch 8, sl st in center of loop 2 loops ahead to create diagonal, rep across to form diamond net; end with sl st to last loop (approx 29 diagonal connections)
Round 6 :
Work decorative picot points at outer diamonds: ch 3, sl st into same sp, sk 2, sl st into next sp to make alternating decorative points
Round 7 :
Turn strip and repeat Round 2-6 to create double-faced openwork, slightly offset so diamonds nest between rounds for strength; fasten off and block flat.
Info :
The lattice is forgiving—measure your ghost motif placement by holding motifs over the strip and marking centers with removable pins. If your strip is shorter than required, work multiple and join them using slip-stitch joins in black to hide seams.
Round 8 :
Optional: add small sc posts at intervals (every 6 diamonds) to create sewing anchors for flowers and ghosts (work sc posts down center of diamond and leave long tail for sewing).
— Joining Flowers and Leaves to Lattice :
Info :
Arrange your ghost motifs along the center strip with approx 1.25-1.5 inches between ghost edges; place clusters of flowers and leaves to surround ghosts. Use long tails from flowers/leaves to whip stitch through lattice anchors or sc posts. Sew gently so motifs sit slightly raised for dimension.
Round 1 :
Position medium flower beside ghost scallop; insert needle through lattice center and flower center, pull tail snug and tie on backside. Repeat for all flower placements.
Round 2 :
Sew leaves behind flower clusters aligning leaf tips with scallop edges. Use matching green thread to hide stitches.
Info :
For a natural look, stagger flower sizes and overlap some petals over the ghost scallops; this visually binds ghost and floral elements into a single composition.
— Attaching Ghosts to Lattice :
Round 1 :
Lay ghost motif over lattice strip centered at planned position. With long tail from ghost or separate black thread, whip stitch around the internal round 22-24 area to anchor ghost to the lattice without compressing scallops (approx 24-30 evenly spaced stitches).
Round 2 :
Attach bow tie to ghost center between rounds 15-17 using the long tail from the bow tie. Secure with 6 small stitches through lattice for extra anchoring.
Info :
Sew through the lattice at arch centers; avoid stitching through outer scallops to preserve their curve. Leave a small joining slack so the runner is flexible and flat when laid on the table.
— Decorative Eye/Mouth Embroidery :
Round 1 :
Using black yarn and tapestry needle satin stitch two oval eyes approx 6-7mm across. Place them between rounds 10 and 11 and 10 stitches apart (center-to-center).
Round 2 :
Embroider a small smile under the eyes using backstitch or chain stitch, roughly 6-8 mm wide. Add cheek blush with tiny cream/pink yarn knots or light fabric paint if desired.
Info :
Take care that embroidery stitches are secure; weave ends through several stitches on the backside and trim closely to prevent snags on the tabletop.
— Final Edge & Border (worked in black) :
Round 1 :
With black yarn pick up the outermost diamonds of lattice and sc evenly around the entire runner to create a continuous border. Work 1 sc for every diamond apex (approx 120-160 sc depending on length).
Round 2 :
Ch 4, sk next sc, sl st in next sc (picot chain loop) around to create small loops; this will add delicate points around the runner edge (approx 60 loops)
Round 3 :
Into each ch-4 loop: (sc, hdc, 3 dc, hdc, sc) to form a tiny scalloped border, giving the runner a finished lace look. Fasten off and weave all ends.
Info :
Blocking the assembled runner is crucial. Pin the runner flat on a blocking mat, shaping scallops evenly and setting spacing between ghosts. Spray lightly with water and let dry completely before using.
— Optional Reinforcements and Variations :
Round 1 :
For added stability, work an additional foundation row of sc in black around the entire runner on the backside, but keep it hidden by attaching it where lattice diamonds meet to avoid visible bulk on top.
Round 2 :
Alternate design: replace some small flowers with tiny crocheted pumpkins (ch 6, join, 10 sc, shape with increases/decreases) for a more autumnal theme.
Info :
To scale runner longer or shorter, add or remove ghost motifs and lengthen black lattice strips accordingly. Keep flower clusters proportional: roughly 4-6 flowers surrounding each ghost for balanced coverage.
Finishing this runner is such a rewarding moment — five sweet ghosts with bright floral clusters come together into a dramatic, festive accent that steals the show on any table. The contrast of cream ghosts and black lace with jewel-tone flowers creates both whimsy and elegance. Blocking, careful joins, and the tiny bow ties will make your work sing. Enjoy styling it for Halloween or autumn gatherings, and take pride in a handmade showpiece you created stitch by stitch. 🎃🧶