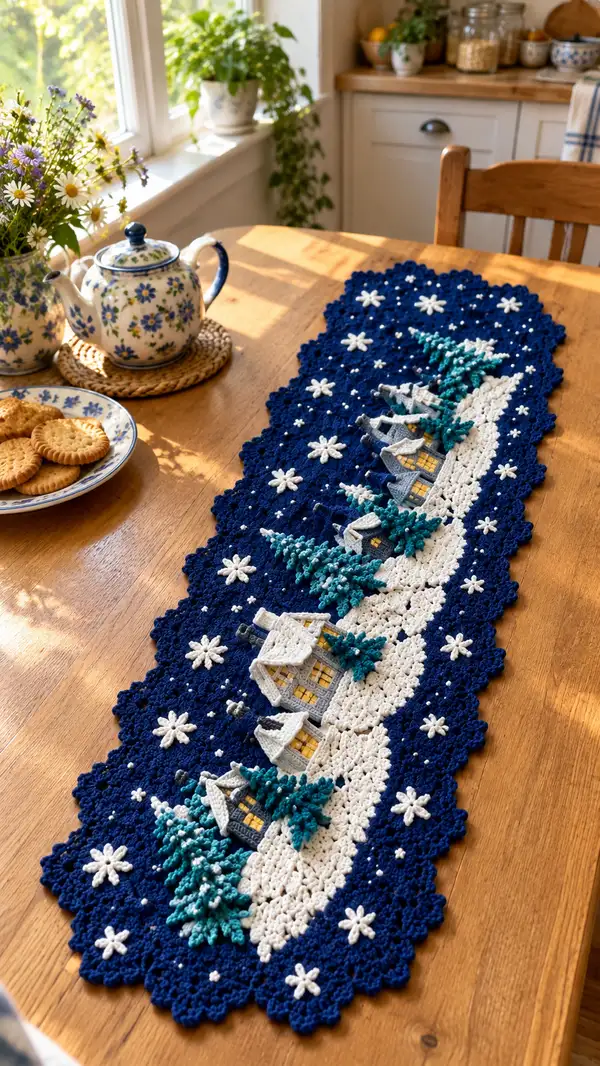
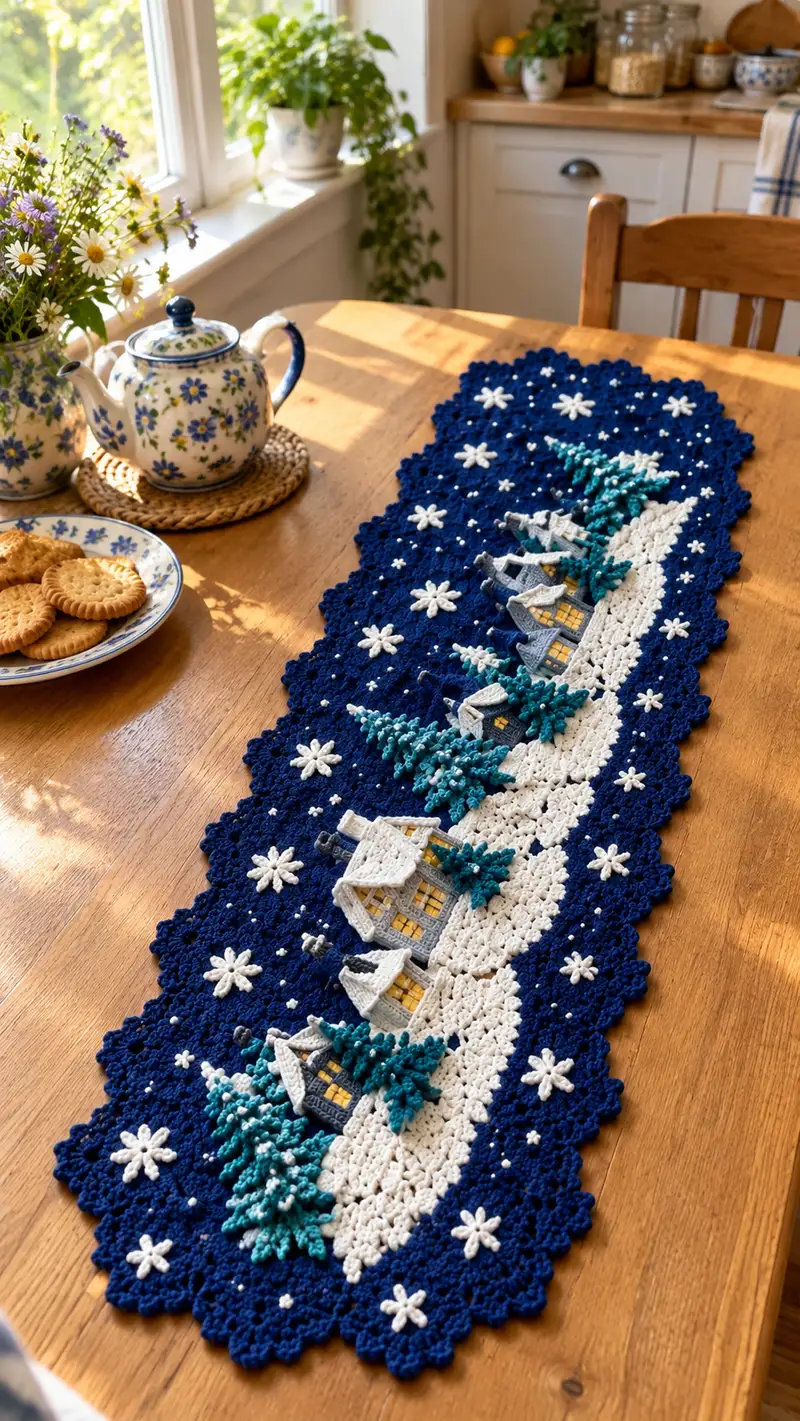
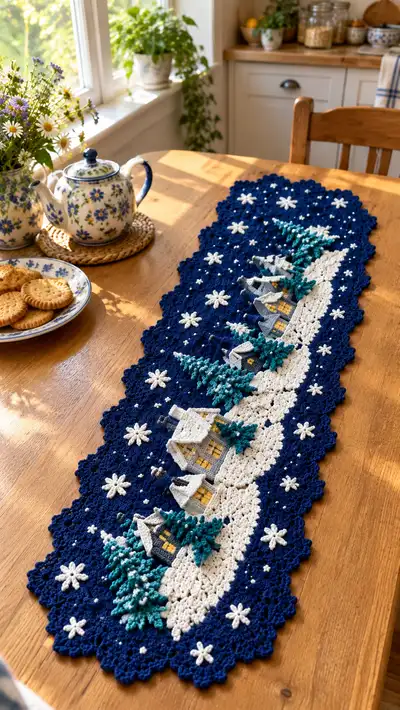
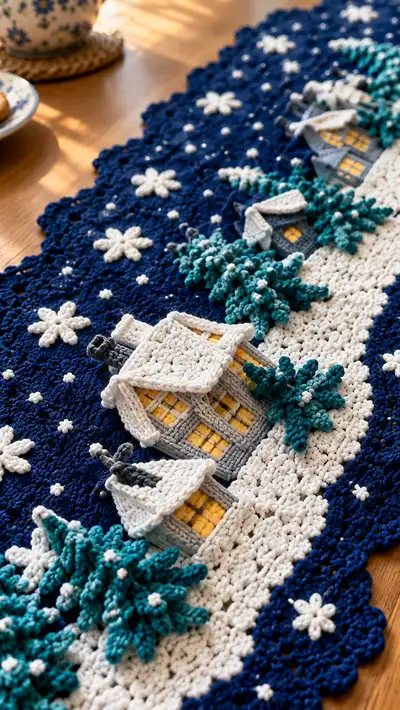
A cozy winter village table runner worked in rich navy, crisp white and teal accents. The runner features a snowy central path, tiny applique cottages with glowing yellow windows, dimensional evergreen trees, scattered snowflakes and a scalloped lace edge. Designed to lie flat on a table, it brings a handmade festive touch to your home and is perfect for holiday decorating or giving as a special seasonal gift.
Progress Tracker
0% Complete
— Base Runner (Background) :
Info :
Work this runner in rounds to create a long oval panel with a lacy shell pattern. The navy background is built first — the white snow path and all appliques will be added later. Keep tension even and block the piece before attaching embellishments.
Round 1 :
6 sc in magic ring (6)
Round 3 :
(1 sc, inc) x 6 (18)
Round 4 :
(2 sc, inc) x 6 (24)
Round 5 :
(3 sc, inc) x 6 (30)
Round 6 :
(4 sc, inc) x 6 (36)
Info :
We will begin converting this small circle to a gradual oval shape by placing increases at four cardinal points. Mark the first stitch of each round to track the beginning.
Round 7 :
(5 sc, inc) x 6 (42)
Round 8 :
(6 sc, inc) x 6 (48)
Round 9 :
1 sc in each st (48)
Info :
To stretch into an oval, the next rounds will add increases at four evenly spaced points only. This produces length while keeping side stitch counts steady.
Round 10 :
*(10 sc, inc)* repeat 4 times (52)
Round 11 :
1 sc in each st (52)
Round 12 :
*(11 sc, inc)* repeat 4 times (56)
Round 13 :
1 sc in each st (56)
Round 14 :
*(12 sc, inc)* repeat 4 times (60)
Round 15 :
1 sc in each st (60)
Info :
We will introduce a lacy shell motif by working alternating rounds of shell clusters and single crochet. Shells create the openwork background seen in images.
Round 16 :
*skip 1 st, 5 dc in next st (shell made), skip 1 st, sc in next 2 sts* repeat around (60, shells formed)
Round 17 :
1 sc in each st and in top of each shell (60)
Round 18 :
*sc, ch2, 2 dc in next shell, ch2, sc in next 2 sc* repeat around (60)
Round 19 :
1 sc in each st (60)
Round 20 :
*sc in next 4 sts, inc* repeat 10 times (70)
Round 21 :
1 sc in each st (70)
Info :
Continue extending the runner length by adding a pair of increases at each long-oval end every few rounds. The increases should be placed in the centers of the ends to keep the oval shape balanced.
Round 22 :
*(6 sc, inc)* repeat 10 times (80)
Round 23 :
1 sc in each st (80)
Round 24 :
*(7 sc, inc)* repeat 10 times (90)
Round 25 :
1 sc in each st (90)
Round 26 :
*sc 3, shell (5 dc) in next, sc 3, sc in 5 next* repeat around to create even lacy repeat (90)
Round 27 :
1 sc in each st (90)
Round 28 :
*(8 sc, inc)* repeat 10 times (100)
Round 29 :
1 sc in each st (100)
Info :
At this stage the runner is developing length. Measure your piece: target length (prior to appliques) should be approximately 70-85 cm depending on increase frequency. Adjust rounds 22-28 to match desired length.
Round 30 :
Work a scalloped shell border foundation: *sc, ch2, 5 dc in next, ch2, sc in next 8 sts* repeat around shaping shells at ends carefully (100)
Round 31 :
1 sc in each st (100)
Round 32 :
Work an open scallop: *in shell space work (sc, ch3, sc)*; in even sc spaces work sc across. This loosens fabric for border detail (100)
Round 33 :
1 sc in each st (100)
Info :
From here you may continue even rounds until the base spans the desired table length. The numbers above give a solid starting point. After Round 33 block the base flat with pins to open the lace and set measurements for applique placement.
Round 34-40 :
Work 7 rounds of 1 sc in each st to stabilize the base (100)
Info :
Fasten off navy yarn leaving a long tail for final edging join. Block the entire navy base flat. Mark the center line and measure positions for the white snow path and appliques — houses and trees are spaced evenly along the center, leaving equal navy margins.
— Snow Path (Center White Snowbank) :
Info :
The snow path is crocheted separately as an elongated oval applique which will be sewn to the navy background. Work this in white; shape to follow the runner center. Keep edges neat to sew invisibly.
Round 1 :
6 sc in magic ring (6)
Round 3 :
(1 sc, inc) x 6 (18)
Round 4 :
(2 sc, inc) x 6 (24)
Round 5 :
(3 sc, inc) x 6 (30)
Round 6 :
1 sc in each st (30)
Round 7 :
*sc in next 4 sts, inc* repeat 6 times (36)
Round 8 :
1 sc in each st (36)
Round 9 :
*sc in next 5 sts, inc* repeat 6 times (42)
Round 10 :
1 sc in each st (42)
Info :
To shape the path into an elongated strip, we will now elongate by working extra increases at each end every two rounds. Keep the piece flat and check against the base when large enough.
Round 11 :
*(7 sc, inc)* repeat 6 times (48)
Round 12 :
1 sc in each st (48)
Round 13 :
*(8 sc, inc)* repeat 6 times (54)
Round 14 :
1 sc in each st (54)
Round 15 :
Work 2 rounds of shell texture to mimic packed snow: *skip 1, 3 dc in next, skip 1, sc* repeat (54)
Round 16 :
1 sc in each st (54)
Round 17 :
Fasten off leaving a long tail for sewing. Block to the measured center of the navy base, shaping into a gentle curve that follows the runner. Trim if needed to fit the center length.
Info :
Sew the white snow path to the navy base before adding houses and trees — this gives a firm foundation and hides navy stitches beneath the snowbank edges. Use small whip stitches with matching white yarn.
— Houses (Make 4 — Cottage A, B, C, D) :
Info :
Each house is a small applique built from a rectangular wall panel and a separate roof. Light grey walls, white snow on roofs, dark grey accents, and yellow window panes create the cozy glowing look. Work houses flat and leave long tails for sewing. These instructions detail one house; repeat for the remaining 3 with small size variations listed in Info sections.
House Wall — Round 1 :
Ch 12, turn and sc in 2nd ch from hook and across (11 sc) — this is Row 1 of a flat panel (11)
House Wall — Round 2 :
Ch1, turn, sc in each st across (11)
House Wall — Round 3-10 :
Repeat Row 2 for 8 more rows to create a 10-row rectangle (11 sts x 10 rows)
Info :
These house walls are done in continuous flat rows to make a neat rectangle. For a slightly taller house, work 2–4 additional rows. Keep edges square for easier roof attachment.
House Wall — Window Detail :
With yellow yarn embroider a 2 x 3 grid on the front face: using tapestry needle weave vertical and horizontal small bars inside the central window area to simulate panes. Anchor stitches at reverse side.
House Roof — Round 1 :
Ch 10 and work sl st to join into a ring, ch1. Rnd 1: 10 sc in ring (10)
House Roof — Round 2 :
(1 sc, inc) x 5 (15)
House Roof — Round 3 :
(2 sc, inc) x 5 (20)
House Roof — Round 4 :
1 sc in each st (20)
House Roof — Round 5 :
Work 2 rows of (shell edge) to form a peaked look: *skip 1, 5 dc in next, skip 1, sc* repeat around (20)
House Roof — Round 6 :
Fasten off leaving a long tail for attachment. Using white yarn, crochet a narrow snowy cap by working a sc trim along the lower edge: join white and work 1 round sc across roof base (20)
House Assembly :
Place roof over wall panel aligning central top. Sew roof to top row of wall using whip stitch with matching yarn. Add a small chimney: ch 4, join with sl st to form a short tube, 4 sc in tube; fasten off and sew to roof top edge.
Info :
Vary the wall and roof sizes slightly for each house to create perspective. For example, House B: ch 10 for wall, House C: ch 14 for wall. Keep windows centered and slightly offset along the snow path for a natural village layout.
House Finishing :
Add small dark grey embroidery lines for window frames and door details. Use a running stitch with thin yarn or sewing thread for crisp lines.
— Trees (Evergreens) — Make 8 :
Info :
Trees are worked as layered clusters to create a dense 3D texture. Use teal/sea-green yarn and work several tiers, each tier slightly larger. Small white bobbles are added later to simulate snow.
Tree Base — Round 1 :
6 sc in magic ring (6)
Tree Base — Round 2 :
inc x6 (12)
Tree Tier 1 — Round 3 :
*ch2, in next st work (dc, tr, dc) to make a point; sl st next st* repeat around to create 6 small points (12)
Tree Tier 2 — Round 4 :
Attach new yarn round the base of tier 1 and repeat but with 8 points: *ch2, (dc, tr, dc) in next st, sl st next* repeat 8 times (16)
Tree Tier 3 — Round 5 :
Repeat for 10 points to widen lower branches: *ch2, (dc, tr, dc) in next* repeat 10 times (20)
Info :
For fullness, add an additional round of smaller points beneath each tier by working shell stitches (3 dc) into spaces between main points. This produces dense foliage.
Tree Tier 4 — Round 6 :
Work (3 dc) into each space around base (60) creating dense texture. Fasten off leaving long tail for sewing.
Tree Trunk :
With dark grey, ch 4, join to form a small ring then work 6 sc in ring and 2 rounds of 6 sc (6 sts, 2 rows). Fasten off and stitch trunk in center of tree underside.
Info :
For a layered, snowy tree effect, lightly brush white yarn ends across some points with small bobbles sewn on after assembly. To make trees shorter or taller, vary the number of point tiers and their stitch counts accordingly.
— Snowflake Motifs (Large & Small) :
Info :
Large six-pointed snowflakes and tiny pearl-like dots scattered across the navy field add charm. Work a mix of 10 large and 20 small motifs and sew into place. Use white yarn for contrast.
Large Snowflake — Round 1 :
6 sc in magic ring (6)
Large Snowflake — Round 2 :
*ch4, sl st in next st* repeat 6 times to create loops (6 loops)
Large Snowflake — Round 3 :
In each ch4 loop work: sc, hdc, 3 dc, hdc, sc. Fasten off and block points with small pins to shape.
Small Snow Dot :
6 sc in magic ring, pull tight and fasten off for small bobble (6)
Info :
Sew large snowflakes evenly along both sides of the white path and some onto the navy margins. Small dots fill gaps. Use a small bead or a French knot of yarn in center for extra detail.
— Border Scallop & Final Navy Edging :
Info :
Finish the runner edge with a firm scalloped border in navy to echo the lacy edge seen. Join yarn with sl st anywhere and work rounds to match existing base stitches. Work slowly around curved ends.
Round 1 :
Join navy at edge and work 1 round sc evenly around edge to tidy (work 1 sc per visible stitch across straight edges and 3 sc within each end shell) (count will vary by runner size)
Round 2 :
*sc, ch3, sc in same st (picot), skip 2, sc in next 4 sts* repeat around to form scallops
Round 3 :
In each ch3 picot work 7 dc to form shell, sl st to anchor. Repeat around for scalloped edge.
Info :
Adjust shell size if scallops feel too large — reduce to 5 dc per shell for subtler scallops. Fasten off and weave in ends neatly on the wrong side.
— Assembly & Embellishment :
Info :
Pin and sew appliques to the snow path and navy base. Start at one end: secure house bases to the edge of the white snowbank, then place trees around houses. Sew small snow dots/bobbles onto tree branches and across the navy field.
Step :
Arrange houses (largest near one end, smaller toward the center) leaving roughly equal visual spacing. Pin in place and tack with long tail using ladder or whip stitch. Use small stitches to minimize visibility.
Step :
Sew trees next, tucking trunks slightly under house edges and along the snowbank edge. Stitch only through the white snow path and into the navy base to anchor firmly without distorting the path edge.
Step :
Attach snowflakes and dots: large flakes are sewn with 6 tiny stitches at the point centers; small dots are sewn with a single thread and tightened so they sit raised like pearls.
Step :
Embroider window frames with dark grey using small backstitches. If you want glowing windows, put a square of mustard felt behind the house windows and tack in place before final stitching; trim felt edges flush.
Info :
After assembly, block the entire runner one last time to flatten seams and set motif placement. Light steam blocking across appliques will reshape points and set shells.
— Optional Tiny Details & Pearls :
Info :
Small sewn-on beads or pearl-shaped yarn bobbles add sparkle. Use clear craft glue to affix beads if you prefer not to sew. Place sparingly for a refined look.
Finishing :
Weave in all ends to the wrong side. Trim excess yarn and lightly steam block to settle the finished piece. Let cool completely before placing on a table.
Final Info :
The above rounds and techniques provide a modular approach: adjust number of base rounds or size/number of appliques to best fit your table. Keep careful notes of placement as you go to ensure symmetry.
Putting the last stitches into this winter village runner feels like tucking a little scene into place — each house, tree and flake adds personality and charm. The contrast between deep navy and bright white makes the tiny cottages glow and the scalloped edge finishes it like a frame. I hope making this brings you the same warmth and satisfaction I felt creating it — display it with pride and enjoy the cozy atmosphere it creates. 🧶✨