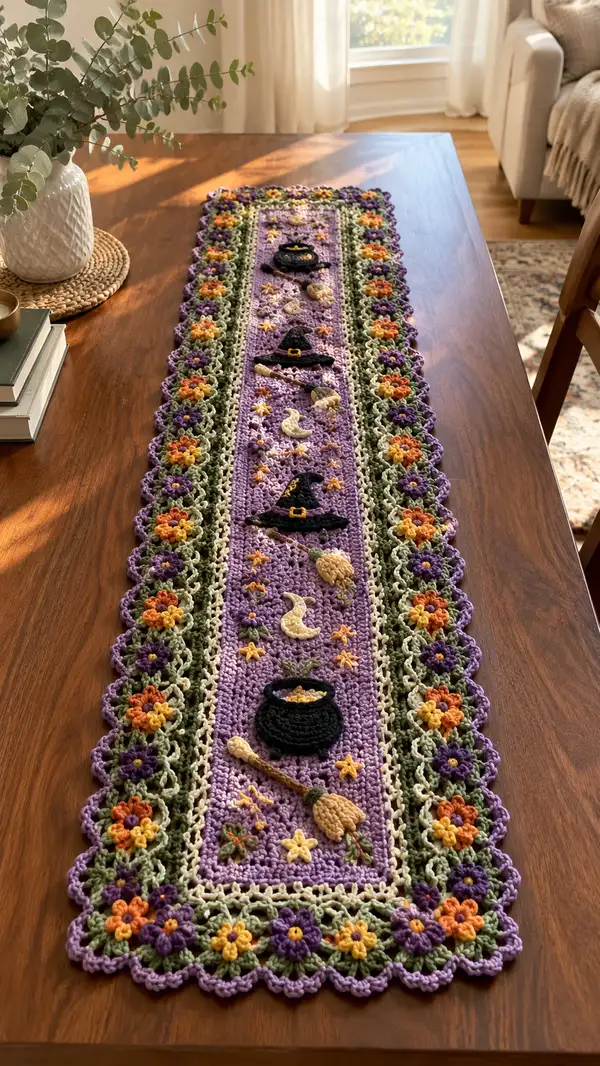
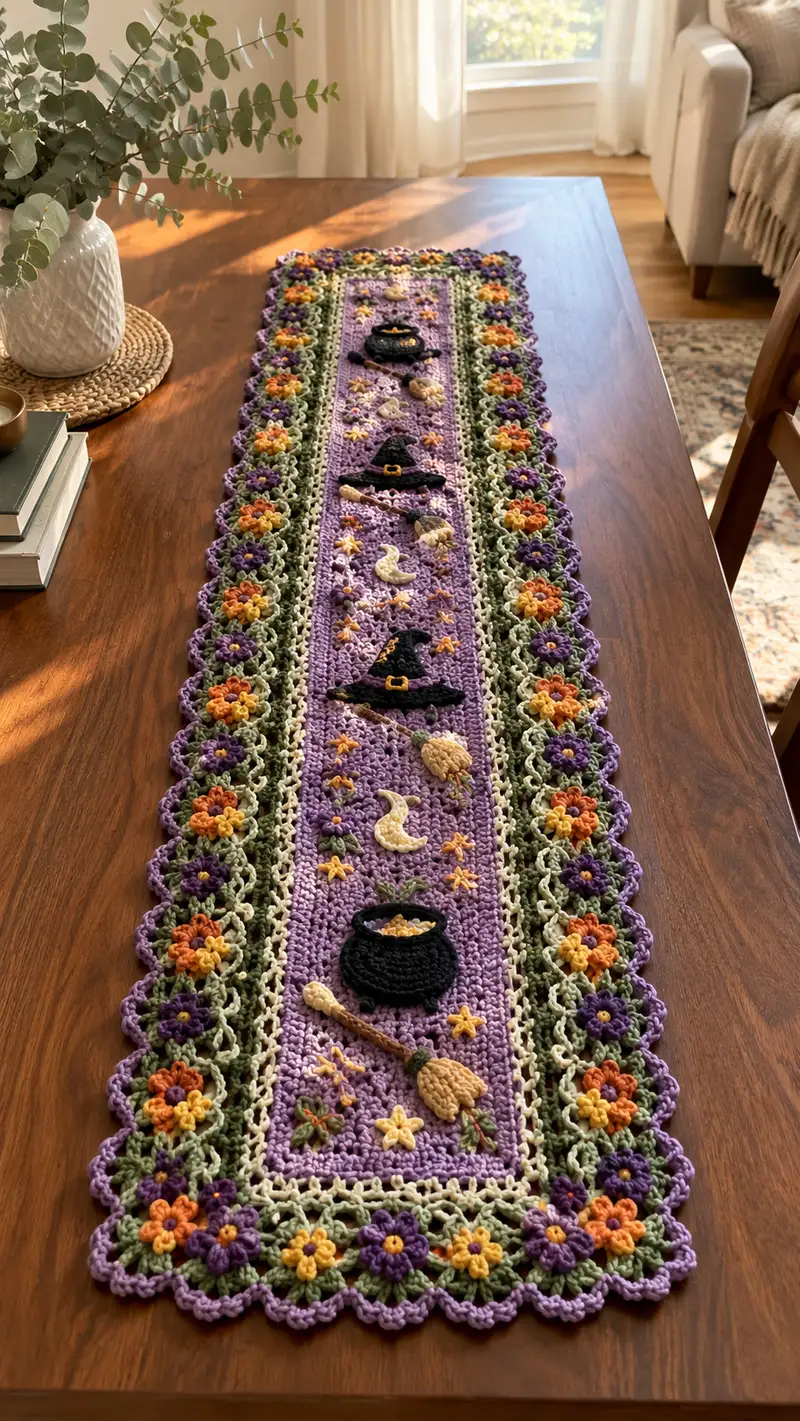
A long, whimsical Halloween table runner combining a lavender central panel with spooky appliques — cauldrons, witch hats, broomsticks, moons and star clusters — framed by a delicate green lattice and a scalloped floral border in purple, orange and gold. This pattern uses small applique motifs and joined floral granny motifs to create a layered, textured look that lays flat and dresses any table for the season. Detailed stitch-by-stitch instructions, color changes and assembly notes included.
Progress Tracker
0% Complete
— Center Panel (worked flat, rows) :
Foundation :
Using lavender yarn, ch 180 (or desired finished runner length; adjust multiple of 2). This chain is the full width of the center panel; do not join.
Row 1 :
1 sc in 2nd ch from hook and in each ch across. Turn. (179 sc)
Row 2 :
Ch 1, 1 sc in each st across. Turn. (179 sc)
Row 3-6 :
Ch 1, 1 sc in each st across. Turn. (179 sc)
Info :
Work the first 6 rows in sc to create a firm base. Keep tension even; place a stitch marker at the end of each row to help count rows and maintain consistent turns.
Row 7 :
Ch 2 (counts as hdc), hdc in next st, *ch 1, sk 1 st, hdc in next 2 sts*; rep from * to end, finish with hdc in last st. Turn. (approx 120 hdc separated by ch-1 sps)
Row 8 :
Ch 1, sc in each hdc and ch-1 sp across. Turn. (approx 179 sc)
Row 9-14 :
Ch 1, 1 sc in each st across. Turn. (179 sc)
Info :
These even sc rows form the field where appliques will be sewn. Mark rounds where you plan to place motifs: for a runner of this size place appliques at rows 8, 22, 36 and 50 (approx). Adjust spacing to personal taste. Keep center line straight by counting stitches from each edge before placing motifs.
Row 15 :
Ch 2, hdc in each st across. Turn. (179 hdc)
Row 16-20 :
Ch 1, sc in each st across. Turn. (179 sc)
Info :
If adding embroidered stars now, mark their placement in rows 16-20. Use a strand of golden yellow for embroidered star stitches later once body is complete.
Row 21-26 :
Ch 1, sc in each st across. Turn. (179 sc)
Row 27 :
Ch 2, hdc in each st across. Turn. (179 hdc)
Row 28-34 :
Ch 1, sc in each st across. Turn. (179 sc)
Info :
These rows include the second applique placement zone. If you prefer to add appliques as you go, position the flat appliques on the RS after row 28 and pin them in place before continuing. Alternatively, finish panel and attach appliques later for more control.
Row 35 :
Ch 2, hdc in next st and across. Turn. (179 hdc)
Row 36-42 :
Ch 1, sc in each st across. Turn. (179 sc)
Row 43 :
Ch 1, sc in first 5 sts, *sk 1 st, (5 sc in next 5 sts) to create subtle vertical texture across center at spaced intervals*; continue to last 5 sts, sc last 5 sts. Turn. (179 sc)
Row 44-50 :
Ch 1, sc in each st across. Turn. (179 sc)
Info :
At this point the center panel should reach the desired length for the central rectangular section that will be framed by the lattice and motifs. For a longer runner, continue repeats of rows 15-44 until you reach desired length; keep appliques evenly spaced.
Final Rows 51-54 :
Ch 1, sc in each st across. Turn. (179 sc). Fasten off and weave in ends. Block panel flat if desired.
Info :
Leave the center panel flat and set aside. You will join the floral border motifs to the sides and ends of this panel with joining rows shown later. Keep RS facing up for placement.
— Cauldron Applique :
Round 1 :
With black yarn and 3.25mm hook, 6 sc in magic ring. (6)
Round 2 :
Inc in each st around. (12)
Round 3 :
(1 sc, inc) x 6. (18)
Round 4 :
(2 sc, inc) x 6. (24)
Round 5 :
(3 sc, inc) x 6. (30)
Info :
These rounds form the rounded body of the cauldron. Work tightly to get a dense fabric that will sit flat on the center panel. You may switch to 3.5mm hook if you want a looser cauldron with visible texture.
Round 6 :
1 sc in each st around. (30)
Round 7 :
1 sc in each st around. (30)
Round 8 :
(4 sc, dec) x 5. (25)
Round 9 :
(3 sc, dec) x 5. (20)
Round 10 :
(2 sc, dec) x 5. (15)
Round 11 :
(1 sc, dec) x 5. (10)
Round 12 :
1 sc around the top edge to create a rim; fasten off leaving a 12" tail for sewing. (10)
Info :
Optional: Add a small line of golden yellow bobble stitches at the rim to represent bubbling; embroider small 'bubbles' after attaching. Block flat if necessary.
— Cauldron Contents and Feet (tiny details) :
Round 1 :
Using golden yellow, ch 6, sl st to join to a small circle: 6 sc in magic ring. Fasten off leaving tail for sewing. (6)
Round 2 :
Sew several of these small circles inside cauldron rim to simulate bubbling liquid. Add 3 tiny black feet: With black yarn ch 3, 3 sc in 2nd ch from hook (or make 3 sc into a small ring) and fasten off; sew under cauldron edge at three points.
Info :
Place cauldron on center panel where marked. Sew only through the back loop of the cauldron to allow a slight raised appearance if desired.
— Witch Hat Applique :
Round 1 :
With black yarn, 6 sc in magic ring. (6)
Round 2 :
Inc in each st around. (12)
Round 3 :
(1 sc, inc) x 6. (18)
Round 4 :
1 sc in each st around. (18)
Info :
These rounds form the top of the hat cone. Keep the cone slightly tall by working even instead of increasing too rapidly.
Round 5 :
(2 sc, dec) x 6. (12)
Round 6 :
Ch 1, fold cone in half lengthwise and work 6 sc through both layers across the bottom to close slightly; fasten off leaving tail for sewing. This creates a pointed cone hat. (6)
Brim :
With black yarn, join at base of hat, ch 1, 6 sc evenly around base to create a narrow brim, then *ch 2, sk 1 sc, sl st in next st* all the way around to form a slightly scalloped brim. Fasten off and weave in ends.
Decoration :
Add a small golden buckle: chain 6 with golden yarn, sl st to form a small rectangle, then sew to front of hat. Optionally add a tiny band of contrasting yarn before sewing on buckle.
Info :
Make two or three hats in different sizes for variety. Lightly stuff hat cone with a small amount of fiberfill for dimension before sewing onto panel.
— Broom Applique :
Handle Round 1 :
With brown yarn, ch 12. Row 1: 1 sc in 2nd ch from hook and across (11 sc). Fasten off leaving long tail for sewing.
Bristles Round 1 :
Switch to golden/tan yarn. Ch 10, in 2nd ch from hook make 3 sc, hdc in next, dc in next 3, hdc in next, 3 sc in last; fold base and sc across to create thickness; fasten off leaving long tail. Make 1 or 2 roving clusters for broom head.
Assembly :
Overlap the bristle cluster over one end of the handle and sew securely. With green accent yarn wrap a small band near the bristles and secure with a few stitches. Fasten off and weave in ends.
Info :
Make broom slightly curved by steam-blocking bristles or adding a few tiny stitches to pull bristles inward. Sew brooms at an angle on the center panel so they appear to lie naturally.
— Crescent Moon Applique :
Round 1 :
With cream yarn, 6 sc in magic ring. (6)
Round 2 :
Inc in each st around. (12)
Round 3 :
(1 sc, inc) x 6. (18)
Round 4 :
Shape crescent: ch 1, sc 6, dec, sc 4, dec, sc 2. (14)
Round 5 :
Working in rows, sc back across to refine curve. Fasten off leaving tail for sewing. Trim tail so crescent looks tapered at ends.
Info :
Make two or three moons in varying sizes. Slightly blocking the crescent on a curved surface will help it maintain shape once sewn to the panel.
— Small Star Applique (make many) :
Round 1 :
Golden yarn, ch 6, sl st to join. *Ch 3, sl st in ring* 5 times to create five loops. Fasten off leaving tail.
Round 2 :
Working in loops: in each ch-3 loop work (sc, hdc, dc, hdc, sc). Fasten off leaving tail for sewing. Make many stars in golden yellow to scatter across the center panel.
Info :
Embroider star centers with a French knot or a small yellow seed stitch for depth. Vary size by working ch-2 loops for tiny stars and ch-4 for larger stars.
— Flower Motif (granny-flower for border) :
Round 1 :
With orange yarn, make a magic ring, ch 1, 10 sc in ring. Sl st to first sc. (10)
Round 2 :
Change to purple yarn. *(ch 3, sl st) in next st* around to create 10 picot loops. Sl st to join. (10 picot loops)
Round 3 :
In each picot loop: (sc, hdc, 3 dc, hdc, sc) to create petal. Fasten off purple. (10 petals)
Info :
Make flower centers slightly raised by using a small amount of stuffing inside center before closing Round 1, or by finishing with a button or French knot in yellow.
Round 4 :
With olive green yarn, join between petals and ch 4, sl st to next space to create connecting loops; rep around to form a ring of ch-4 spaces for joining motifs later. Fasten off leaving tail.
Info :
You will need many of these flower motifs to run the full border length on both sides and at ends. Make enough to match the length of your center panel; motif gauge should be consistent so pattern sits flat.
— Joining Floral Border (Join-As-You-Go or sew) :
Info :
Arrange floral motifs along both long edges of the center panel, placing them so their olive ch-4 loops lie adjacent to the panel’s edge. You can either join motifs to the panel with a whip stitch through the panel edge or join-as-you-go by slip stitching the motif ch-4 loops to the edge stitches.
Join Step 1 :
With olive green, align first motif at center of one long edge. Use long tail to whip stitch through motif ch-4 loop and through a corresponding st on the panel every ch-4 loop. Repeat for each motif along side edges and both ends, making sure motifs are evenly spaced so corners meet neatly.
Info :
If you prefer a neat finished look, baste motifs in place with pins and a long basting yarn first, then sew permanently using small mattress stitches to hide the join.
Join Step 2 :
Once motifs are attached along both sides and ends, check for gaps and add small olive green chain loops to link neighboring motifs where necessary. Fasten off and weave in ends carefully on the wrong side.
— Inner Lattice Round (frame between panel and floral border) :
Round 1 :
With pale sage/olive green yarn, join to outermost edge of center panel where motif joins begin. Ch 1, sc evenly across the panel edge, working 1 sc in each row-end along length and across the ends until you return to start. Sl st to join. (St count will match panel width.)
Round 2 :
Ch 3 (counts as dc), *ch 2, sk 2 sc, dc in next sc* repeat around to create an airy lattice. Adjust sk/ch counts to maintain even spacing across the panel edge. Sl st to join. (Even spacing)
Round 3 :
Ch 1, sc in each dc and ch-2 space across to firm up lattice ridge. Sl st to join. Fasten off.
Info :
This narrow lattice band both frames the central lavender field and provides an even anchor for the floral motifs. Work gently so the edges remain flat and aligned with motifs.
— Outer Scalloped Edge (final finish) :
Round 1 :
With purple yarn, join at any point on outer row of flower motifs. Ch 1, sc in same st, *ch 3, 5 dc in next petal tip, ch 3, sc in next join space*; rep around the entire border and ends. Sl st to join. (Sc and 5-dc shells around)
Round 2 :
Ch 1, sc in same st, *sc in next 2 sts, (ch 3, sc) in center of shell to make a little picot, sc in next 2 sts, sc in join space*; rep around to define scallops. Sl st to join. Fasten off and weave in ends.
Info :
For extra pop, work a contrasting slip-stitch row in pale cream along outer edge before the scallop to make the scallops sit slightly raised.
— Embroidery and Small Finishing Appliques :
Info :
Using golden and cream yarns, embroider little star clusters between main appliques on the center panel using simple star stitches (long straight stitches crossing in the center). Sew moons, small stars and broom details in their planned locations. Use small tacking stitches around the perimeter of appliques to secure them without flattening their dimension.
Finishing :
Weave in all ends on WS. Lightly block the entire runner to encourage it to sit flat using steam or wet blocking method depending on fiber content. Pin scallops and floral motif petals in shape until dry. Trim any excess tails and secure knots inside the wrong side.
Info :
Consider adding an invisible whipstitch along the inner panel seam under the lattice to secure the panel to the floral border more permanently if the runner will see heavy use. Otherwise, a careful slip-stitch join is decorative and removable for washing.
This table runner brings together seasonal charm and crochet texture for a delightful seasonal centerpiece. The modular structure makes it fun to assemble — each applique and flower motif adds personality until the whole runner tells a whimsical witchy story. It looks gorgeous on a dining table or console and will become a favorite seasonal accent you’ll be proud to display. 🧶✨🎃